Brand: YAMAHA
Category: Audio/Video
Document Type: Manual
Language: EN
Brand: YAMAHA
Category: Audio/Video
Document Type: Manual
Language: EN
Uploaded: Nov. 21, 2025, 8:52 p.m.
Manual Publish Date: 2006-01-01
None
Introduction
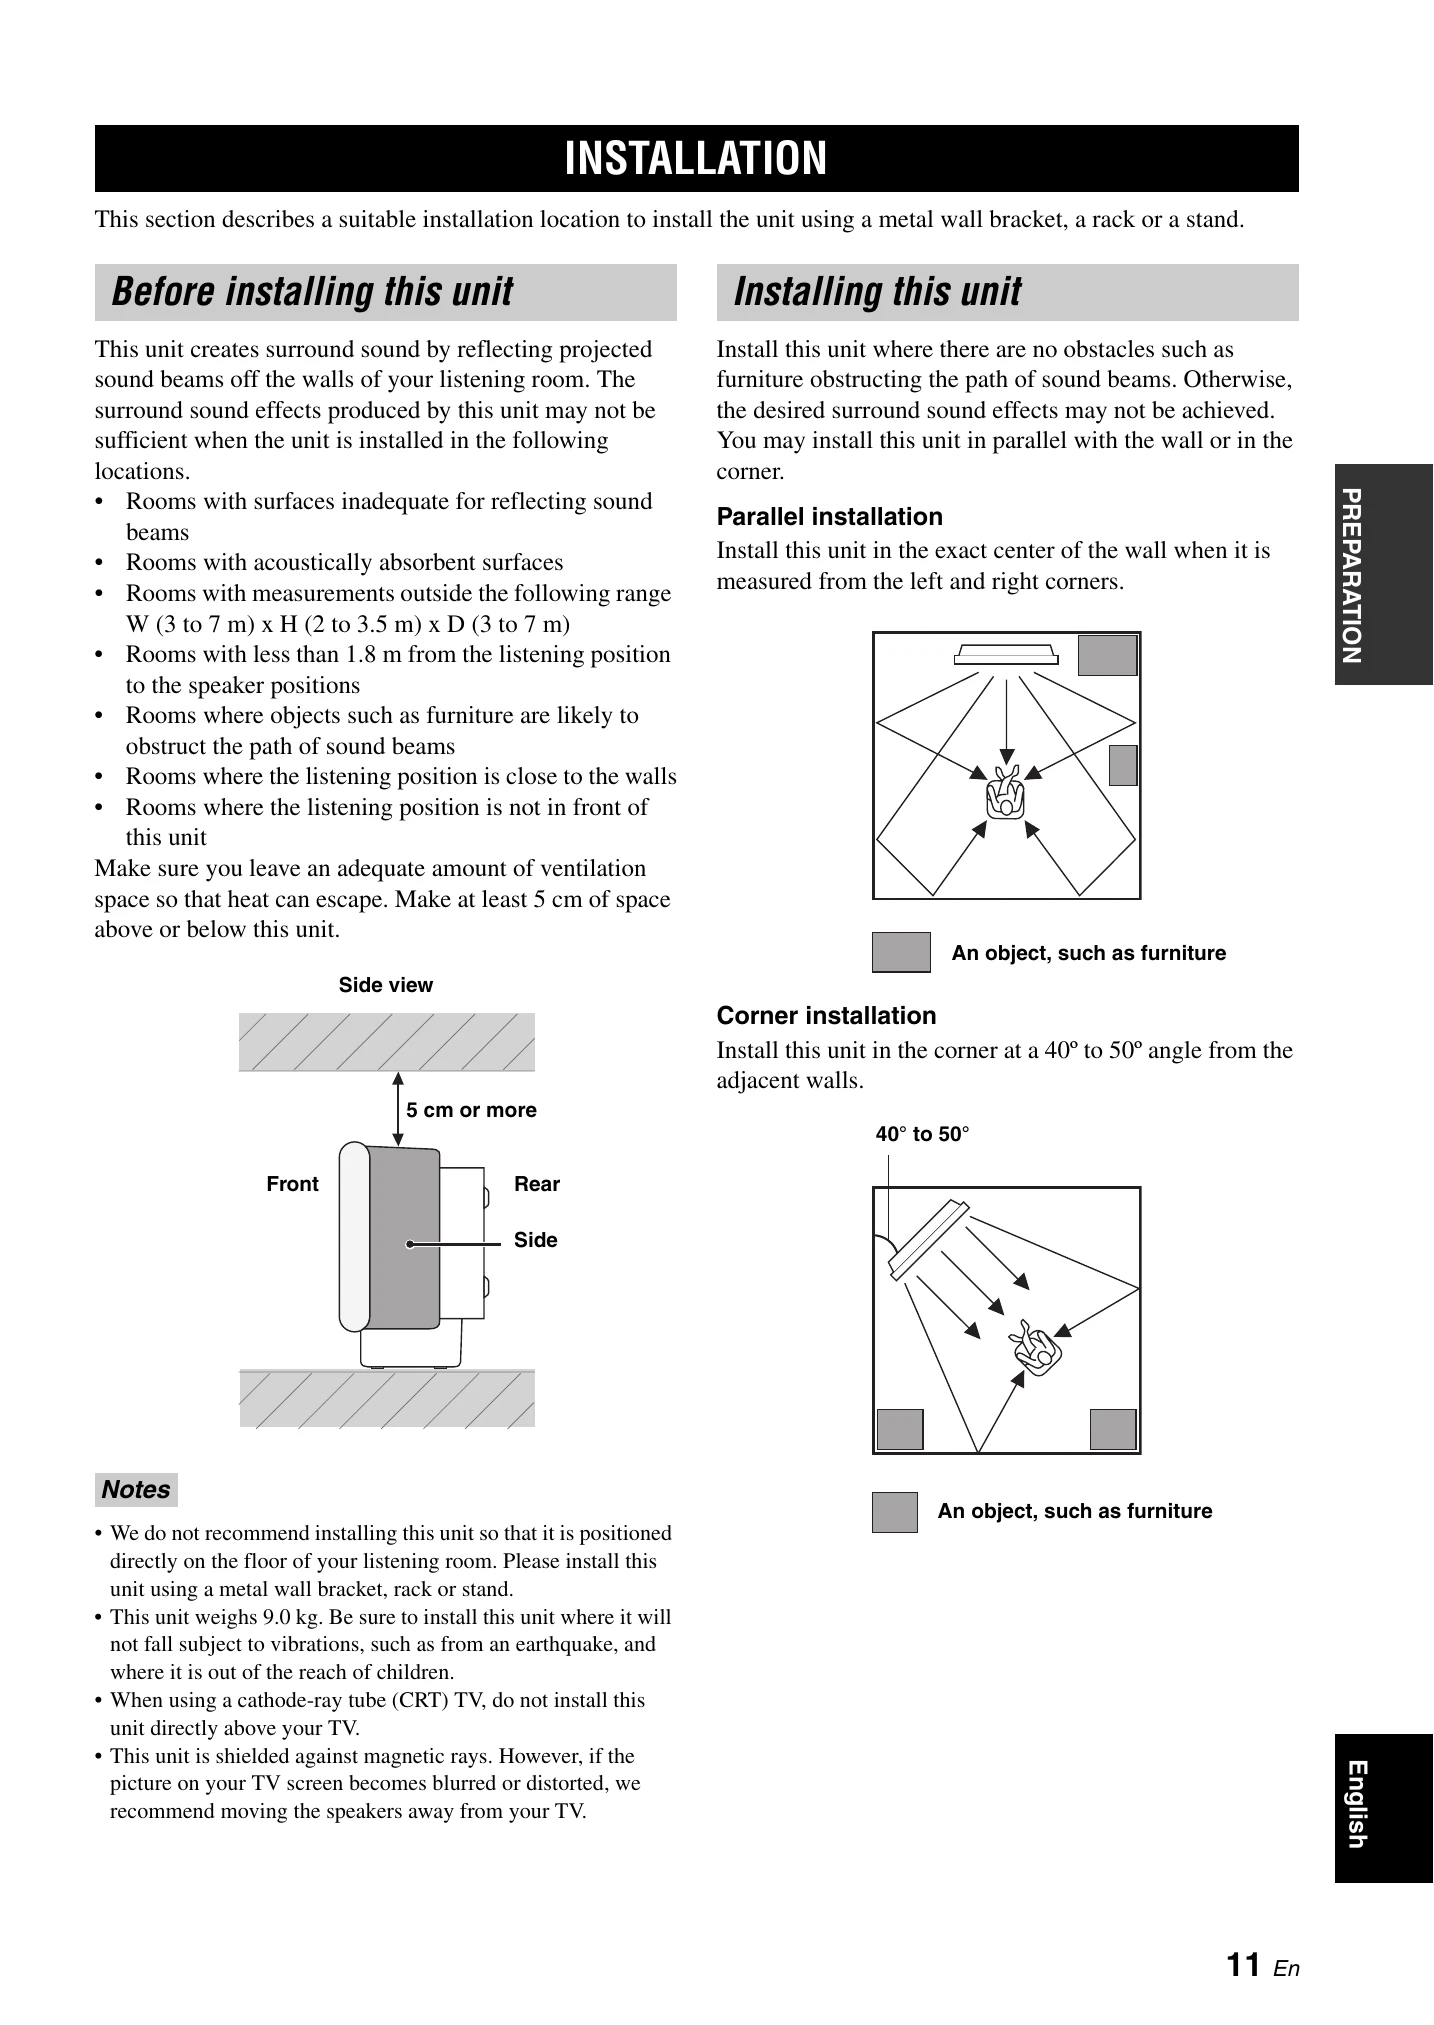
This unit creates surround sound by reflecting projected sound beams off the walls of your listening room. It eliminates the need for multiple speakers and complicated wiring, offering a powerful surround sound experience from a slimline unit.
Installation
Choose a suitable installation location with adequate ventilation and ensure sound beams are not obstructed by furniture. Parallel or corner installation options are available.
Connections
Connect external components like TVs, DVD players, and VCRs using the provided audio/video jacks. Ensure all connections are made before powering on the unit.
Setup
Prepare the remote control and turn on the unit. Run AUTO SETUP using the optimizer microphone for automatic acoustic optimization. Manual setup options are also available for fine-tuning.
Operation
Select input sources, adjust volume, and enjoy surround sound by choosing various beam modes and CINEMA DSP programs. Basic and advanced operations are detailed in the manual.
| Problem | Cause | Remedy | See page |
|---|---|---|---|
| This unit fails to turn on when STANDBY/ON is pressed, or enters the standby mode soon after the power has been turned on. | The power supply cable is not firmly connected to the AC wall outlet or to the AC inlet on the rear panel of this unit. | Connect the power supply cable firmly to the AC wall outlet or to the AC inlet on the rear panel of this unit. | 23 |
| This unit suddenly enters the standby mode. | The internal temperature becomes too high and the overheat protection circuitry has been activated. | Wait about 1 hour for this unit to cool down and then turn it back on. | — |
| No sound. | Incorrect input or output cable connections. | Connect the cables properly. If the problem persists, the cables may be defective. | 15 |
| The sound suddenly goes off. | Signals this unit cannot reproduce (such as PCM signals with more than 96 kHz of sampling frequency) are being received from a source component. | Play a source whose signals can be reproduced by this unit. | — |
| The sleep timer has turned the unit off. | Turn on the power, and play the source again. | — | |
| No sound from the effect channels. | You are playing back the source or program in the stereo mode or my beam mode. | Press one of the beam mode buttons on the remote control to select a multi-channel playback mode and then try to play back the source or program once more. | 42 |
| No sound from the center channel. | The output level of the center channel is set to minimum. | Raise the level of the center channel. | 72 |
| No sound from the surround channels. | The output level of the surround channels is set to minimum. | Raise the output level of the surround channels. | 72 |
| No sound from the subwoofer. | BASS OUT in SUBWOOFER SET is set to FRONT. | Select SWFR. | 67 |
| Distorted or too little bass sound. | CROSS OVER in SUBWOOFER SET is set incorrectly. | Set CROSS OVER correctly. | 67 |
| Too much bass sound. | One of the night listening modes is currently selected. | Turn off the night listening modes. | 55 |
| TruBass is currently turned on. | Turn off TruBass. | 57 | |
| Surround sound effects are insubstantial. | The listening room is not a regular shape. | Install this unit in a square or rectangular shaped room. | — |
| There is no wall in the path of the sound beam. | Try placing a flat object, such as a board, in the path of the sound beam. | — | |
| Dolby Digital or DTS sources cannot be played. (Dolby Digital or DTS indicator does not light up in the front panel display.) | The connected component is not set to output Dolby Digital or DTS digital signals. | Make an appropriate setting following the operating instructions for your component. | — |
| There is noise interference when a subwoofer is not connected to this unit. | The protection circuitry was in operation because a source with strong bass elements was played back. | Turn down the volume level. | 41 |
| Low frequency sounds are distorted. | CROSS OVER in SUBWOOFER SET is set incorrectly. | Set CROSS OVER correctly. | 67 |
| On-screen display does not appear. | The VIDEO OUT (composite) jack of this unit is not connected to the video input jacks of your TV. | Connect the VIDEO OUT (composite) jack of this unit to the video input jacks of your TV. The OSD is not output at the COMPONENT VIDEO OUT jacks. | 16 |
| No picture is displayed for external components, such as a DVD player. | The video pin cable is not connected properly. | Connect the cable properly. | 17 |
| This unit does not operate properly. | The internal microcomputer has been frozen by an external electric shock (such as lightning or excessive static electricity) or by a power supply with low voltage. | Disconnect the AC power supply cable from the outlet and then plug it in again after about 30 seconds. | — |
| There is noise interference from digital or high-frequency equipment. | This unit is too close to the digital or high-frequency equipment. | Move this unit further away from such equipment. | — |
| This unit does not output effect sounds properly. | The original source includes surround effects. | Disable surround effect settings on this unit. | — |
| My beam auto-adjust function does not work. | The listening room is too noisy. | Keep the listening room as quiet as possible. | 49 |