Brand: WORX
Category: Power Tool
Document Type: Manual
Language: EN
Brand: WORX
Category: Power Tool
Document Type: Manual
Language: EN
Uploaded: April 20, 2026, 8:06 p.m.
Warranty information is not available in the provided manual excerpt.
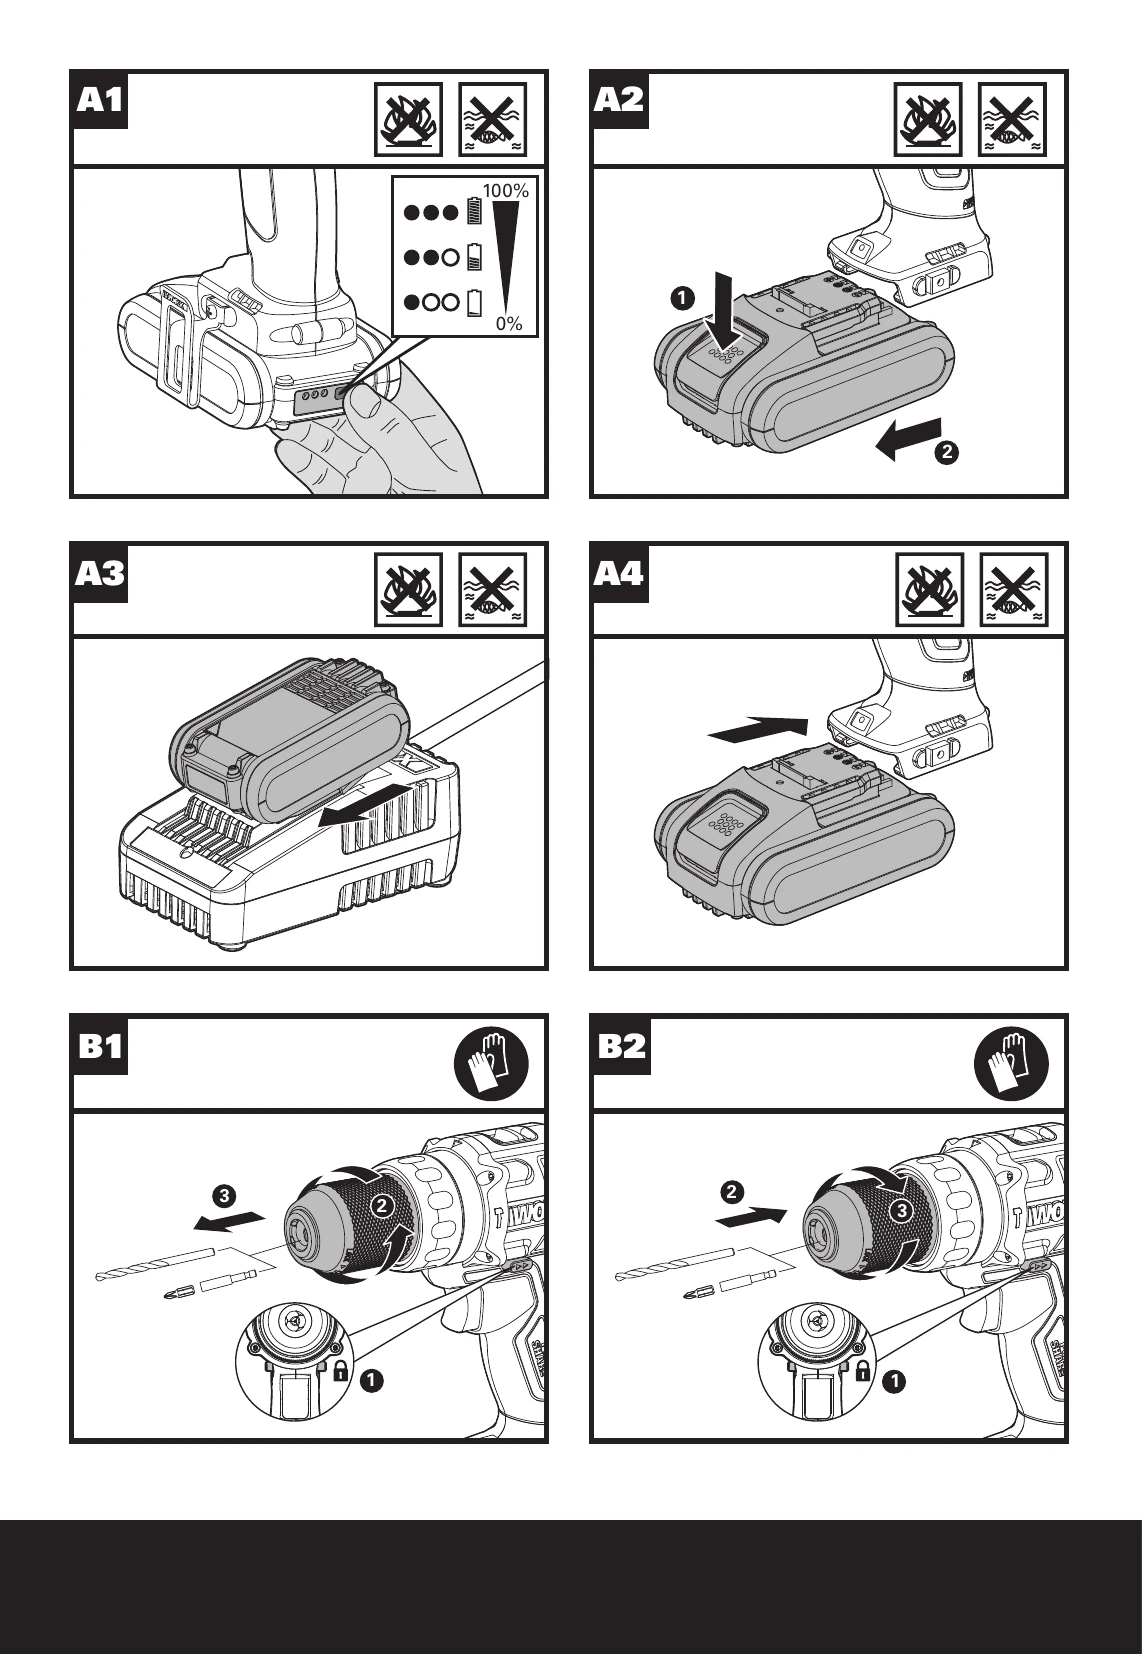
Checking the battery charge condition: NOTE: Fig. A1 only applies for the battery pack with battery indicator light.
Removing the battery pack
Charging the battery
Installing the battery pack
Warning: Always lock off trigger switch and disconnect tool from power source when changing accessories. Always ensure the bit is secure before starting the tool. Damage to the Chuck or a loose bit may cause possible personal injury.
Warning: Do not operate for long periods at low speed because excess heat will be produced internally.
Before operation, the LED light will be activated when the On/Off switch is slightly depressed, and will automatically turn off 20 seconds after the On/Off switch is released.
Warning: To turn on the light, press the On/Off switch and make sure the Forward/Reverse Rotation Control is on right/left position.
The tool and battery are equipped with a protection system. When the LED Light is quickly flashing 60 seconds and turn off, the system will automatically cut off power to the tool to extend battery life. The tool will automatically stop during operation if the tool and/or battery are placed under one of the following conditions:
| 1. WHY DOES THE DRILL NOT TURN ON WHEN YOU PRESS THE SWITCH? | The Forward and Reverse Switch, which is on top of the trigger, is positioned in the lock function. | Unlock the Forward and Reverse Switch putting it into the required rotation position. Push the trigger and the drill will start to rotate (See Fig. B). |
|---|---|---|
| 2. THE DRILL STOPS BEFORE THE SCREW IS COMPLETELY TIGHTENED. WHY? | Incorrect torque setting. | Verify the torque position of the Torque Adjustment Ring, you can find the Torque Adjustment Ring between the Chuck and the drill body. Position 1 is the lowest torque (screw driving force) and position 22 is the highest torque (screw driving force). Position is for drill operation. Position T is for hammer drill operation. Regulate the Torque Adjustment Ring to a higher position to reach the best result (See Fig. E). |
| 3. I CAN NOT FIT THE BATTERY INTO THE BATTERY CHARGER. WHY? | Battery can only be inserted in one direction. | The battery can be inserted into the charger only in one direction. Turn the battery around until it can be inserted into the slot, the red LED Light should turn on when the battery is charging. |
| 4. REASONS FOR DIFFERENT BATTERY PACK WORKING TIMES | Charging time problems, prolonged non-use, heavy working conditions, or charging outside temperature range. | Charging time problems, as above, and having not used a Battery Pack for a prolonged time will reduce the Battery Pack working time. This can be corrected after several charge and discharge operations by charging & working with your drill. Heavy working conditions such as large screws into hard wood will use up the Battery Pack energy faster than lighter working conditions. Do not re-charge your Battery Pack below 0°C and above 40°C as this will affect performance. |