Brand: TORO
Category: Lawn Care
Document Type: Installation Guide
Language: EN
Brand: TORO
Category: Lawn Care
Document Type: Installation Guide
Language: EN
Uploaded: Nov. 21, 2025, 7:52 p.m.
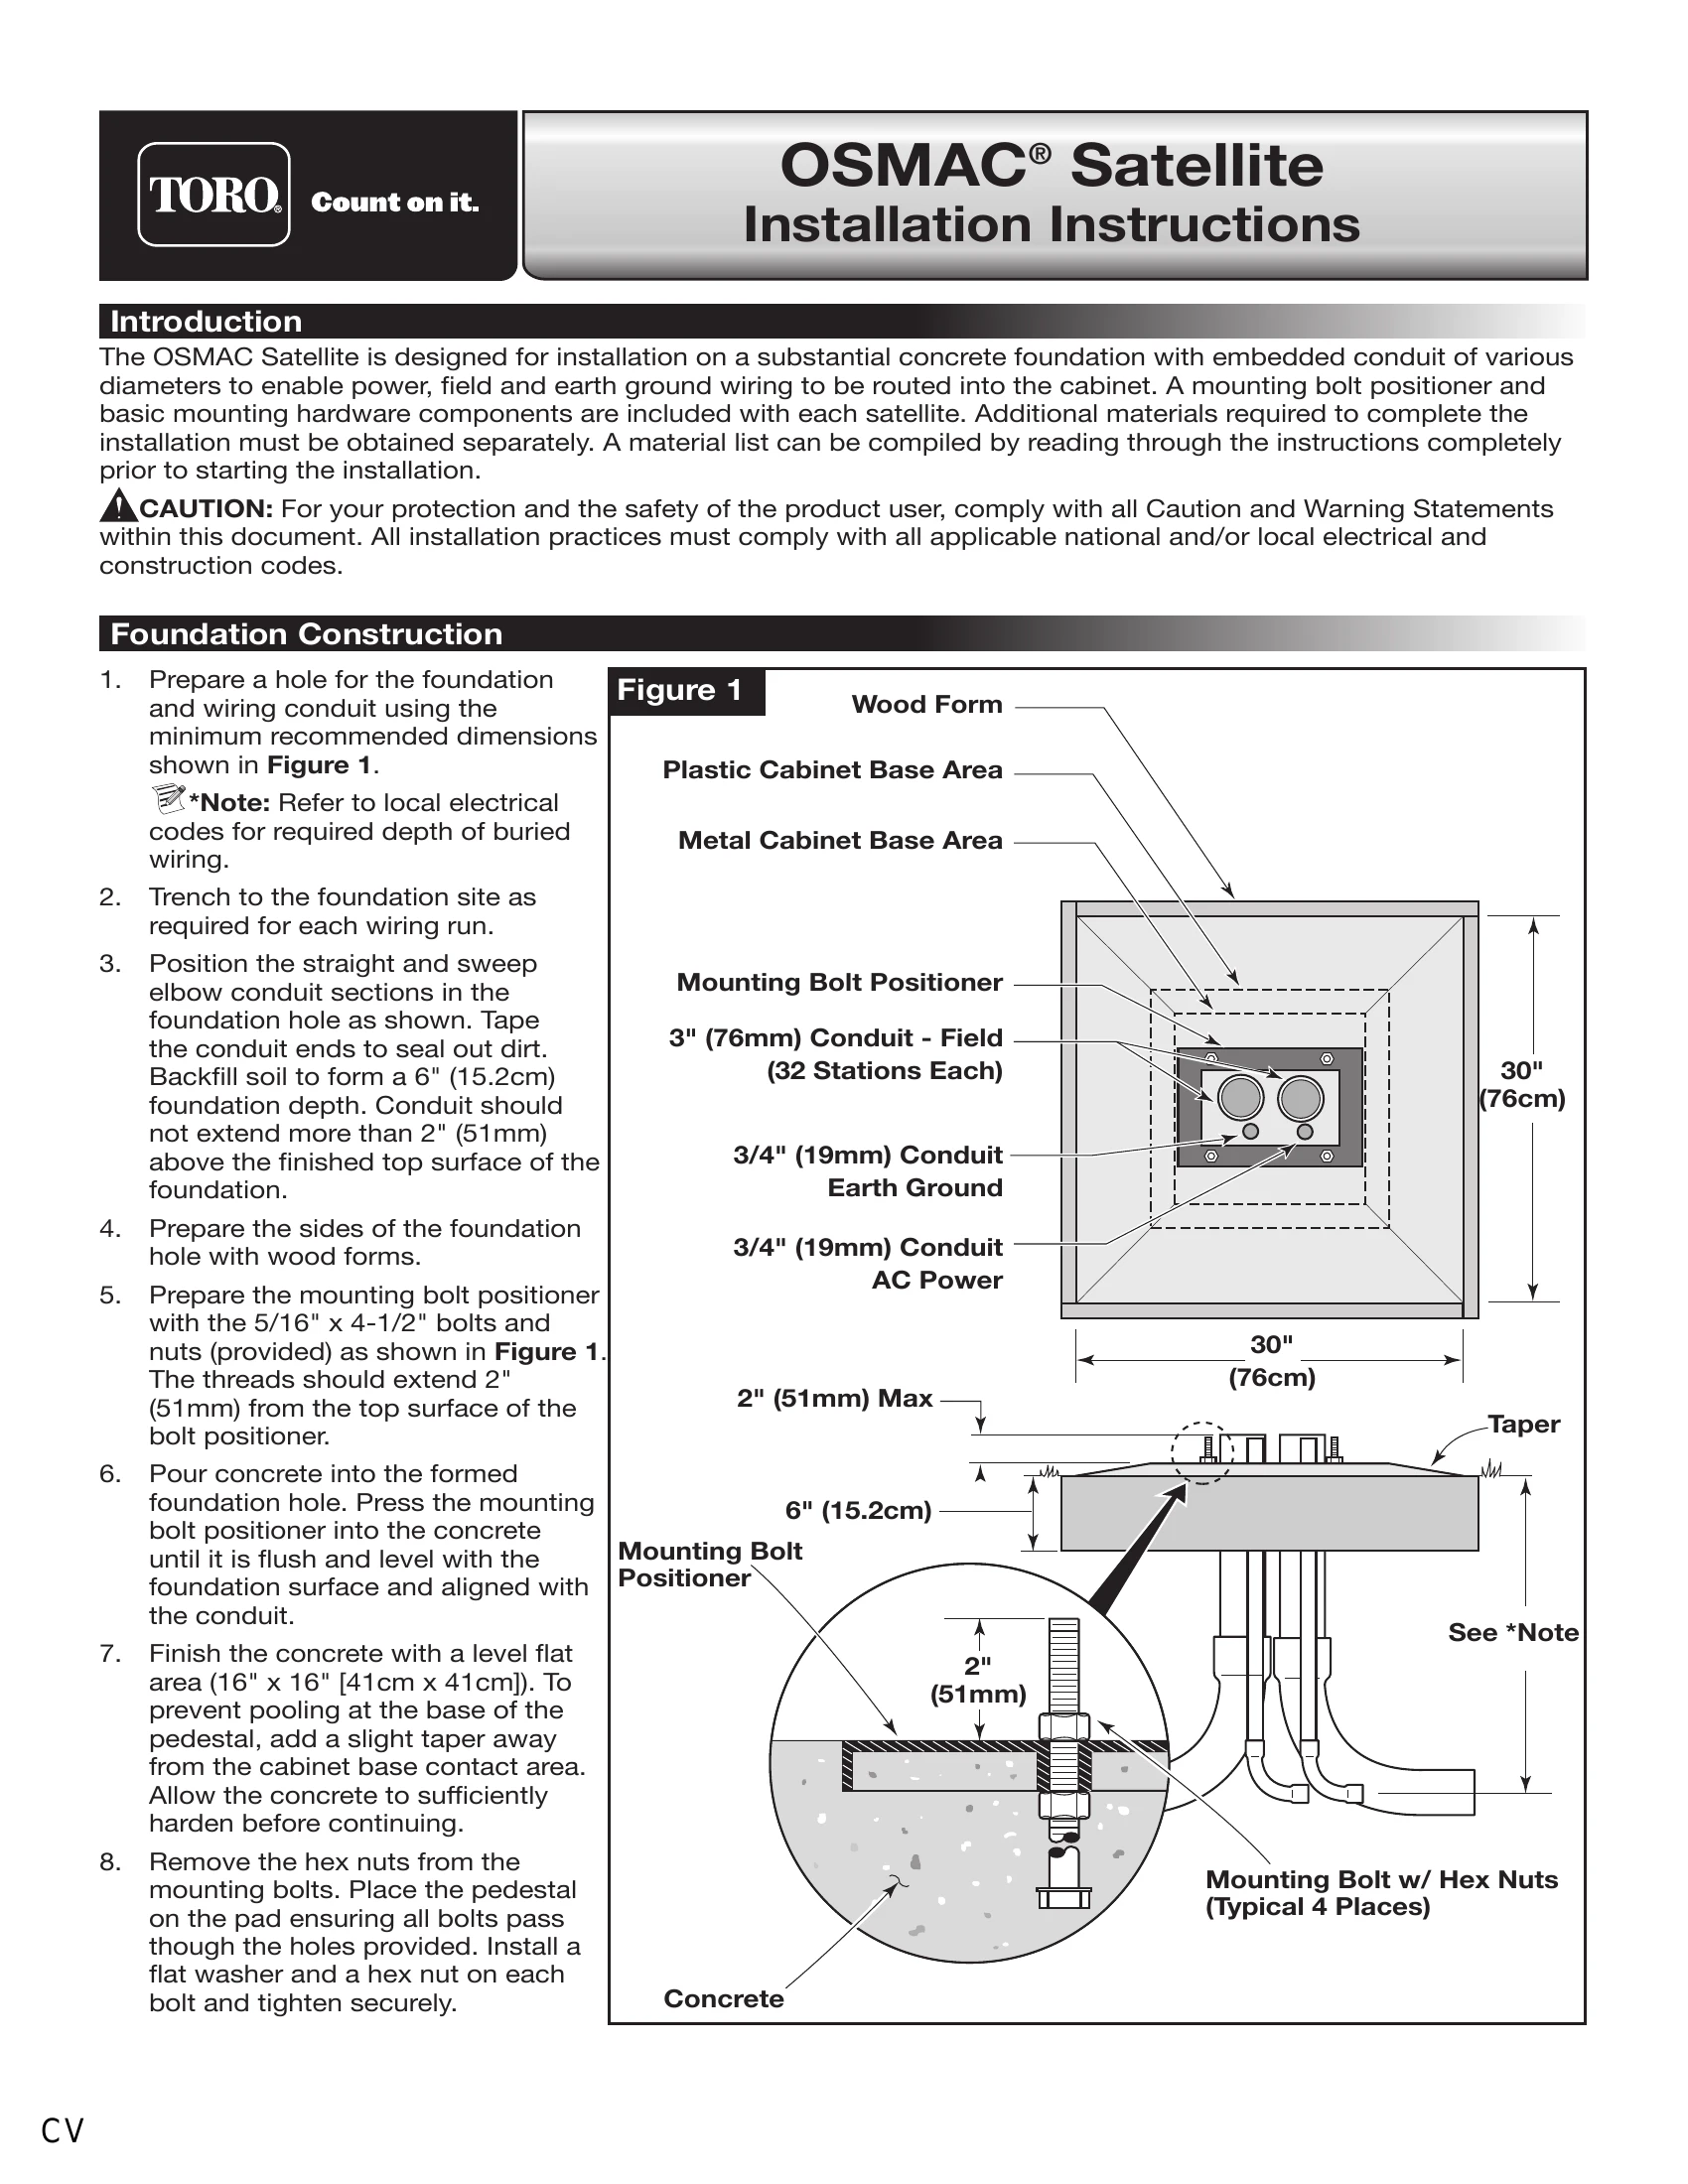
Prepare a foundation hole and conduit. Position conduit, backfill with soil to create a 6" (15.2cm) depth, ensuring conduit does not extend more than 2" (51mm) above the surface. Prepare sides with wood forms. Prepare the mounting bolt positioner with bolts and nuts. Pour concrete, pressing the positioner into the concrete until flush and level. Finish the concrete with a slight taper. Allow to harden. Remove nuts, place pedestal on pad, install washers and nuts, and tighten.
Drive a 5/8" (16mm) copper-clad steel rod into moist soil. Attach #6 solid copper wire near the top using a clamp or "Cad weld" fastener. Route wire through the foundation into the satellite and secure to the ground lug on the power supply chassis. Ensure soil remains moist. Measure ground resistance.
Ensure the AC power source is off. Place the main power switch in the Off position. Select the input voltage (115V or 230V). Remove the power wiring access cover. Route a 3-conductor cable from the power source to the terminal block. Connect wires according to Table 1. Reinstall the cover and apply power.
Attach control and common wires to valve leads using waterproof splicing. Route wires into the satellite through the conduit. If an automatic pump start is required, refer to wiring diagrams. Secure field common wire and pump start relay wire to the Pump/Com module terminals. Secure valve control wires to station terminals. Switches on Relay Boards enable local control (ON, OFF, AUTO).