Brand: SONY
Category: TV
Document Type: Parts/Service
Language: EN
Brand: SONY
Category: TV
Document Type: Parts/Service
Language: EN
Uploaded: Nov. 21, 2025, 8 p.m.
Manual Publish Date: 1999-10-01
No specific warranty information is provided in the manual.
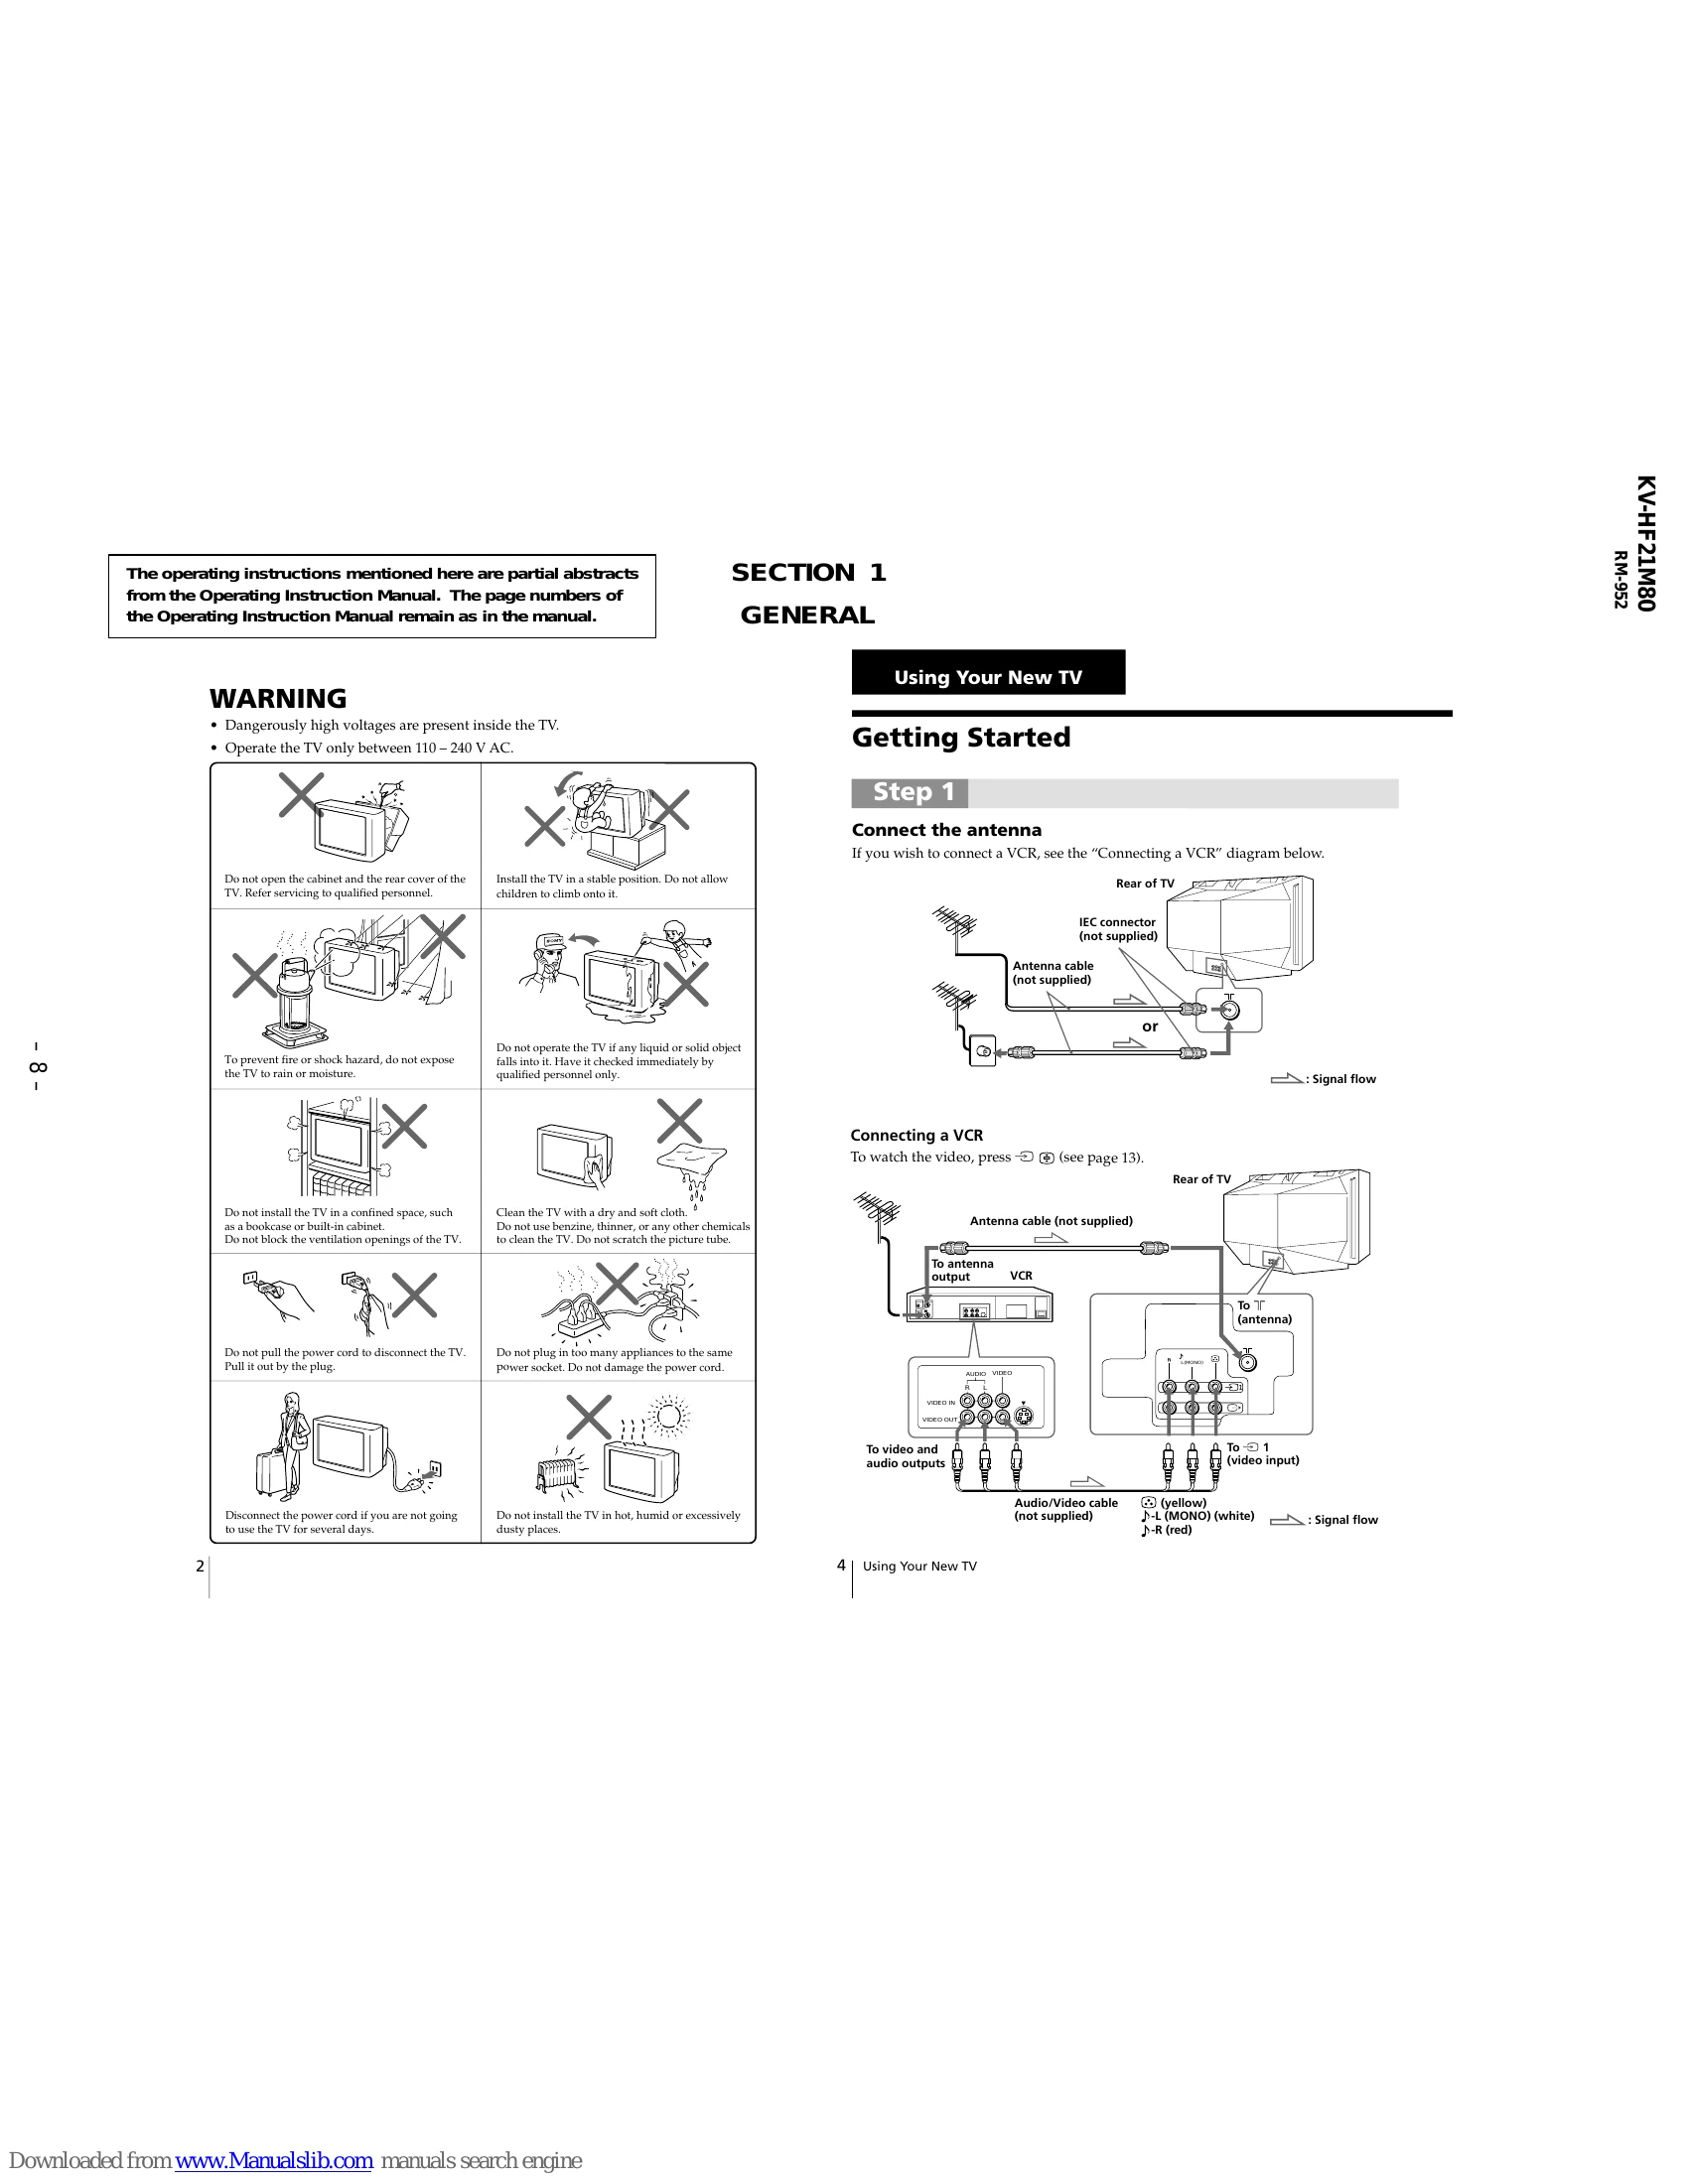
Step 1: Connect the antenna
Connect the antenna cable to the "ANTENNA" or "RF IN" terminal on the rear of the TV. If you wish to connect a VCR, follow the "Connecting a VCR" diagram.
Connecting a VCR
Connect the antenna cable from the VCR to the TV's antenna input. Connect the video and audio output from the VCR to the TV's video and audio input jacks. Press the "VIDEO" button to watch the VCR.
You can connect other components like a VCR, multi-disc player, camcorder, video game, or stereo system using the input/output jacks.
Connecting a camcorder/video game equipment
Use the video input jacks (usually on the front of the TV) to connect these devices. Audio/Video cables are typically required.
To prevent the TV from falling, use the supplied screws to attach the band to the TV stand and rear of the TV, or use a cord/chain to secure it to a wall or pillar.
Automatically: Turn on the TV, then press "AUTO PROGR." The TV will scan and preset channels.
Manually: Press SELECT until "MANUAL PROGRAM" appears, then use PROGR +/- or number buttons to select the channel and press SELECT.
Turn on the TV using the power button. Use the PROGR +/- or number buttons to select a channel. Adjust volume with the +/- buttons.
Includes functions like temporary power off, mute, input selection, jump to previous channel, on-screen information display, automatic volume adjustment, and picture position adjustment.
Press SELECT until the language option appears, then use +/- to select the desired language.
Press the timer button until the desired time appears. Select the TV program or video mode you want to display. Set the Sleep timer if desired.
Picture/Sound Modes: Press PIC MODE or SOUND MODE repeatedly to select desired presets.
Adjusting Settings: Use SELECT to choose a setting (e.g., Picture, Color, Brightness) and +/- to adjust the level.
Surround Mode: Select "SURROUND" and use +/- to choose MOVIE, MUSIC, or OFF.
Press FAVORITE, then use number buttons 1-6 to select a pre-set favorite channel. To change settings, press SELECT until "FAVORITE CH SET UP" appears.
Select a channel, press SELECT until "CHILD LOCK" appears, then use +/- to toggle ON/OFF. A symbol indicates a locked channel.
Guides users through common issues like snowy picture, noisy sound, distorted picture, and no picture, offering solutions and possible causes.
The indicator light flashes to indicate possible causes of a problem. Count the flashes and inform the service center.
| Symptom | Solutions | Possible cause |
|---|---|---|
| Snowy picture | Check the antenna cable and connection. Press SELECT until "MANUAL PROGRAM" appears and preset the channel. Check the antenna type (VHF/UHF). Adjust the antenna direction. Try using a booster. |
Connection is loose or the cable is damaged. Channel presetting is inappropriate or incomplete. The antenna type is inappropriate. The antenna direction is inappropriate. Signal transmission is too low. |
| Noisy sound | If the sound of some channels are noisy, select the channel, then select the appropriate TV system ("TV SYS"). | The TV system setting is inappropriate. |
| Distorted picture | Turn off or disconnect the booster if it is in use. | Broadcast signals are too strong. |
| Good picture, Noisy sound |
|
|
| No sound |
|
|
| No color |
|
|
| Abnormal color patches |
|
|
| Lines moving across the TV screen |
|
|
| The indicator on your TV flashes red a number of times between 3-second intervals. |
|
|
| TV cabinet creaks. |
|
|
| A "boom" sound is heard when the TV is turned on. |
|
|