Page 15: Charging the battery pack.
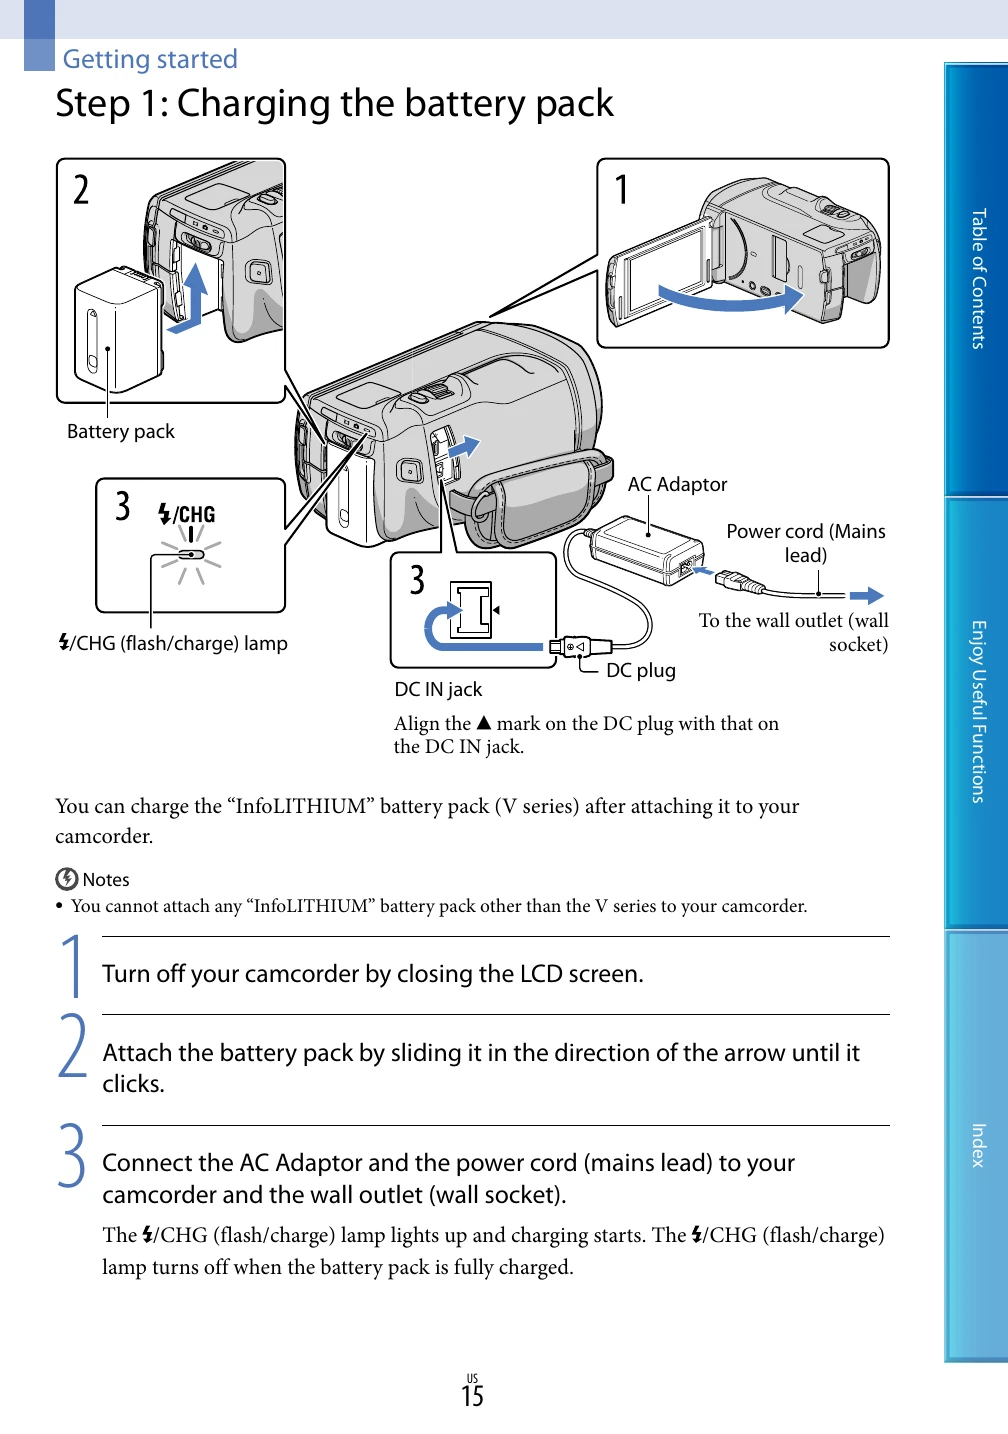
- Close the LCD screen.
- Attach the battery pack by sliding it until it clicks.
- Connect the AC adaptor and power cord to the camcorder and wall outlet. The 4/CHG lamp indicates charging.
Page 18: Turning the power on and setting the date and time.
- Open the LCD screen. Press POWER to turn on the camcorder.
- Select the desired language and touch [Next].
- Select the geographical area and touch [Next].
- Set Daylight Savings and touch [Next].
- Select the date format and touch [Next].
- Select the date and time, touch OK, then touch [Next].
Page 22: Preparing the recording media.
- Touch MENU → [Setup] → [Media Settings] → [Media Select].
- Touch the desired recording medium and press OK. Both movies and photos are recorded on the selected medium.
Page 20: Auto 3D Lens Adjust.
- Touch [Run] to start the adjustment.
- Aim the camcorder at a subject. Ensure the scale is higher than the mark.
- Press OK when the indicator exceeds the mark. The camcorder will zoom to adjust the lenses.