Brand: SONY
Category: Camcorder
Document Type: Manual
Language: EN
Brand: SONY
Category: Camcorder
Document Type: Manual
Language: EN
Uploaded: Aug. 10, 2025, 12:16 a.m.
Manual Publish Date: null
null
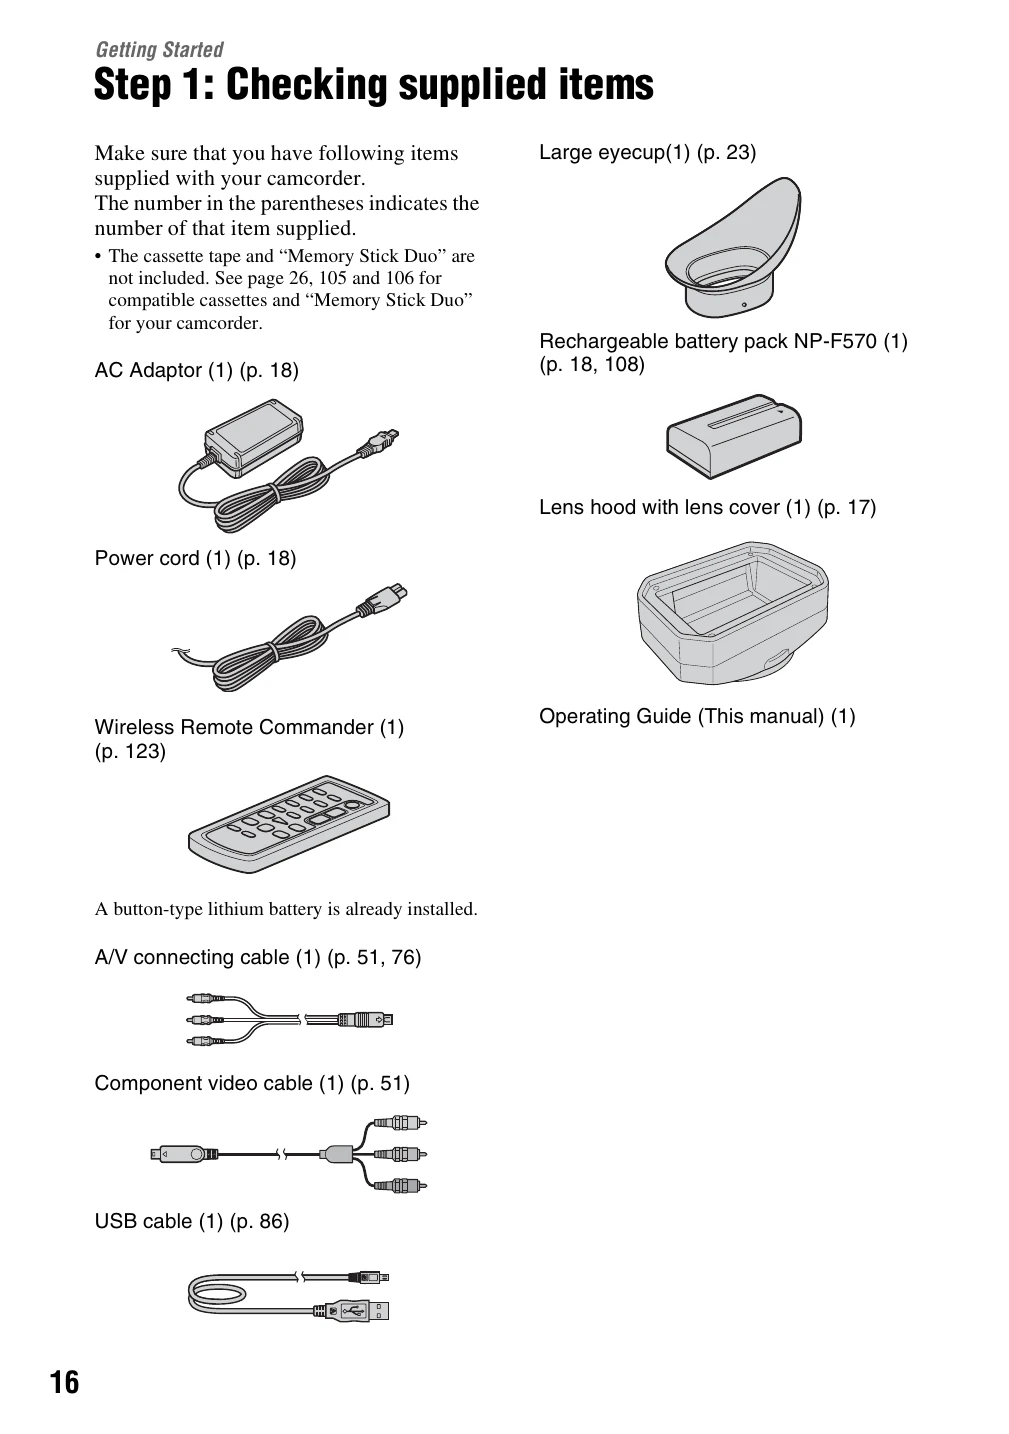
Step 1: Checking supplied items: Ensure all accessories are present.
\nStep 2: Attaching the lens hood: Align marks and tighten the fixing screw.
\nStep 3: Charging the battery pack: Connect the AC Adaptor and power cord, then set the POWER switch to OFF (CHG).
\nStep 4: Turning the power on and holding your camcorder: Slide the POWER switch to CAMERA or VCR. Hold the camcorder properly with the grip belt.
\nStep 5: Adjusting the LCD panel and viewfinder: Open and rotate the LCD panel for optimal viewing. Adjust the viewfinder lens adjustment lever.
\nStep 6: Setting the date and time: Follow on-screen prompts to set the date and time.
\nStep 7: Inserting a tape or a “Memory Stick Duo": Insert media into the appropriate slot.
\n