Brand: SEARS
Category: Woodworking Tool Accessory
Document Type: Manual
Language: EN
Brand: SEARS
Category: Woodworking Tool Accessory
Document Type: Manual
Language: EN
Uploaded: Sept. 12, 2025, 4:16 a.m.
Manual Publish Date: 1993-05-01
All parts listed may be ordered from any Sears Service Center and most Sears stores.
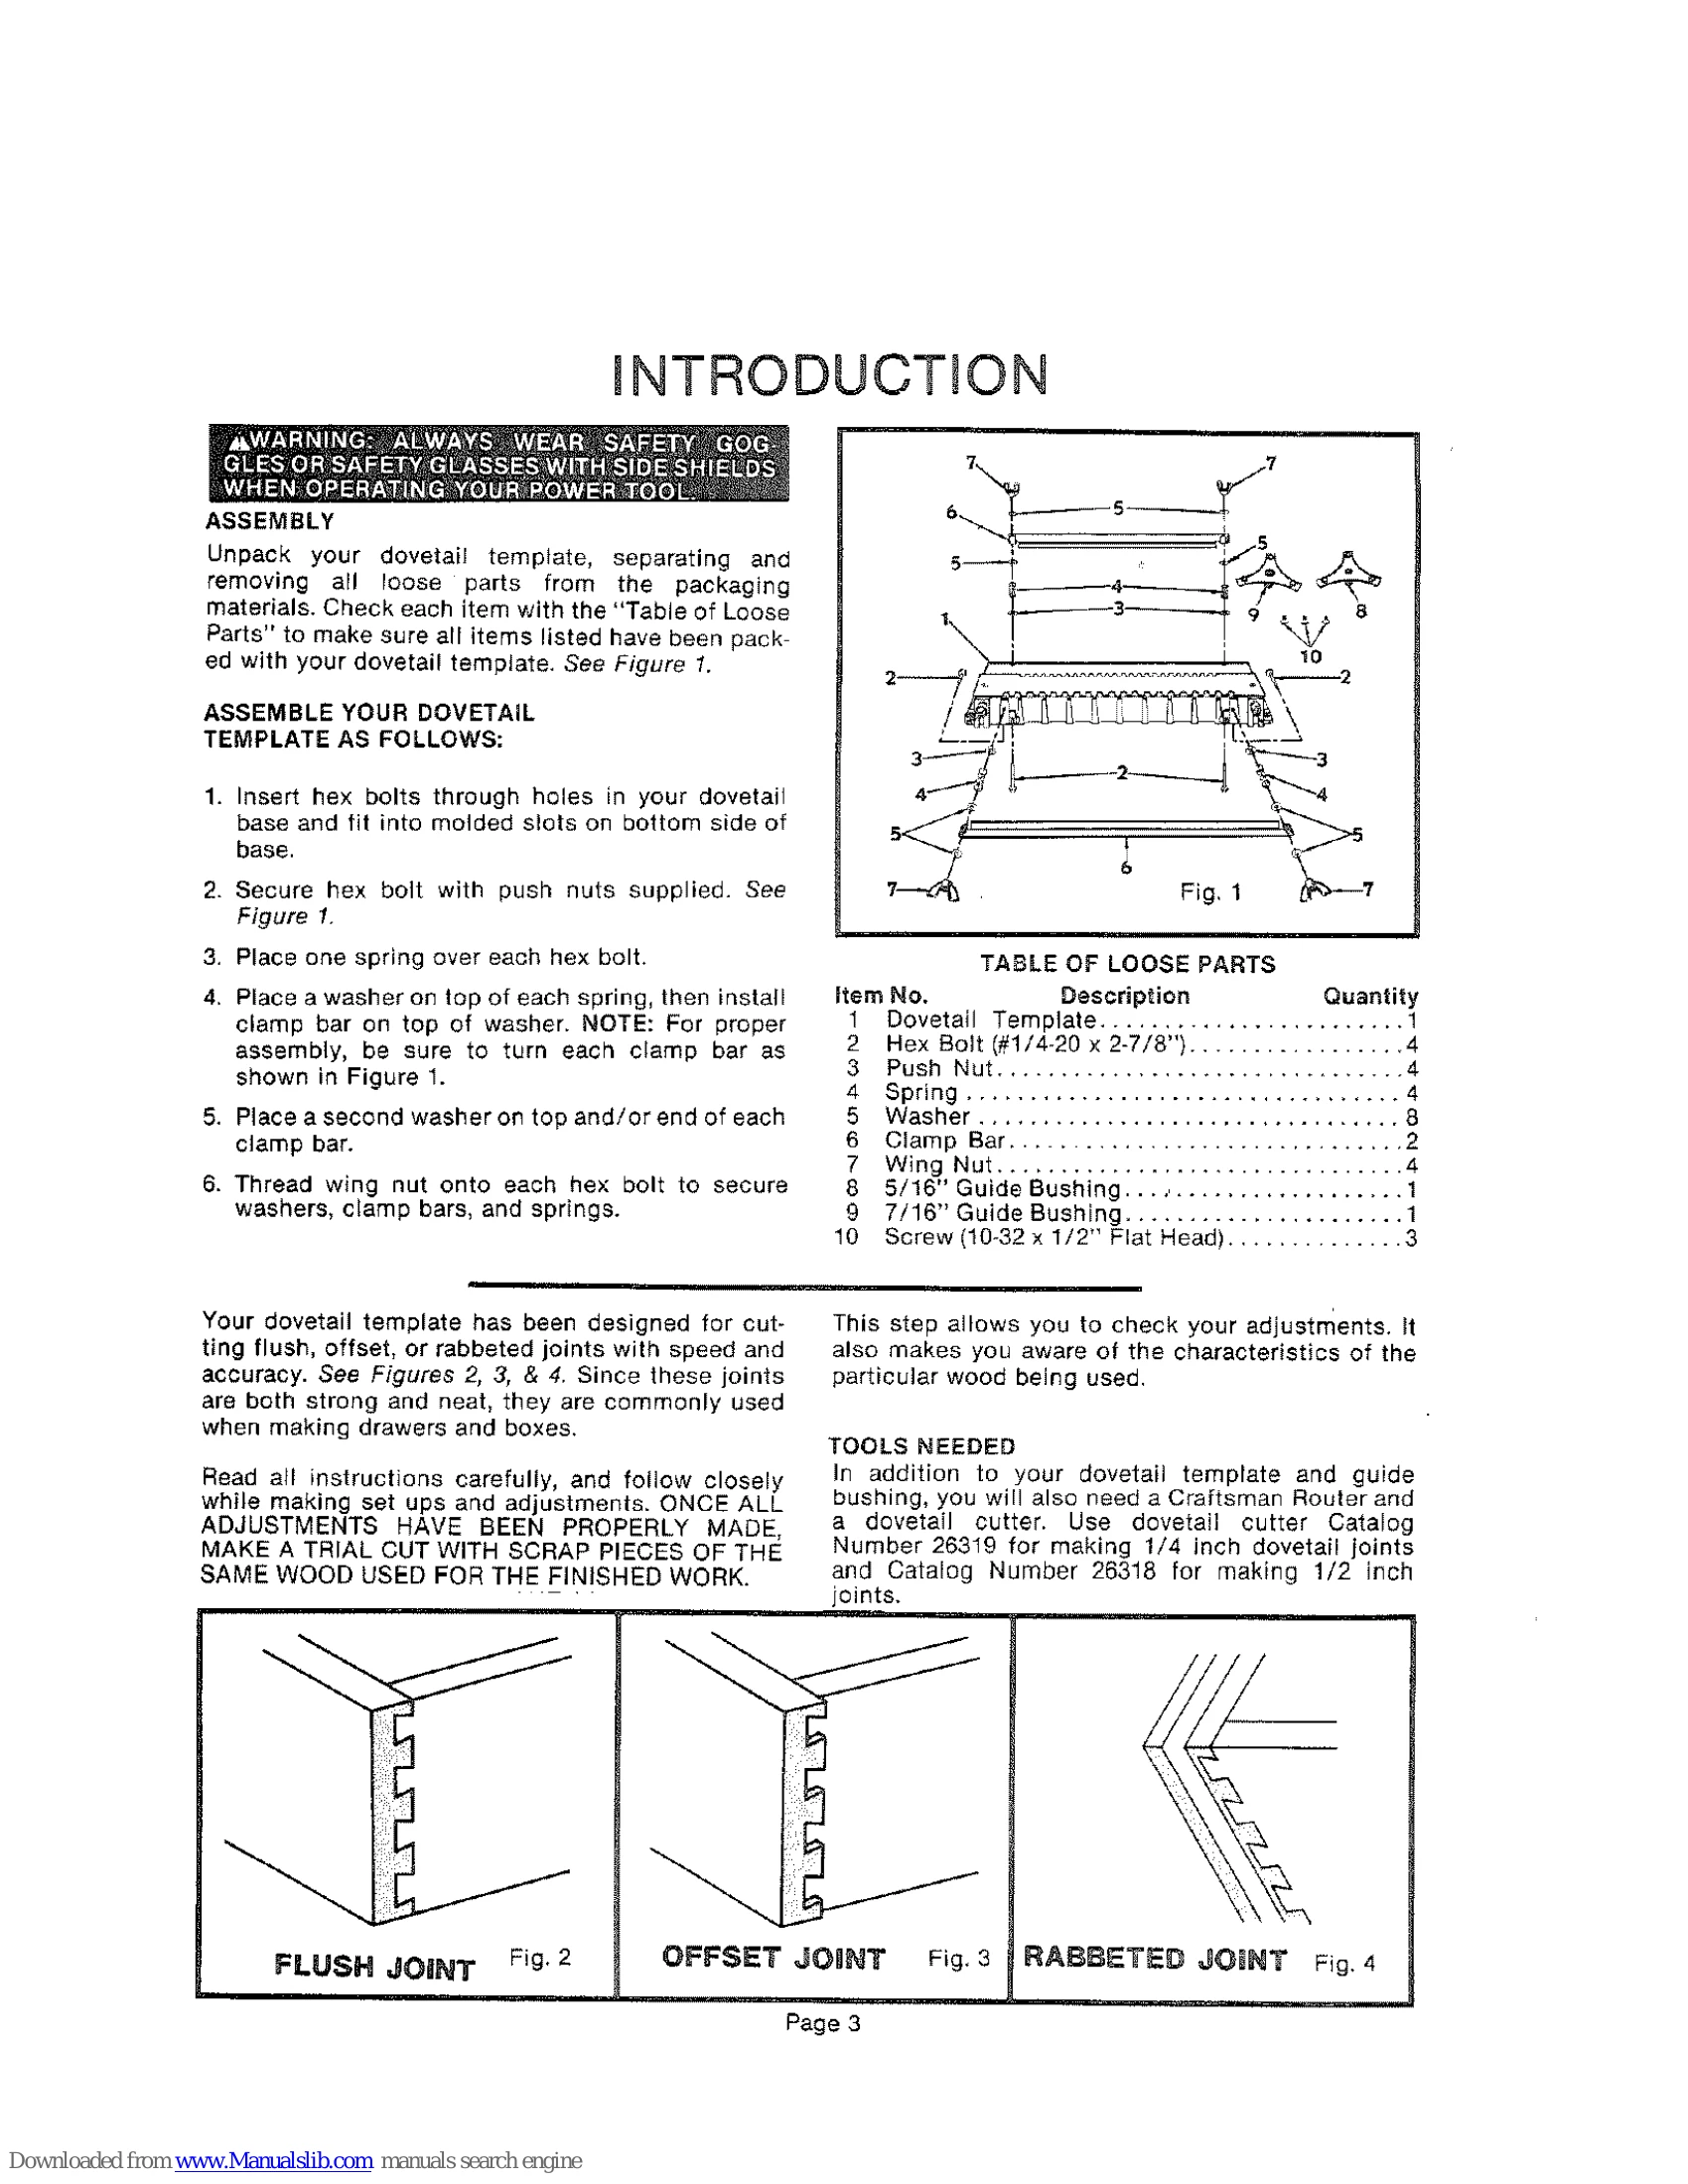
Unpack the dovetail template and identify all parts using the "Table of Loose Parts." Assemble the template by inserting hex bolts through the base, securing with push nuts, adding springs, washers, and clamp bars, and tightening with wing nuts.
Mount the dovetail template securely to a workbench or a piece of plywood using "C" clamps or wood screws for mobility.
Attach the appropriate guide bushing (5/16" for 1/4" joints, 7/16" for 1/2" joints) to the router subbase. Insert the dovetail cutter bit through the bushing and into the collet, ensuring at least 1/2" engagement. Center the cutter visually and tighten all screws securely.
Determine drawer dimensions and choose between 1/4" or 1/2" joints. Adjust angle brackets on the template for the desired joint size. Mark boards for identification. Clamp boards "inside-out" to the template base, ensuring proper alignment with stops. Rout the joints by feeding the router left to right, then right to left for cleanup. Make trial cuts on scrap wood before proceeding with finished pieces.
Follow specific setup procedures, adjusting angle brackets and board placement as needed for these joint types.
Adjust cutter depth slightly for tight or loose joints. Ensure proper lock nut adjustment for desired depth.
| Problem | Solution |
|---|---|
| If the joint is too tight | Raise the cutter very slightly, this will make the cut more shallow (approximately 1/64"). See depth adjustment instructions as explained in your router owners manual. |
| If the joint is too loose | Lower the cutter bit very slightly to make the cut deeper (approximately 1/64"). |
| If the fit is too deep | Turn the lock nut (I) in a counter-clockwise direction until desired depth is reached. See Figures 15, 20, or 21. NOTE: Be sure to adjust both lock nuts equally. |
| If the fit is too shallow | Turn the lock nut (1) in a clockwise direction until the desired depth is reached. NOTE: Be sure to adjust both lock nuts equally. |