Brand: SANYO
Category: Video
Document Type: Manual
Language: EN
Brand: SANYO
Category: Video
Document Type: Manual
Language: EN
Uploaded: Nov. 21, 2025, 8:40 p.m.
Servicing should always be referred to your dealer or Sanyo Authorized Service Center for any problems.
Setup Location: Install in a location protected from direct sunlight and without unevenness. Use a special bracket for curved surfaces.
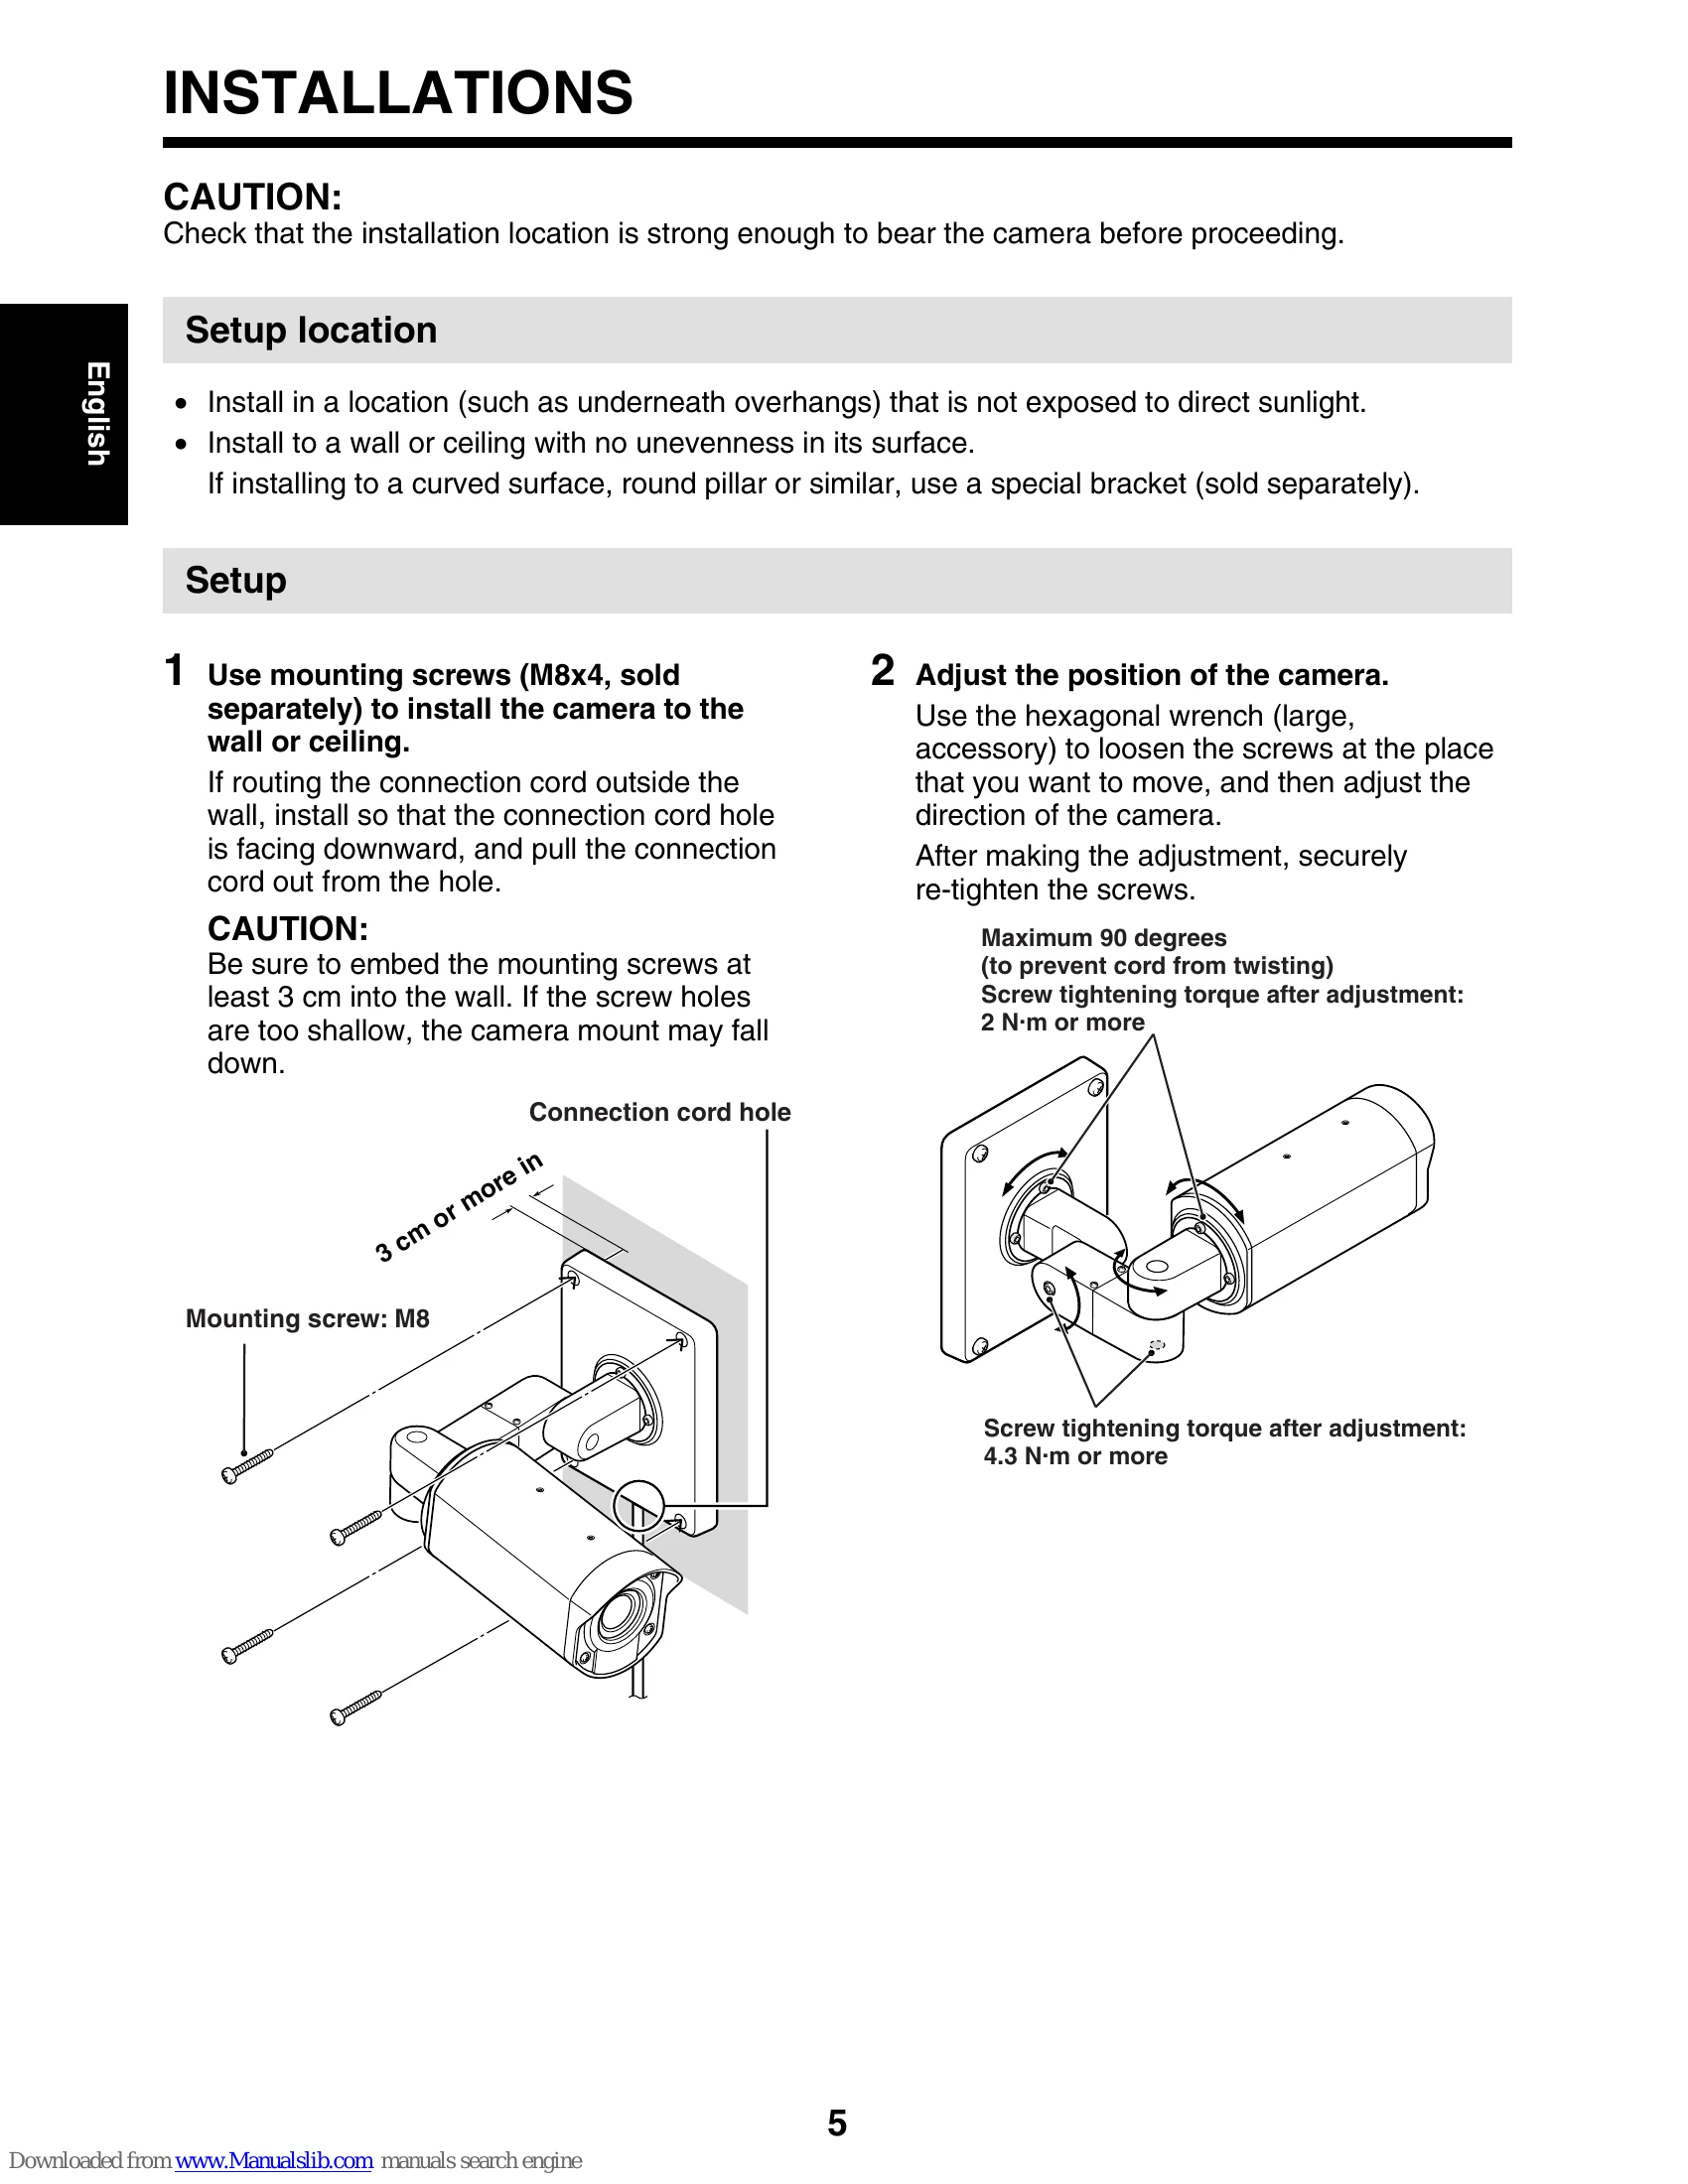
Camera Setup: Use mounting screws (M8x4) to attach the camera to a wall or ceiling. Ensure cords are routed correctly.
Camera Adjustment: Use the hexagonal wrench to loosen screws and adjust the camera's direction. Re-tighten securely.
Sunshade Installation: Attach the sunshade mounting bracket and then the sunshade itself using accessory screws.
Connections: Connect the video output to a monitor or DVR. Connect power via AC 24V or DC 12V adaptors. Connect to other equipment using color-coded cords for control, alarm, or system communication.
Menu Settings: Access the MAIN MENU by pressing the SET button. Use CURSOR buttons to navigate and SET to confirm. Settings include Language, Camera ID, Sync, Privacy Mask, Lens, Mirror, View Settings, and Options.
| Problem | Cause | Solution |
|---|---|---|
| No image or distorted image | Incorrect connection | Check all connections. |
| No power | Power supply issue | Check power source and connections. |
| Menu not accessible | Camera cover not removed or incorrect button press | Ensure camera cover is removed (if necessary) and press SET button for 3 seconds. |
| Image too bright or too dark | Incorrect exposure settings | Adjust Iris, AGC Gain, or Day/Night settings. |
| Motion detection not working | Motion detection not enabled or sensitivity too low | Enable MOTION in VIEW SETTING and adjust sensitivity. |