Manual for UN55D6000

Manual for UN55D6000

Brand: SAMSUNG

Category: TV

Document Type: Manual

Language: EN

Uploaded: Nov. 21, 2025, 6:40 p.m.

Using the Channel Menu

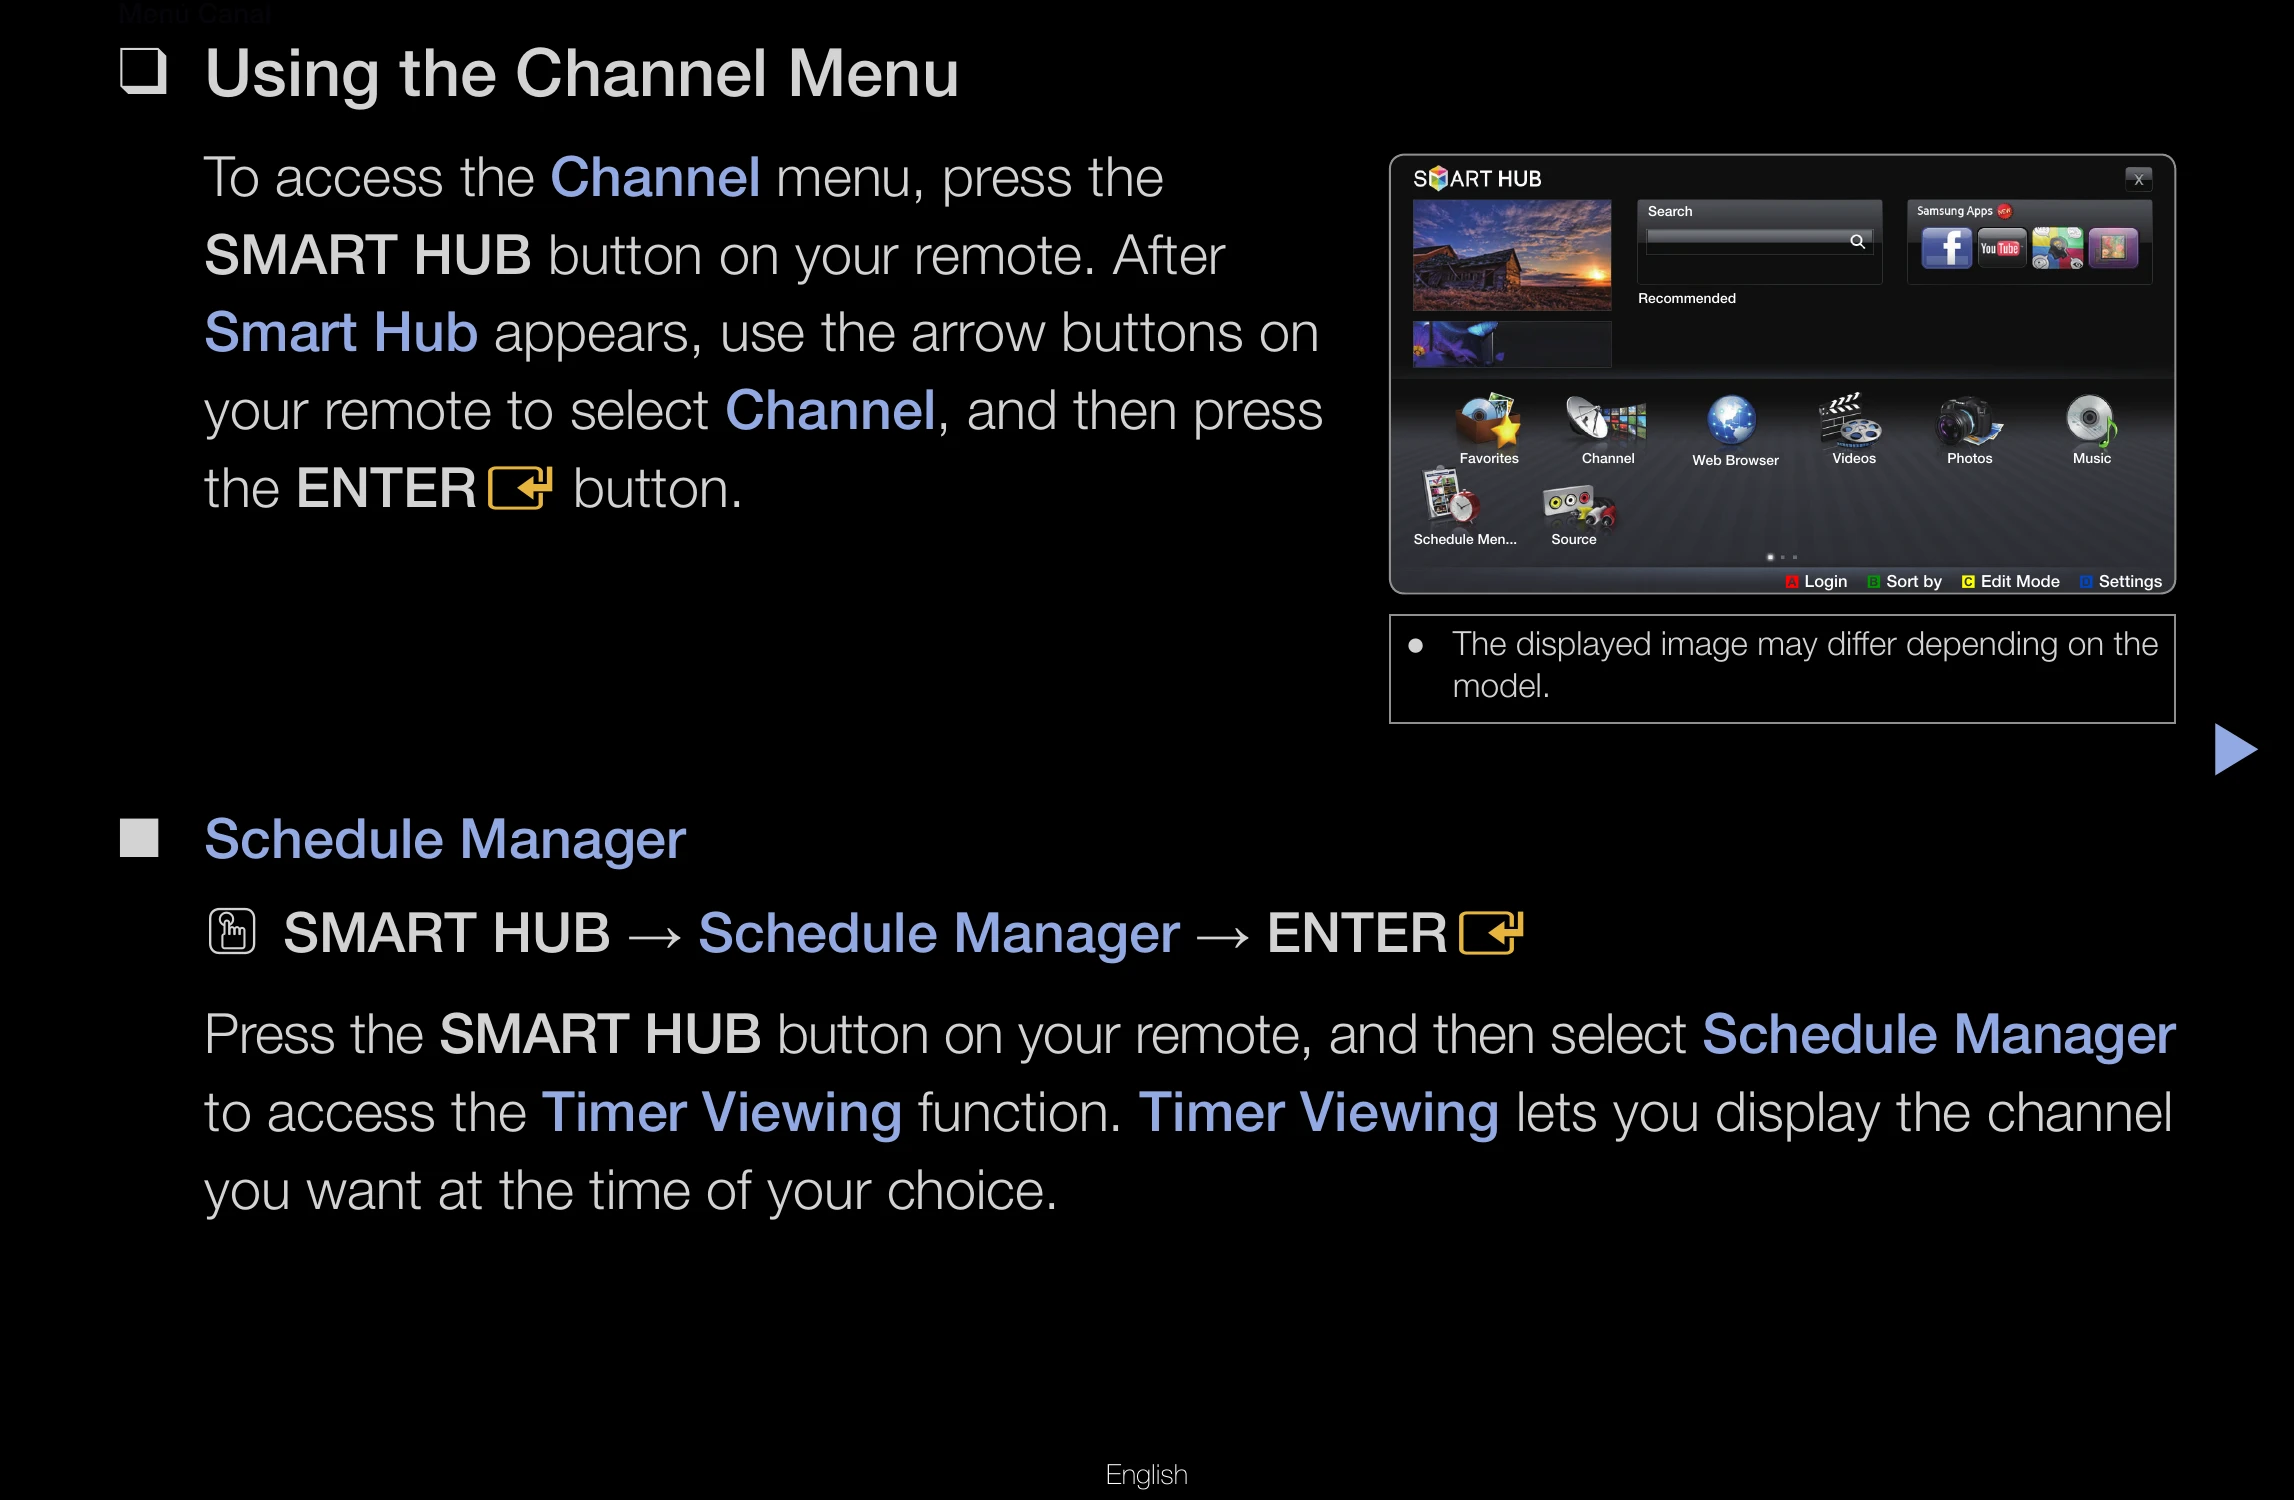
To access the Channel menu, press the SMART HUB button on your remote. After Smart Hub appears, use the arrow buttons on your remote to select Channel, and then press the ENTER button.

Schedule Manager

Press the SMART HUB button on your remote, and then select Schedule Manager to access the Timer Viewing function. Timer Viewing lets you display the channel you want at the time of your choice.

Using the Timer Viewing

You can set the TV to display a desired channel automatically on a day and at a time of your choice. You must set the current time first using the Time → Clock function in the System menu.

Channel List

The Channel List contains the channels your TV displays (Added Channels) when you press the CH LIST button on your remote. On the Channel List, you can view Added Channels, channel information, Favorites, and manage channels.

Channel

Using the Channel function, you can add channels, delete Added channels, set Favorite channels, use the program guide for digital broadcasts and change between the All Channels and Added Ch. screen.

Edit Mode (Favorites)

Setting channels you watch frequently as favorites. Select the Edit Mode icon, then press ENTER to select a channel as a favorite. Press ENTER again to deselect. Select Edit Favorites at the bottom of your screen, then press ENTER. Highlight a group and press ENTER. Select OK, press ENTER, and then press ENTER again.

Edit Mode (Delete Channel)

Select the Edit Mode icon, then press ENTER. Select a channel and press ENTER. Select Delete, press ENTER, then press ENTER again.

Using the TOOLS button with Channel

Add/Delete: Add or delete channels from the Added Channel list. To add, select All Channels, press ENTER, select a greyed-out channel, press TOOLS, select Add, press ENTER, and then press ENTER again. To delete, select Added Channels, press ENTER, select a greyed-out channel, press TOOLS, select Delete, press ENTER, and then press ENTER again.

Edit Favorites (Add)

Highlight a channel, press TOOLS, select Edit Favorites, press ENTER. Highlight a group, press ENTER. Select OK, press ENTER. The TV displays a "★" symbol next to the channel.

Edit Favorites (Remove)

Highlight a favorite channel, press TOOLS, select Edit Favorites, press ENTER. Highlight the group with a green square, press ENTER, then press ENTER again. Select OK, press ENTER, and then press ENTER again.

Channel Name Edit

Assign a name of up to five characters to an analog channel.

Upcoming Program

View details on the program being aired on the selected digital channel.

Troubleshooting

Refer to the "Issues" and "Solutions and Explanations" sections for troubleshooting various problems such as picture issues, sound problems, connection errors, and 3D display problems.

Anti-theft Kensington Lock

A Kensington Lock is a device to physically fix your TV in place in public. Wrap the cable around an object and attach the lock to the Kensington slot on the back of the TV.

License

Information about trademarks and patents for Dolby, SRS, and DTS technologies.

DivX

Information about DivX Certified® devices and registration for DivX Video-on-Demand.

Open Source License Notice

Open Source Licenses are available on the product menu.

Troubleshooting and error codes

Issues Solutions and Explanations
There is a dotted line on the edge of the screen.
  • If the picture size is set to Screen Fit, change it to 16:9.
  • Change the cable/satellite box resolution.
The picture is black and white.
  • If you are using an AV composite input, connect the video cable (yellow) to the Green jack of Component Input 1 on the TV.
When changing channels, the picture freezes or is distorted or delayed.
  • If the TV is connected to a cable box, try to reset the box. (Disconnect and then reconnect the AC cord and wait until the cable box reboots. It may take up to 20 minutes.)
  • Set the output resolution of the cable box to 1080i or 720p.
3D
The 3D Active Glasses are not working correctly
  • Make sure the glasses are turned on.
  • The 3D Active Glasses may not work properly if there is any other 3D product or electronic devices turned on near the glasses or TV.
  • If there is a problem, keep other electronic devices as far as possible from the 3D Active Glasses.
The 3D images don't look quite right.
  • The ideal viewing distance is three times or more the height of the screen.
  • We also recommend sitting with viewer's eyes on a level with the screen
The batteries in the 3D glasses don't last
  • Turn off 3D glasses while not using them. If you leave 3D glasses on, battery lifespan is shortened
Sound Problem
There is no sound or the sound is too low at maximum volume.
  • First, perform the Sound Test to determine if your TV audio is operating properly.
    • Go to MENU - Support - Self Diagnosis - Sound Test)
    If the audio is OK, the sound problem may caused by the source or signal.
  • Please check the volume of the device (Cable/Sat Box, DVD, Blu-ray etc.) connected to your TV.
The picture is good but there is no sound.
  • Set the Speaker Select option to TV Speaker in the Sound menu.
  • If you are using an external device, check the device's audio output option. (Ex. You may need to change your cable box's audio option to HDMI if you have the box connected to your TV using an HDMI cable.)
  • If you are using a DVI to HDMI cable, a separate audio cable is required.
  • If your TV has a headphone jack, make sure there is nothing plugged into it.
  • Reboot the connected device by disconnecting, and then reconnecting device's power cable.
The speakers are making an inappropriate noise.
  • Check cable connections. Make sure a video cable is not connected to an audio input.
  • For antenna or cable connections, check the signal information. A low signal level may cause sound distortion.
  • Perform the Sound Test as explained on a previous page.
RF (Cable/Antenna) Connection
The TV is not receiving all channels.
  • Make sure the coaxial cable is connected securely.
  • Run Auto Program to add available channels to the channel list. Go to MENU - Channel - Auto Program then select Auto and make sure to select the correct Cable TV signal type. There are 3 options, STD, HRC and IRC. Most cable systems use STD.
  • Verify the antenna is positioned correctly.
No caption on digital channels.
  • Check the Caption Setup menu. Try changing Caption Mode Service1 to CC1.
  • Some channels may not have caption data.
The picture is distorted: macro block error, small block, dots, pixelization.
  • The compression of video contents may cause picture distortion, especially with fast moving pictures such as sports and action movies.
  • A weak signal can cause picture distortion. This is not a TV problem.
PC Connection
A “Mode Not Supported” message appears.
  • Set your PC's output resolution so it matches a resolution supported by the TV.
“PC” is always shown on the source list, even if a PC is not connected.
  • This is normal. “PC” is always shown in the source list, regardless of whether a PC is connected.
The video is OK but there is no audio.
  • If you are using an HDMI connection, check the audio output setting on your PC.
Network Connection
The wireless network connection failed.
  • The Samsung Wireless USB dongle is required to use a wireless network.
  • Make sure the Network Connection is set to Wireless.
  • Make sure the TV is connected to a wireless IP sharer (router).
Software Upgrade over the network fails.
  • Run Network Test in Network menu to confirm the connection.
  • If you have latest Software (SW) version, SW upgrade will not proceed.
Others
Purple/green rolling horizontal bars and buzzing noise from the TV speakers with a Component cable connection.
  • Remove the left and right audio connections from the set-top-box. If the buzzing stops, this indicates that the set-top-box has a grounding issue. Replace the Component video cables with an HDMI connection.
The picture won't display in full screen.
  • HD channels will have black bars on either side of the screen when displaying up scaled SD (4:3) contents.
  • Black bars will appear on the top and bottom of the screen when you watch movies that have aspect ratios different from your TV.
  • Adjust the picture size options on your external device or the TV to full screen.
A “Mode Not Supported” message appears.
  • Check the supported resolution of the TV, and adjust the external device's output resolution accordingly. Refer to the resolution settings on User manual.
  • The external device's Capton function must also be activated
Caption on TV menu is greyed out.
  • You cannot select the Caption menu if you have selected a source connected to the TV via HDMI or Component.
  • The external device's Caption function must also be activated.
There is a plastic smell from the TV.
  • This smell is normal and will dissipate over time.
The TV Signal Information is unavailable in the Self Diagnosis menu.
  • This function is only available for digital channels the TV receives from an Antenna / RF/Coax connection.
The TV is tilted to the side.
  • Remove the base stand from the TV and reassemble it.
The channel menu is greyed out (unavailable).
  • The Channel menu is only available when you select the TV source.
Your settings are lost after 30 minutes or every time the TV is turned off.
  • If the TV is in the Store Demo mode, it will reset audio and picture settings every 30 minutes. Change the settings from Store Demo mode to Home Use mode using the Plug & Play procedure. Press the SOURCE button to select TV mode, and go to MENU → System → Plug & Play → ENTER.
You have intermittent loss of audio or video.
  • Check the cable connections and reconnect them.
  • Loss of audio or video can be caused by using overly rigid or thick cables. Make sure the cables are flexible enough for long term use. If mounting the TV to a wall, we recommend using cables with 90 degree connectors.
You see small particles when you look closely at the edge of the frame of the TV.
  • This is part of the product's design and is not a defect.
The PIP menu is not available.
  • PIP functionality is only available when you are using an HDMI, PC, or Component source.
POP (TV's internal banner ad) appears on the screen.
  • Select Home Use under Plug & Play mode. For details, refer to the Plug & Play Feature.
Privacy Policy