BATTERY LOADING
1. Pull up the Battery Compartment (1).
2. Insert batteries according to polarity diagram.
3. Push down the Battery Compartment (Fig. 5).
BATTERY CHECK
1. Push the red Battery Check Button (16) and look through the viewfinder.
2. If the red "D" signal (34) lights up, batteries are working (Fig. 7).
FILM LOADING
1. Set Mode Switch (8) to "S" (Fig. 8).
2. Pull out Rewind Knob (28) to open Back Cover (Fig. 9).
3. Insert film cartridge (30), push Rewind Knob (28) back (Fig. 10).
4. Insert film leader into Take-up Spool (Fig. 11).
5. Turn Spring Motor Wind Knob to engage sprocket teeth and check film (Fig. 12).
6. Close Back Cover firmly.
7. Turn Spring Motor Wind Knob until indicator shows green line (Fig. 13).
8. Press Shutter Release Button until "1" appears in Exposure Counter (Fig. 14).
SETTING FILM SPEED
Turn Film Speed Dial (10) to match ASA in Film Speed Window (11) (Fig. 15).
FOCUSING
Use Distance Scale (14) symbols (Fig. 16) or measure distance by eye and adjust scale (Fig. 17).
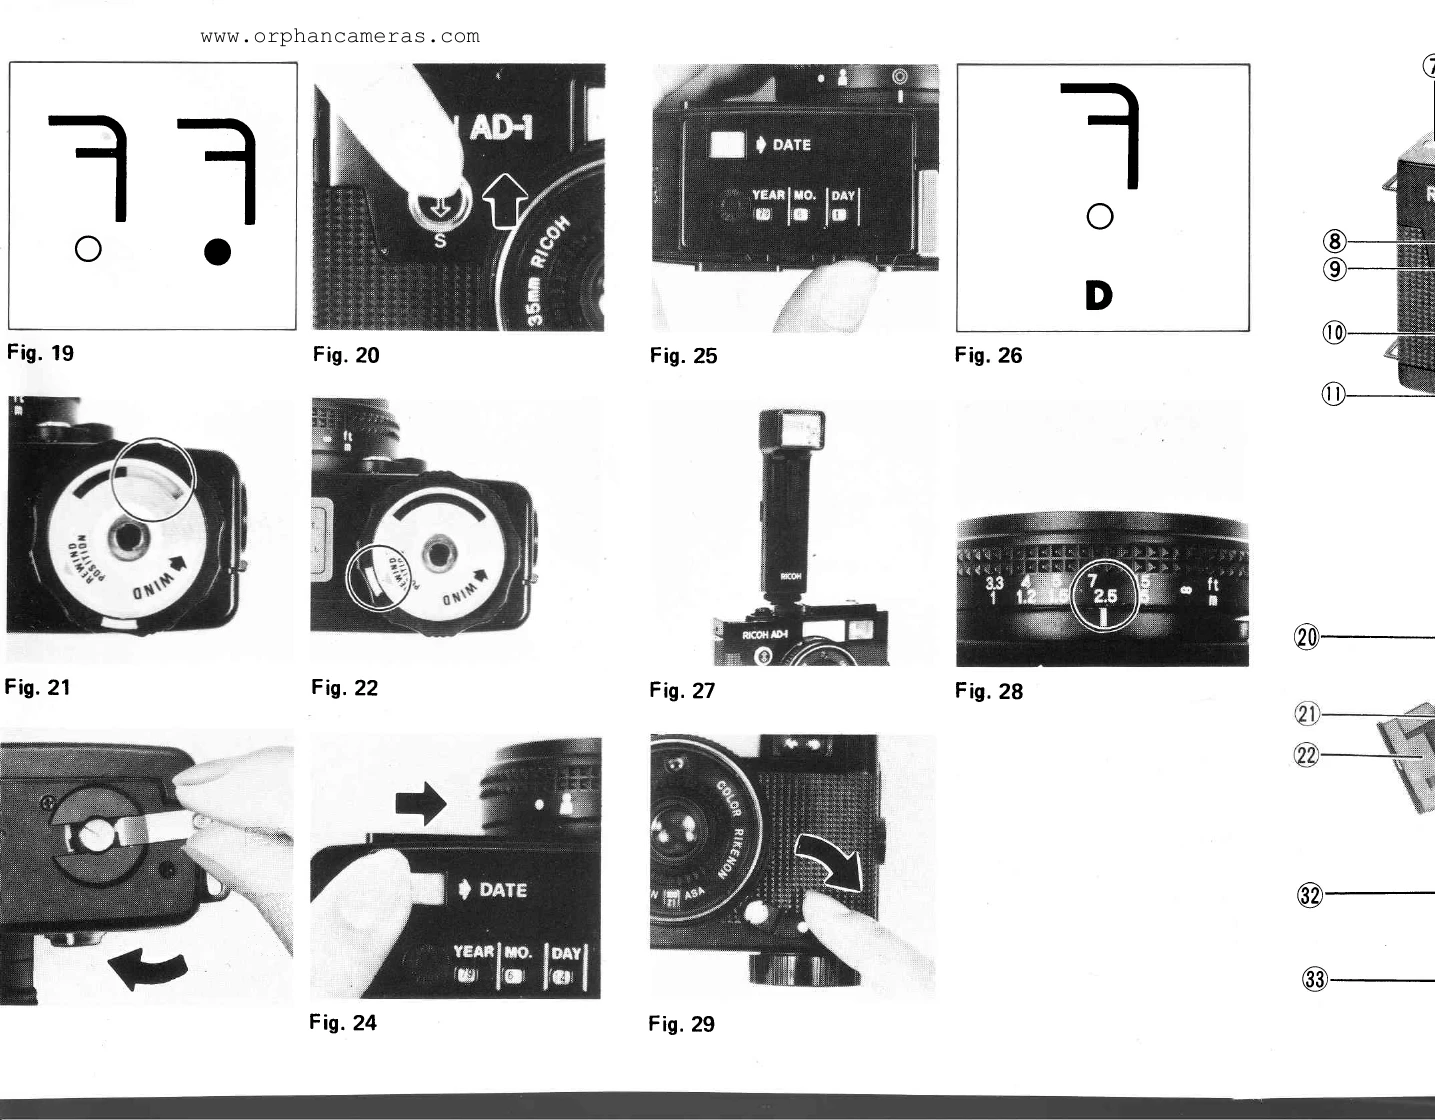
TAKING THE PICTURE
Single Shots: Set Mode Switch (8) to "S" (Fig. 20). Press Shutter Release Button.
Continuous Shots: Set Mode Switch (8) to "C". Keep Shutter Release Button depressed.
REWINDING FILM
1. Turn Spring Motor Wind Knob (25) clockwise to match sign (Fig. 22).
2. Push Film Rewind Release Button (24).
3. Pull up Film Rewind Crank (27) and turn to rewind (Fig. 23).
SETTING THE DATE
1. Slide Date Switch (2) to "Date" (Fig. 24).
2. Turn Date Dials to set date in Window (4) (Fig. 25).
3. Press Shutter Release halfway; "D" signal lights up (Fig. 26).
FLASH PHOTOGRAPHY
Use flash when Under Exposure Warning Signal (35) is red. Use guide number 12 flash unit.
SELF-TIMER
Set Mode Switch (8) to "S". Turn Self-Timer Lever (12) clockwise (Fig. 29). Press Shutter Release Button.