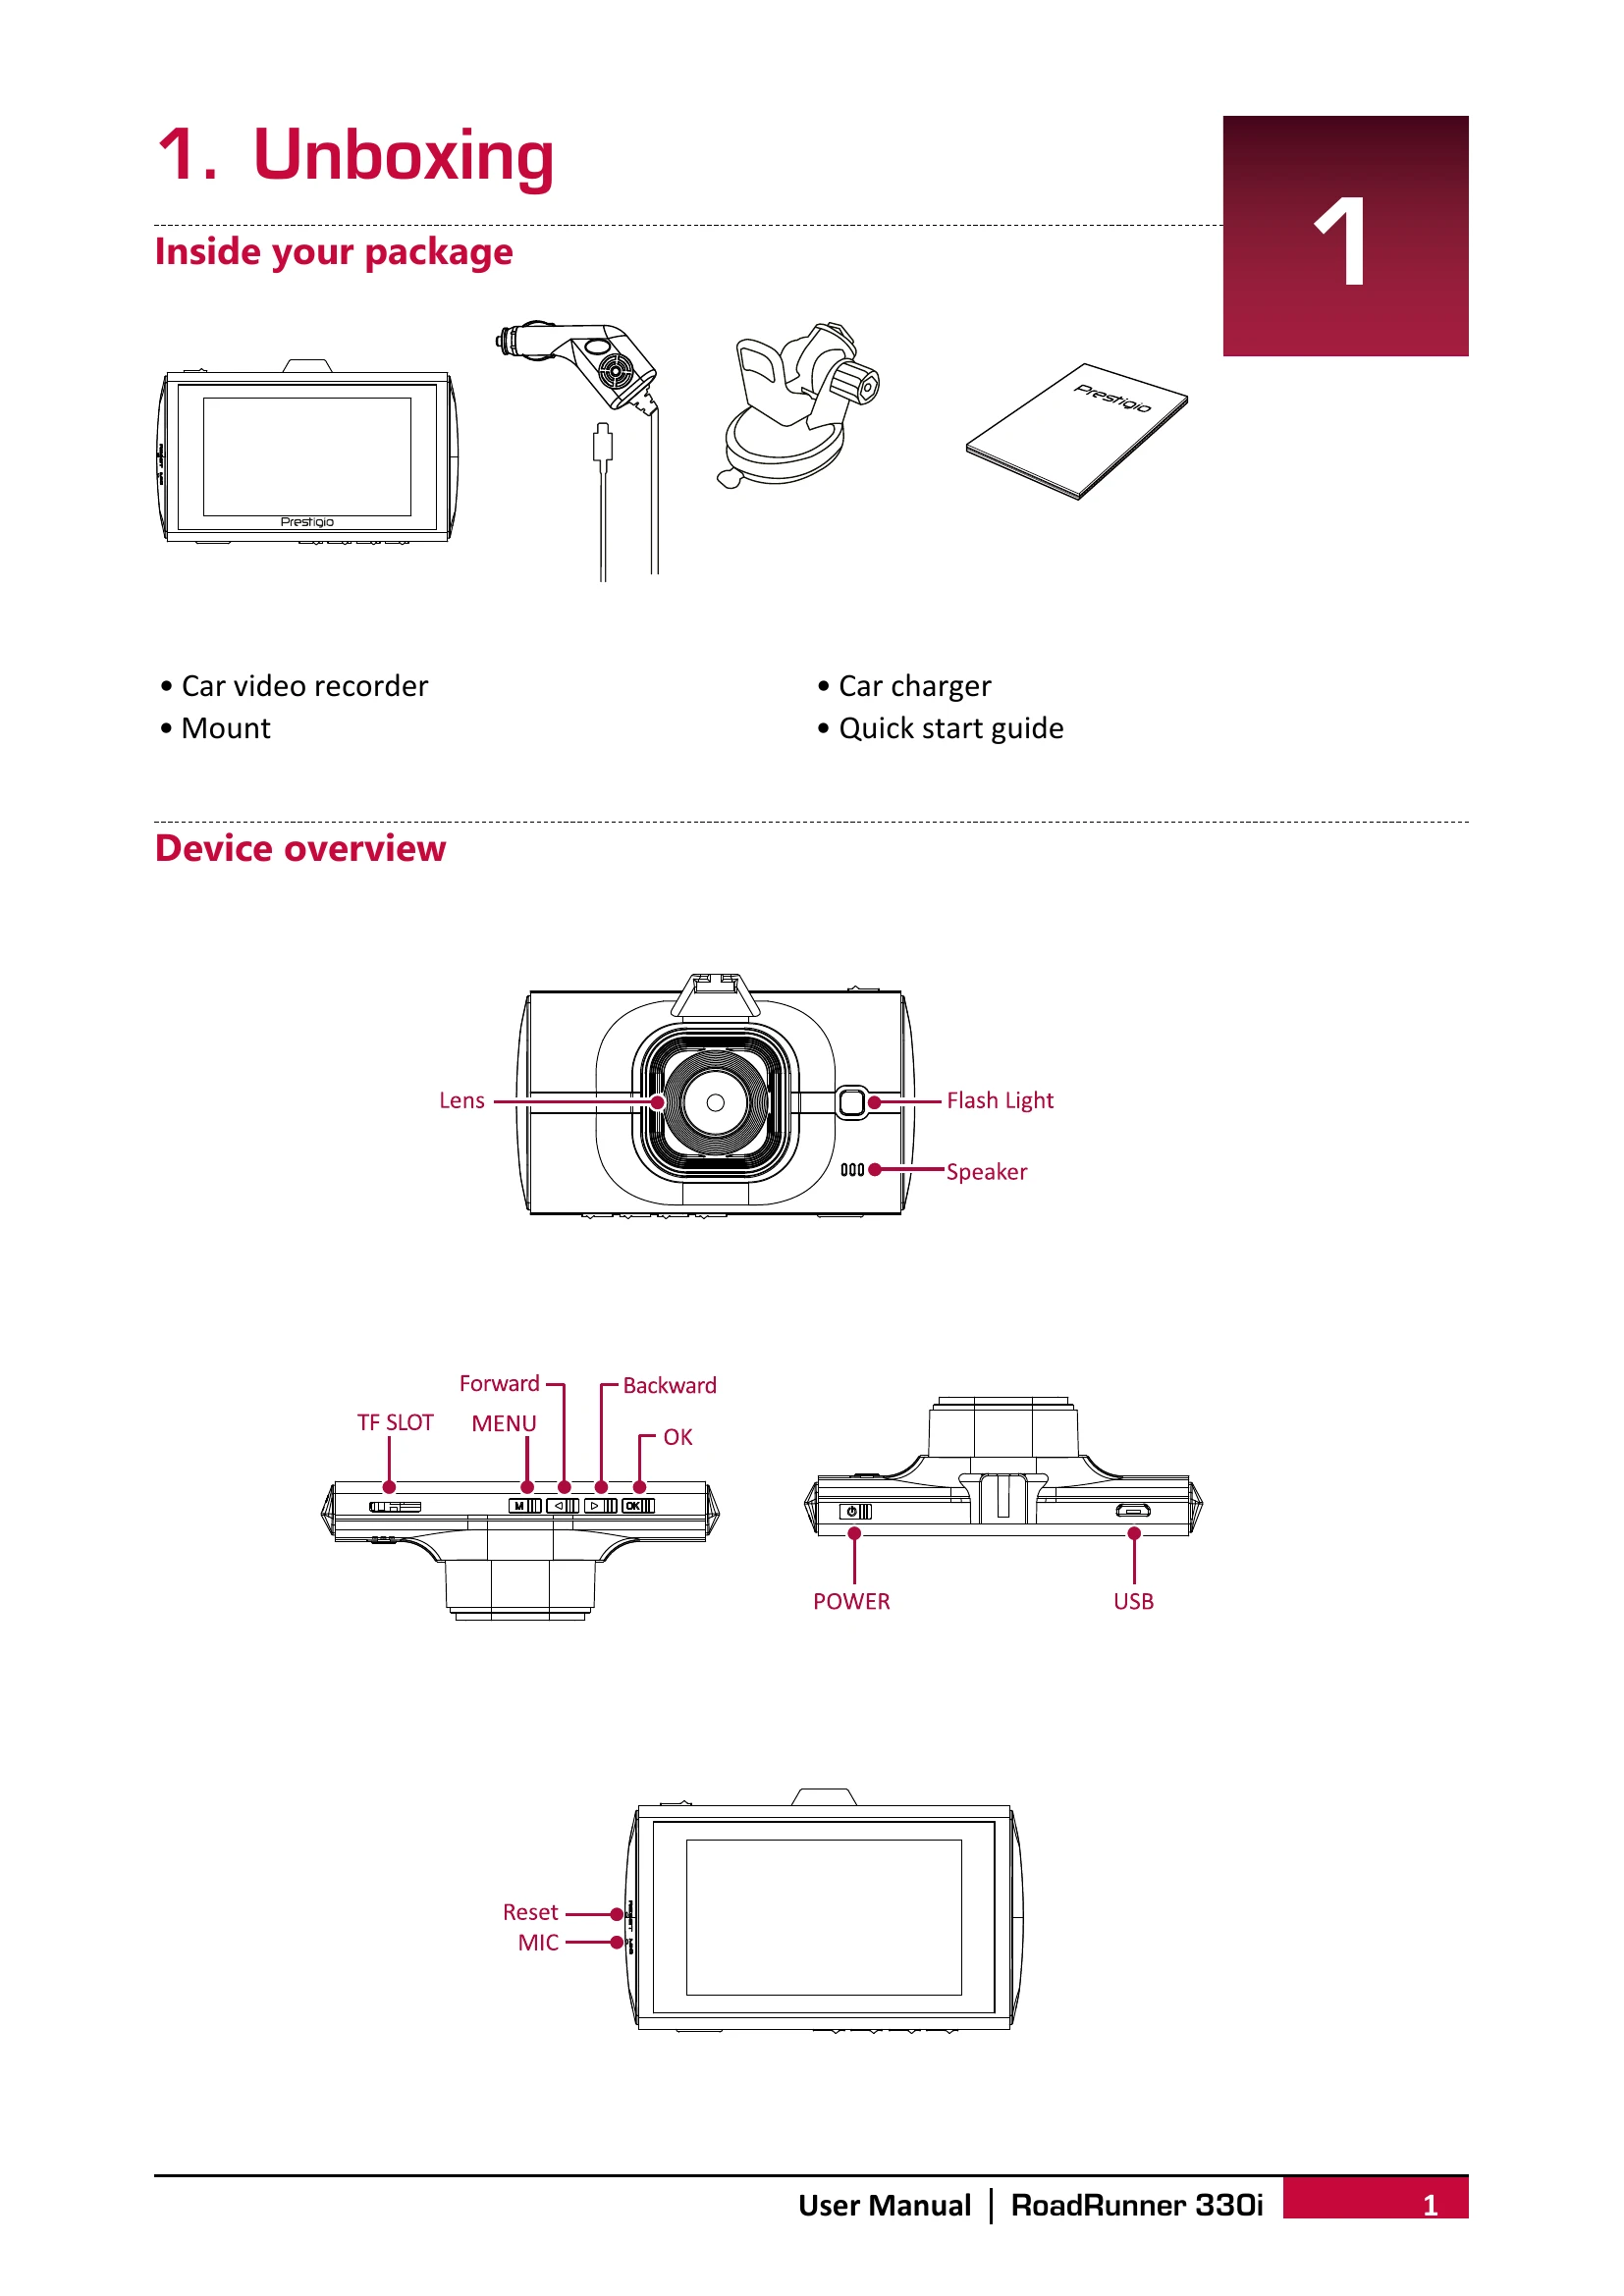
Inside your package: Car video recorder, Mount, Car charger, Quick start guide.
Device overview: Identify the Lens, Flash Light, Speaker, TF SLOT, MENU, Forward, Backward, OK, Reset, MIC buttons, POWER and USB ports.
2. Getting started
Insert a microSD card: Insert the card until it locks. The device will automatically recognize it as default storage.
Mount to Windshield: Attach the bracket to the device, position the suction-cup on the windshield, and press down the clamp to secure. Warning: Do not install on a tinted window.
Charge the battery: Fully charge the Li-ion battery in 1-2 hours using the car charger or a USB cable connected to an AC adapter or computer.
3. Settings
Video settings: Configure Resolution, Date stamp, Motion detection, and Loop recording.
Picture settings: Select the picture image Size.
General settings: Format memory card, choose Language, set Power off timer, restore Default settings, adjust Frequency, and set Date/Time.
4. Recording
Record a video: Auto video recording starts when the car engine launches. Manual recording can be started/stopped with the OK button.
Record the sound: Turn sound on/off with the '6' button.
Lock a recording video: Press MODE during recording.
Take a picture: Select picture mode with MODE and press OK.
5. File management
Browse files: Enter playback mode, then use UP/DOWN arrows.
Delete a file: Use MENU to delete, OK to confirm. Protected files need protection removed first.
Lock and unlock a file: Use MENU to protect/unprotect.
6. Playback
Play video on DVR: Use UP/DOWN to scroll, OK to play/pause, MODE to stop, and MENU to exit playback.
Playback on PC: Remove memory card and insert into a card reader. The USB port is for charging only.
7. Specifications
Display, Processor, Image sensor, View angle, Video resolution, Photo resolution, Video codec, Picture format, Memory, Microphone, Motion Detection, Power source, Interfaces, Operating temperature, Dimension, Weight are listed.