Brand: Panasonic
Category: Home Theater System
Document Type: Manual
Language: EN
Brand: Panasonic
Category: Home Theater System
Document Type: Manual
Language: EN
Uploaded: Nov. 21, 2025, 9:13 p.m.
Please consult your dealer for warranty information.
| Problem | Solution |
| No power. | Insert the AC mains lead securely into the household mains socket. (7) |
| The unit is automatically switched to the standby mode. | When "Auto Power Off" is set to "On", the unit automatically switches to standby after approximately 30 minutes in the stop mode. (19) |
| No response when any buttons pressed. | This unit cannot play discs other than the ones listed in these operating instructions. (4) The unit may not be operating properly due to lightning, static electricity or some other external factor. Turn the unit off and then back to ON. Alternatively, turn the unit off, disconnect the AC mains lead, and then reconnect it. Condensation has formed: Wait 1 to 2 hours for it to evaporate. |
| No response when remote control buttons pressed. | Check that the batteries are installed correctly. (7) The batteries are depleted: Replace them with new ones. (7) Point the remote control at the remote control sensor and operate. (8) |
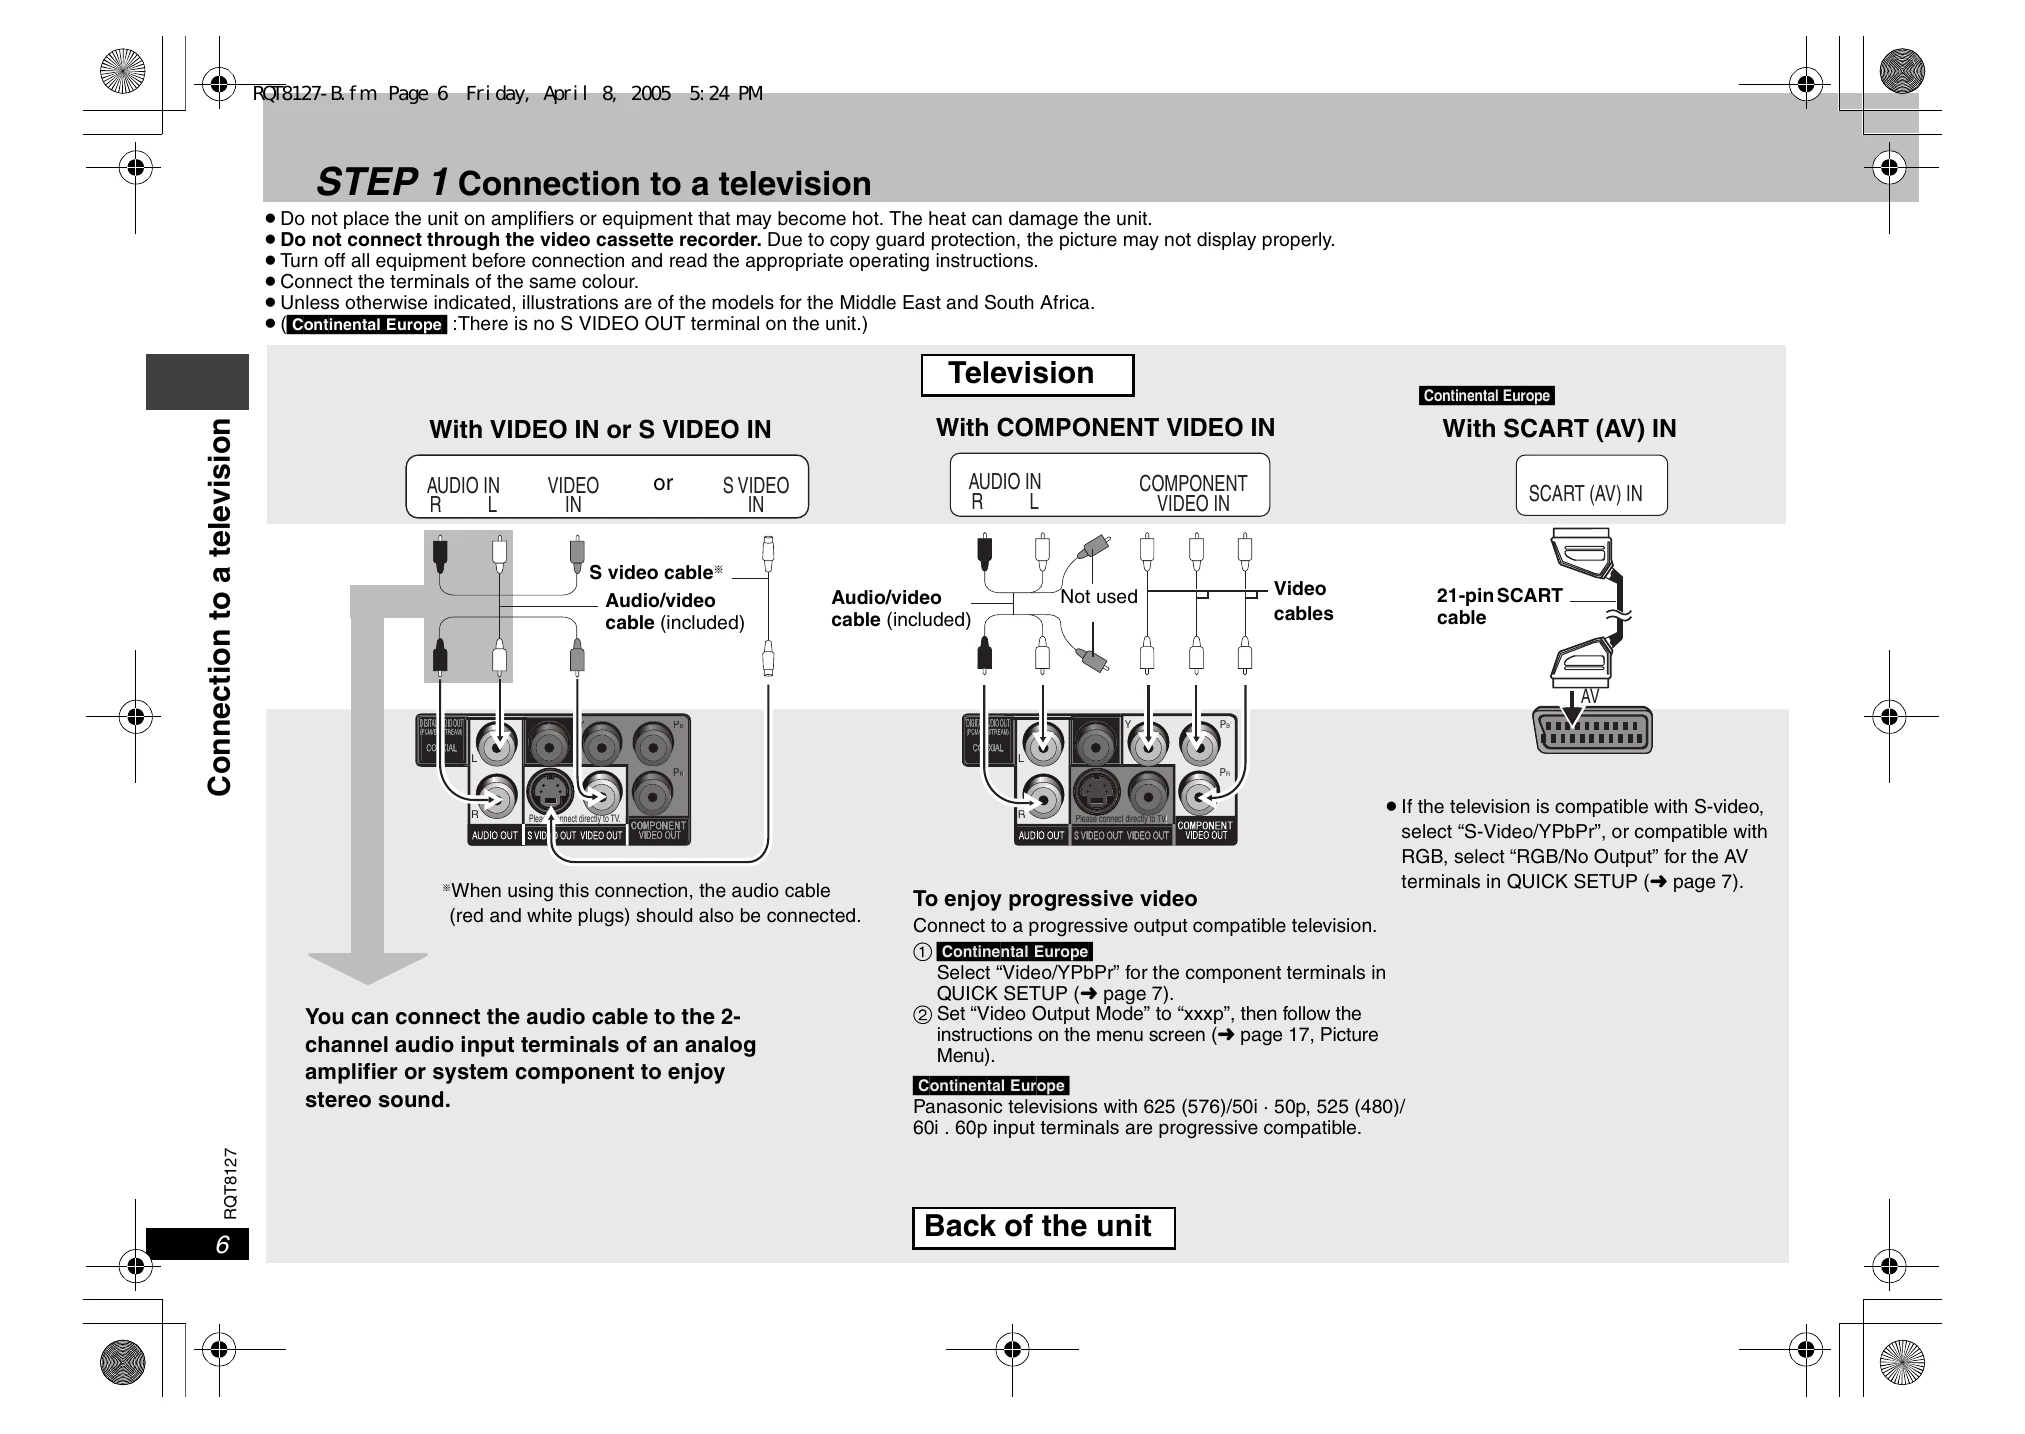
| No picture or sound. | Check the video or audio connection. (6, 7) Check the power or input setting of the connected equipment. Check that the disc has something recorded on it. |
| You have forgotten your ratings password. | Reset all the settings to Factory Preset. While stopped, press and hold [QUICK OSD] and [II] on the unit and then also press and hold [▲OPEN/CLOSE] on the unit until "Initialised" disappears from the television. Turn the unit off and on again. All settings will return to the default values. |
| It takes time before play starts. | Play may take time to begin when an MP3 track has still picture data. Even after the track starts, the correct play time will not be displayed; however, this is normal. MP3 This is normal on DivX video. DivX |
| The program and random play functions do not work. DVD-V | These functions do not work with some DVD-Videos. |
| Menu doesn't appear. VCD with playback control | Press [■] twice and then press [▶] (PLAY). |
| Play doesn't start. | This unit may not play WMA and MPEG4 that contains still picture data. WMA MPEG4 If playing DivX VOD content, refer to the homepage where you purchased the DivX VOD content. (Example: www.divx.com/vod) DivX If a disc contains CD-DA (CD) and other formats, proper playback may not be possible. |
| Subtitle position is wrong. | Adjust the position. ("Subtitle Position" in Display Menu) (17) |
| No subtitles. | Display the subtitles. (12) |
| In A-B Repeat, point B is automatically set. | The end of an item becomes point B when it is reached. |
| Repeat play is automatically canceled. | A-B Repeat is canceled when you press [QUICK REPLAY]. Repeat play may be canceled when you press [MANUAL SKIP] or [ADVANCED DISC REVIEW]. |
| Picture incorrect | |
| Picture distorted. | Ensure that the unit is not connected through a video cassette recorder. (6) Make sure that progressive output has not been selected when the connected television is not progressive compatible. Press and hold [CANCEL] until the picture displays correctly. The settings will return to "xxxi" (interlace). Change "Source Select" in Picture Menu. DivX (17) |
| Picture size doesn't fit the screen. | Change "TV Aspect" in "Video" tab. (18) Use the television to change the aspect. If your television does not have that function, change "4:3 Aspect" in Display Menu. (17) Change the Zoom setting. (12) |
| Picture stops. The television may display incorrectly or colours appear faded. | Picture may stop if the DivX files are greater than 2GB. DivX The unit and television are using different video systems. Use a multi-system or PAL television. The system used on the disc doesn't match your television. -PAL discs cannot be correctly viewed on an NTSC television. -This unit can convert NTSC signals to PAL 60 for viewing on a PAL television ("NTSC Disc Output" in "Video" tab). (18) |