INTRODUCTION
MODEL LINE UP OF DT920 SERIES
The following table shows the model line-up of DT920 series.
MODEL LINE UP OF DT530 SERIES
The following table shows the model line-up of DT530 series.
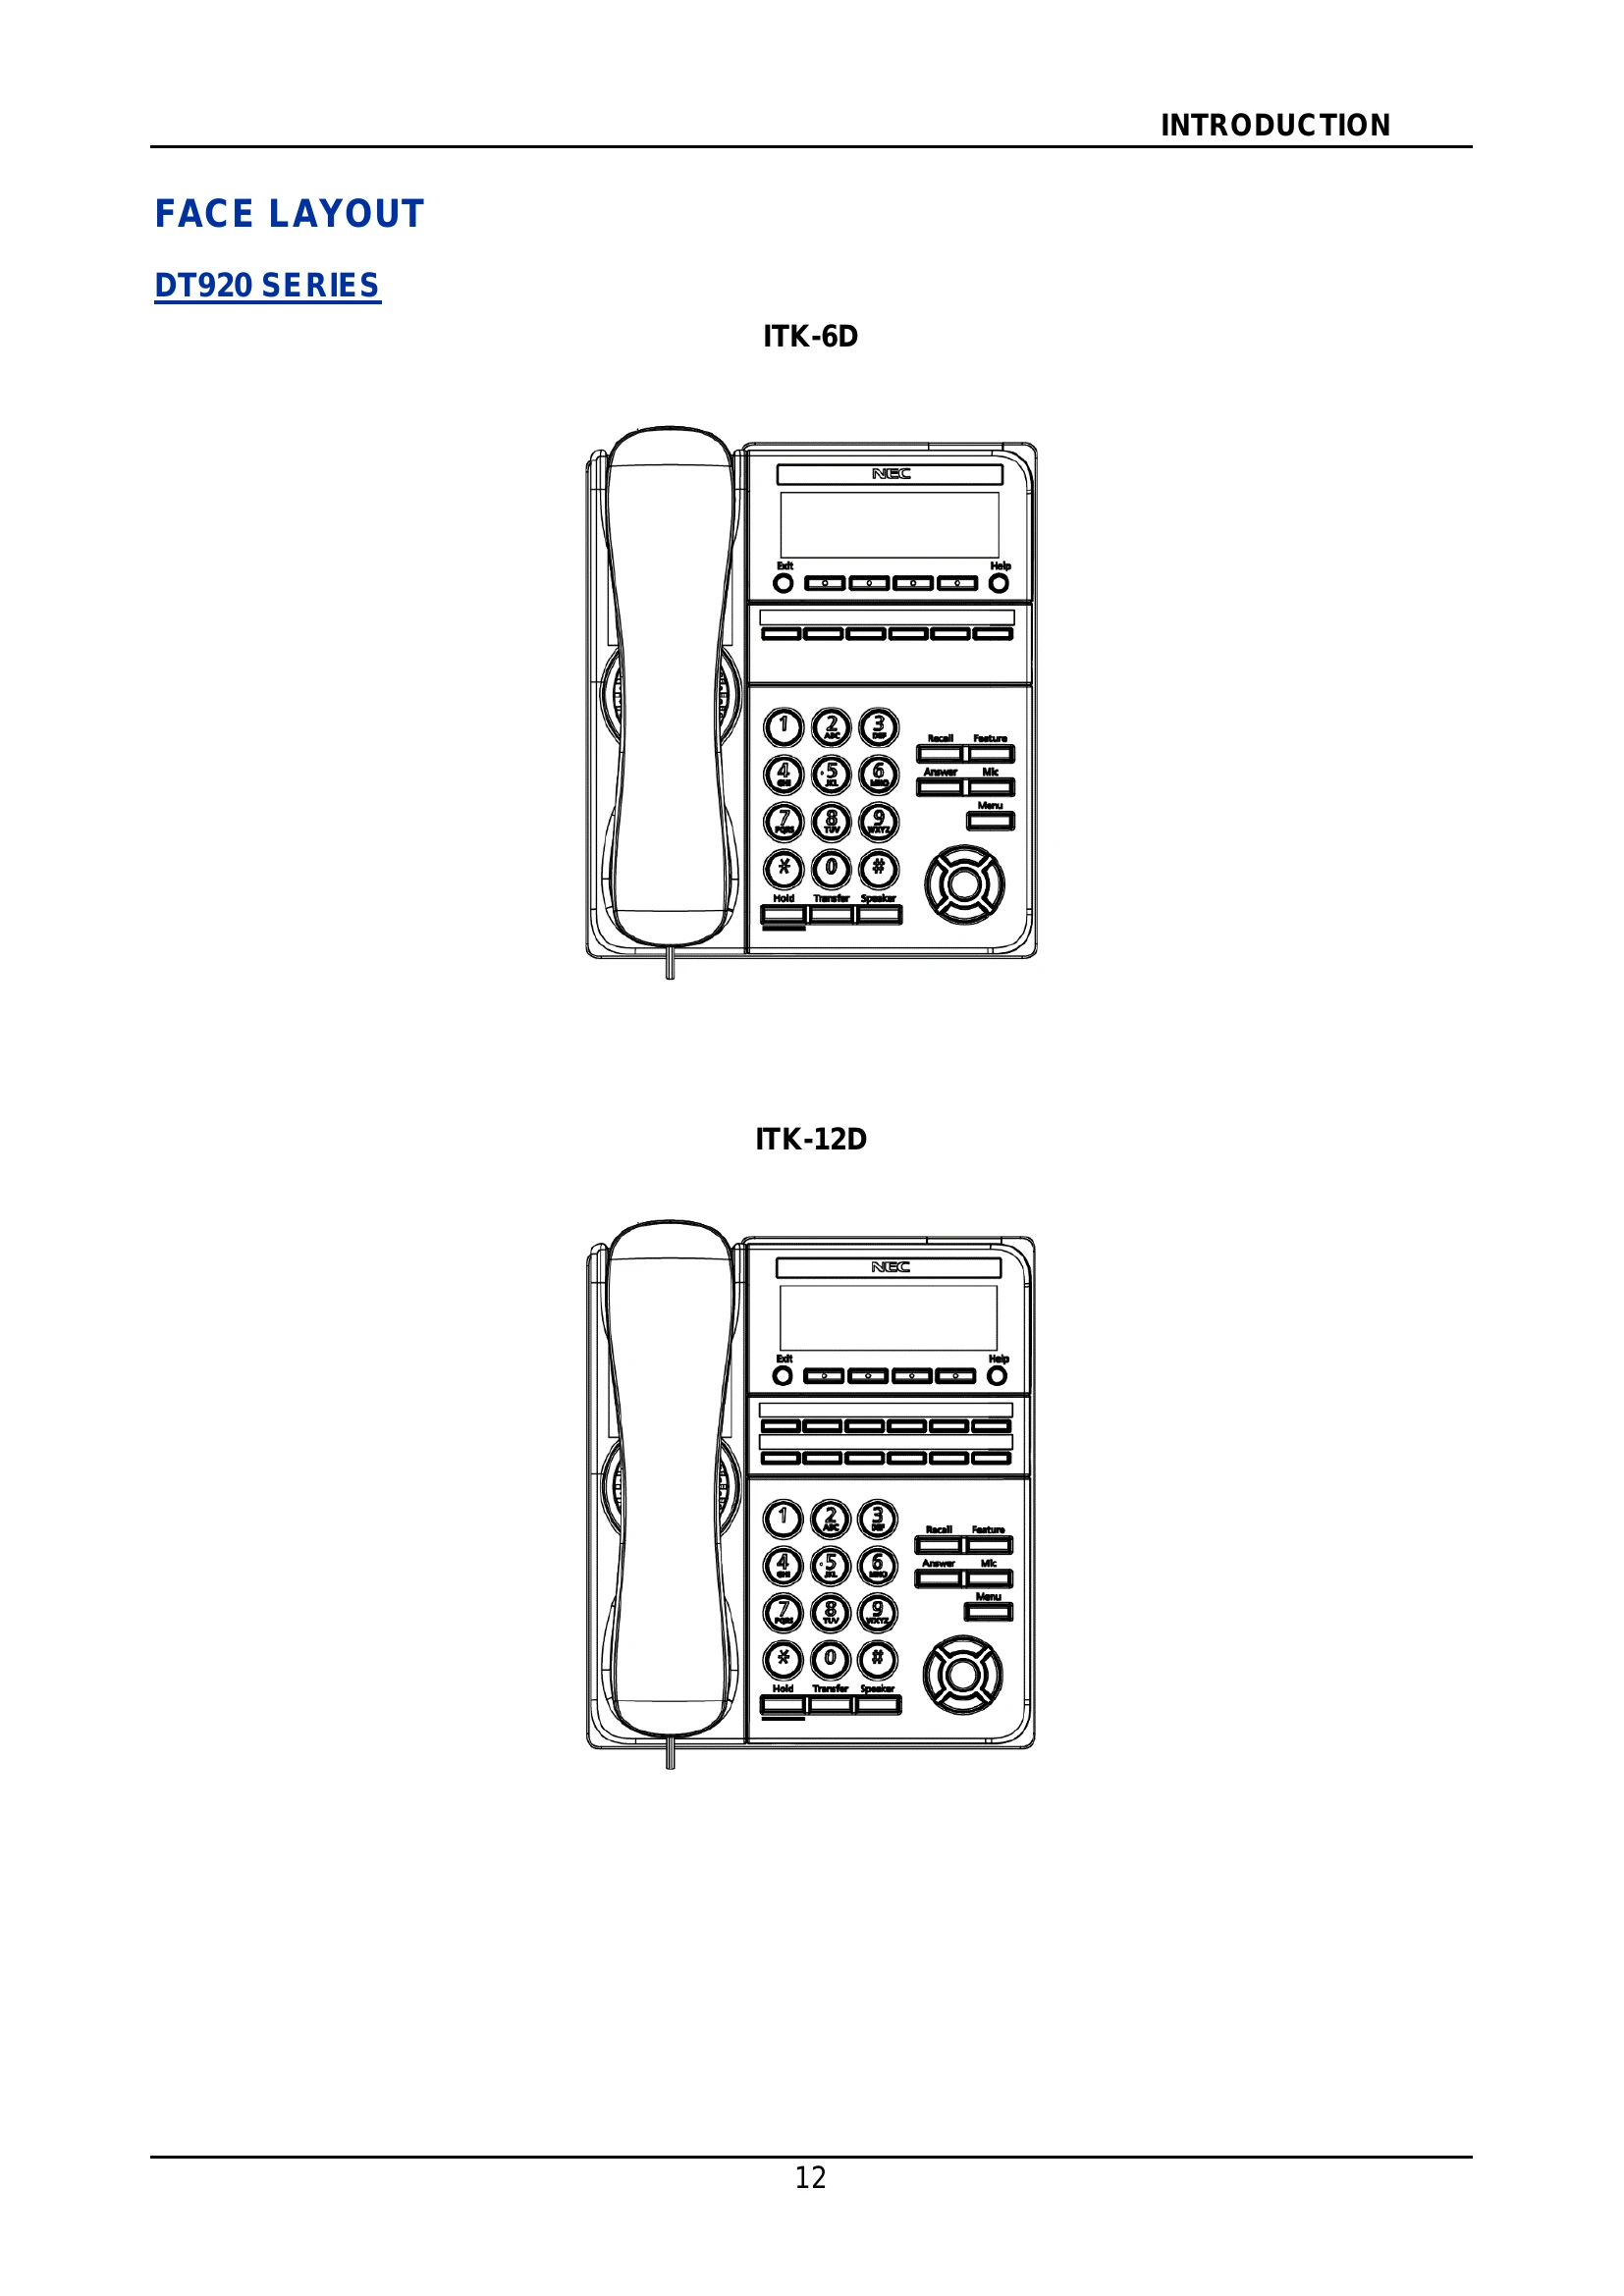
FACE LAYOUT
DT920 SERIES
ITK-6D
ITK-12D
DT530 SERIES
DTK-24D
DTK-12D
KEYS AND PARTS
This section explains keys and parts of DT920 Series using ITK-6D as an example.
MENU
From the Menu key, you can display the configuration menu.
DT920
To Display Menu List
1. Press Menu key while the terminal in an idle state. The Menu List is displayed on LCD. Use Cursor Key to select the desired Menu Item. You can also select the Menu Item directly using digit keys.
DT530
To Display Menu List
SIMPLE OPERATION BY MENU KEY AND CURSOR KEY
By using Menu key and Cursor key, the terminal user can access Call History, Directory and terminal settings with simple operation.
As an example, the following operations show how to access the Directory menu.
SHORTCUT MENU
Terminal has a Shortcut Menu for frequently-used features. You can access to Shortcut Menu by pressing Enter key.
Shortcut Menu includes the following features.
DISPLAY
The LCD displays Icons which provide notification when events occur.
DT920
The LCD displays RTP encryption icon which provides notification when the conversation is encrypted.
DT530
The LCD of DT530 Series displays Icons which provide notification when events (such as missed a call and a voice mail) occur.
INSTALLATION PROCEDURE
ADJUSTING ANGLE OF TILT LEG
The angle of the tilt leg can be adjusted in 5 levels.
Raising Tilt Legs
1. Turn the terminal over (key side down).
2. Raise Tilt Legs to desired height.
3. Turn the terminal over (key side up).
Lowering Tilt Legs
1. Turn the terminal over (key side down).
2. Lower Tilt Legs to desired height.
3. Turn the terminal over (key side up).
CONNECTING LAN CABLE
1. Connect LAN cable to LAN cable connector (LAN (=)) of the terminal.
2. Press the LAN cable into the groove.
CONNECTING LINE CORD
1. Insert a Line cord plug into the Line connector on the back of the telephone set until you hear it click.
2. Thread the line cord through the groove on the back of the telephone.
3. Lead the line cord out through the groove on the tilt leg as shown in the figure below.
CONNECTING AC ADAPTER
1. Insert the AC adapter plug into the connector of the AC adapter on the back of telephone.
2. Fix the AC adapter cord through the groove on the back of telephone.
INSTALLING DIRECTORY CARD
An optional directory card (also known as an abbreviated dialing table) can be attached to the telephone sets. The directory card can be used to record often dialed numbers or other important information.
1. Attach the Directory Card to the Directory Card Holder.
2. Take the protective sheet off from the plastic cover.
3. Push the Directory Card Holder into the grooves on the terminal until they snap into place.
INSTALLING/REMOVING LINE KEY CARD
TO REMOVE KEY SET UNIT (LINE KEY PANEL AND LINE KEY CARD)
1. Use the small notch at the lower right corner of the terminal to lift the Faceplate up.
2. Remove the Faceplate.
3. Remove the DESI Printer Sheet.
TO INSTALL KEY SET UNIT (LINE KEY PANEL, BUTTON PANEL, AND LINE KEY CARD)
1. After replacing the DESI Printer Sheet on the terminal, attach the Faceplate.
2. At each corner, press the locking pin back into place.
A CALL RECORDING
SAVING RECORDING CALL DATA TO THE RECORDING SERVER
You can save voice call data to Recording Server.
When a call is being recorded or when a recording error occurs, LED of the key indicates the status of call recording if Record key is assigned on a Programmable Feature Key. When a recording starts, the recording confirmation tone (a tone to indicate while the terminal is in a recording state) will be sent to the target party at an interval of 15 seconds. However, the recording confirmation tone can be disabled.
LED Display
The LED status while the call recording is executed are explained below.
To Record a Call Manually
Here explains the procedure for recording a call manually. Call recording is started by pressing a Programmable Feature Key where Call Recording feature is assigned. This Programmable Feature Key is called the Record key.
To Record a Call Automatically
When automatic call recording is set, call recording starts when a user goes off-hook or presses the Speaker key. Going on-hook or pressing the Speaker key again ends call recording. In this way, a whole conversation can be recorded.
HEADSET OPERATION
ATTACHING THE HEADSET
The Headset key must be programmed in advance. For details, contact the system administrator.
Connect the headset cable to HEADSET connector on the bottom of the telephone following the procedure below.
To Connect the Headset
1. Insert the modular plug into the HEADSET connector on the bottom of the telephone until it clicks.
2. Place the headset cord into the groove as shown in the figure below, and fix it.
TERMINAL OPERATION USING THE HEADSET
The following procedure explains how to operate a terminal using the headset. While using the headset, the operations equivalent to answering and ending a phone call with handset are available by pressing the Headset key.
To Originate a Call
1. Press the Headset key, and the Headset key lights red.
2. A Line key lights green and dial tone is received.
3. Dial a desired telephone number, after the target party answers the call, you can start a conversation.
4. Press the Headset key to end the call, and the Headset key turns off.
To Answer a Call
1. Press the Headset key while the terminal is ringing, and the Headset key lights red.
2. Press the flashing line key to start a conversation with calling party. Depending on the settings at the installation phase, you can answer the call by pressing the Answer key instead of the line key.
3. Press the Headset key to end the call, and the Headset key turns off.
ADJUSTING HEADSET RINGER TONE VOLUME
You can adjust the ringer tone volume for a headset in an idle or a busy state.
To Adjust the Ringer Tone Volume in Idle State
1. Press the Headset key while in an idle state to switch from headset mode to handset mode, and the Headset key lamp turns off.
2. Receives an incoming call.
3. Press the UP/DOWN key while the terminal is ringing.
For Ringer Tone Volume in Busy State
HOW TO USE THE WIRELESS HEADSET
When using Wireless Headset (W710 (APD-80) or WT100/Voyager Legend CS(APN-91)), you can answer a call, conduct a conversation, or disconnect the call with hooking operations. This section explains about the terminal operation using Wireless Headset.
To Answer a Call
1. Press the Call Control button of the Wireless Headset while the terminal is ringing, and the Headset button lights red. Depending on the installation phase, you can answer the call by pressing Answer key or Headset button instead of Call Control button.
2. Press Call Control button to end the call, and the Headset button turns off.