Manual for JT-SB216DS-W-AUS

Manual for JT-SB216DS-W-AUS

Brand: MITSUBISHI ELECTRIC

Category: Other

Document Type: Manual

Language: EN

Uploaded: Nov. 21, 2025, 7:15 p.m.

Manual Publish Date: 2006-04-01

Warranty Information

The term of validity is one year from the issued date.
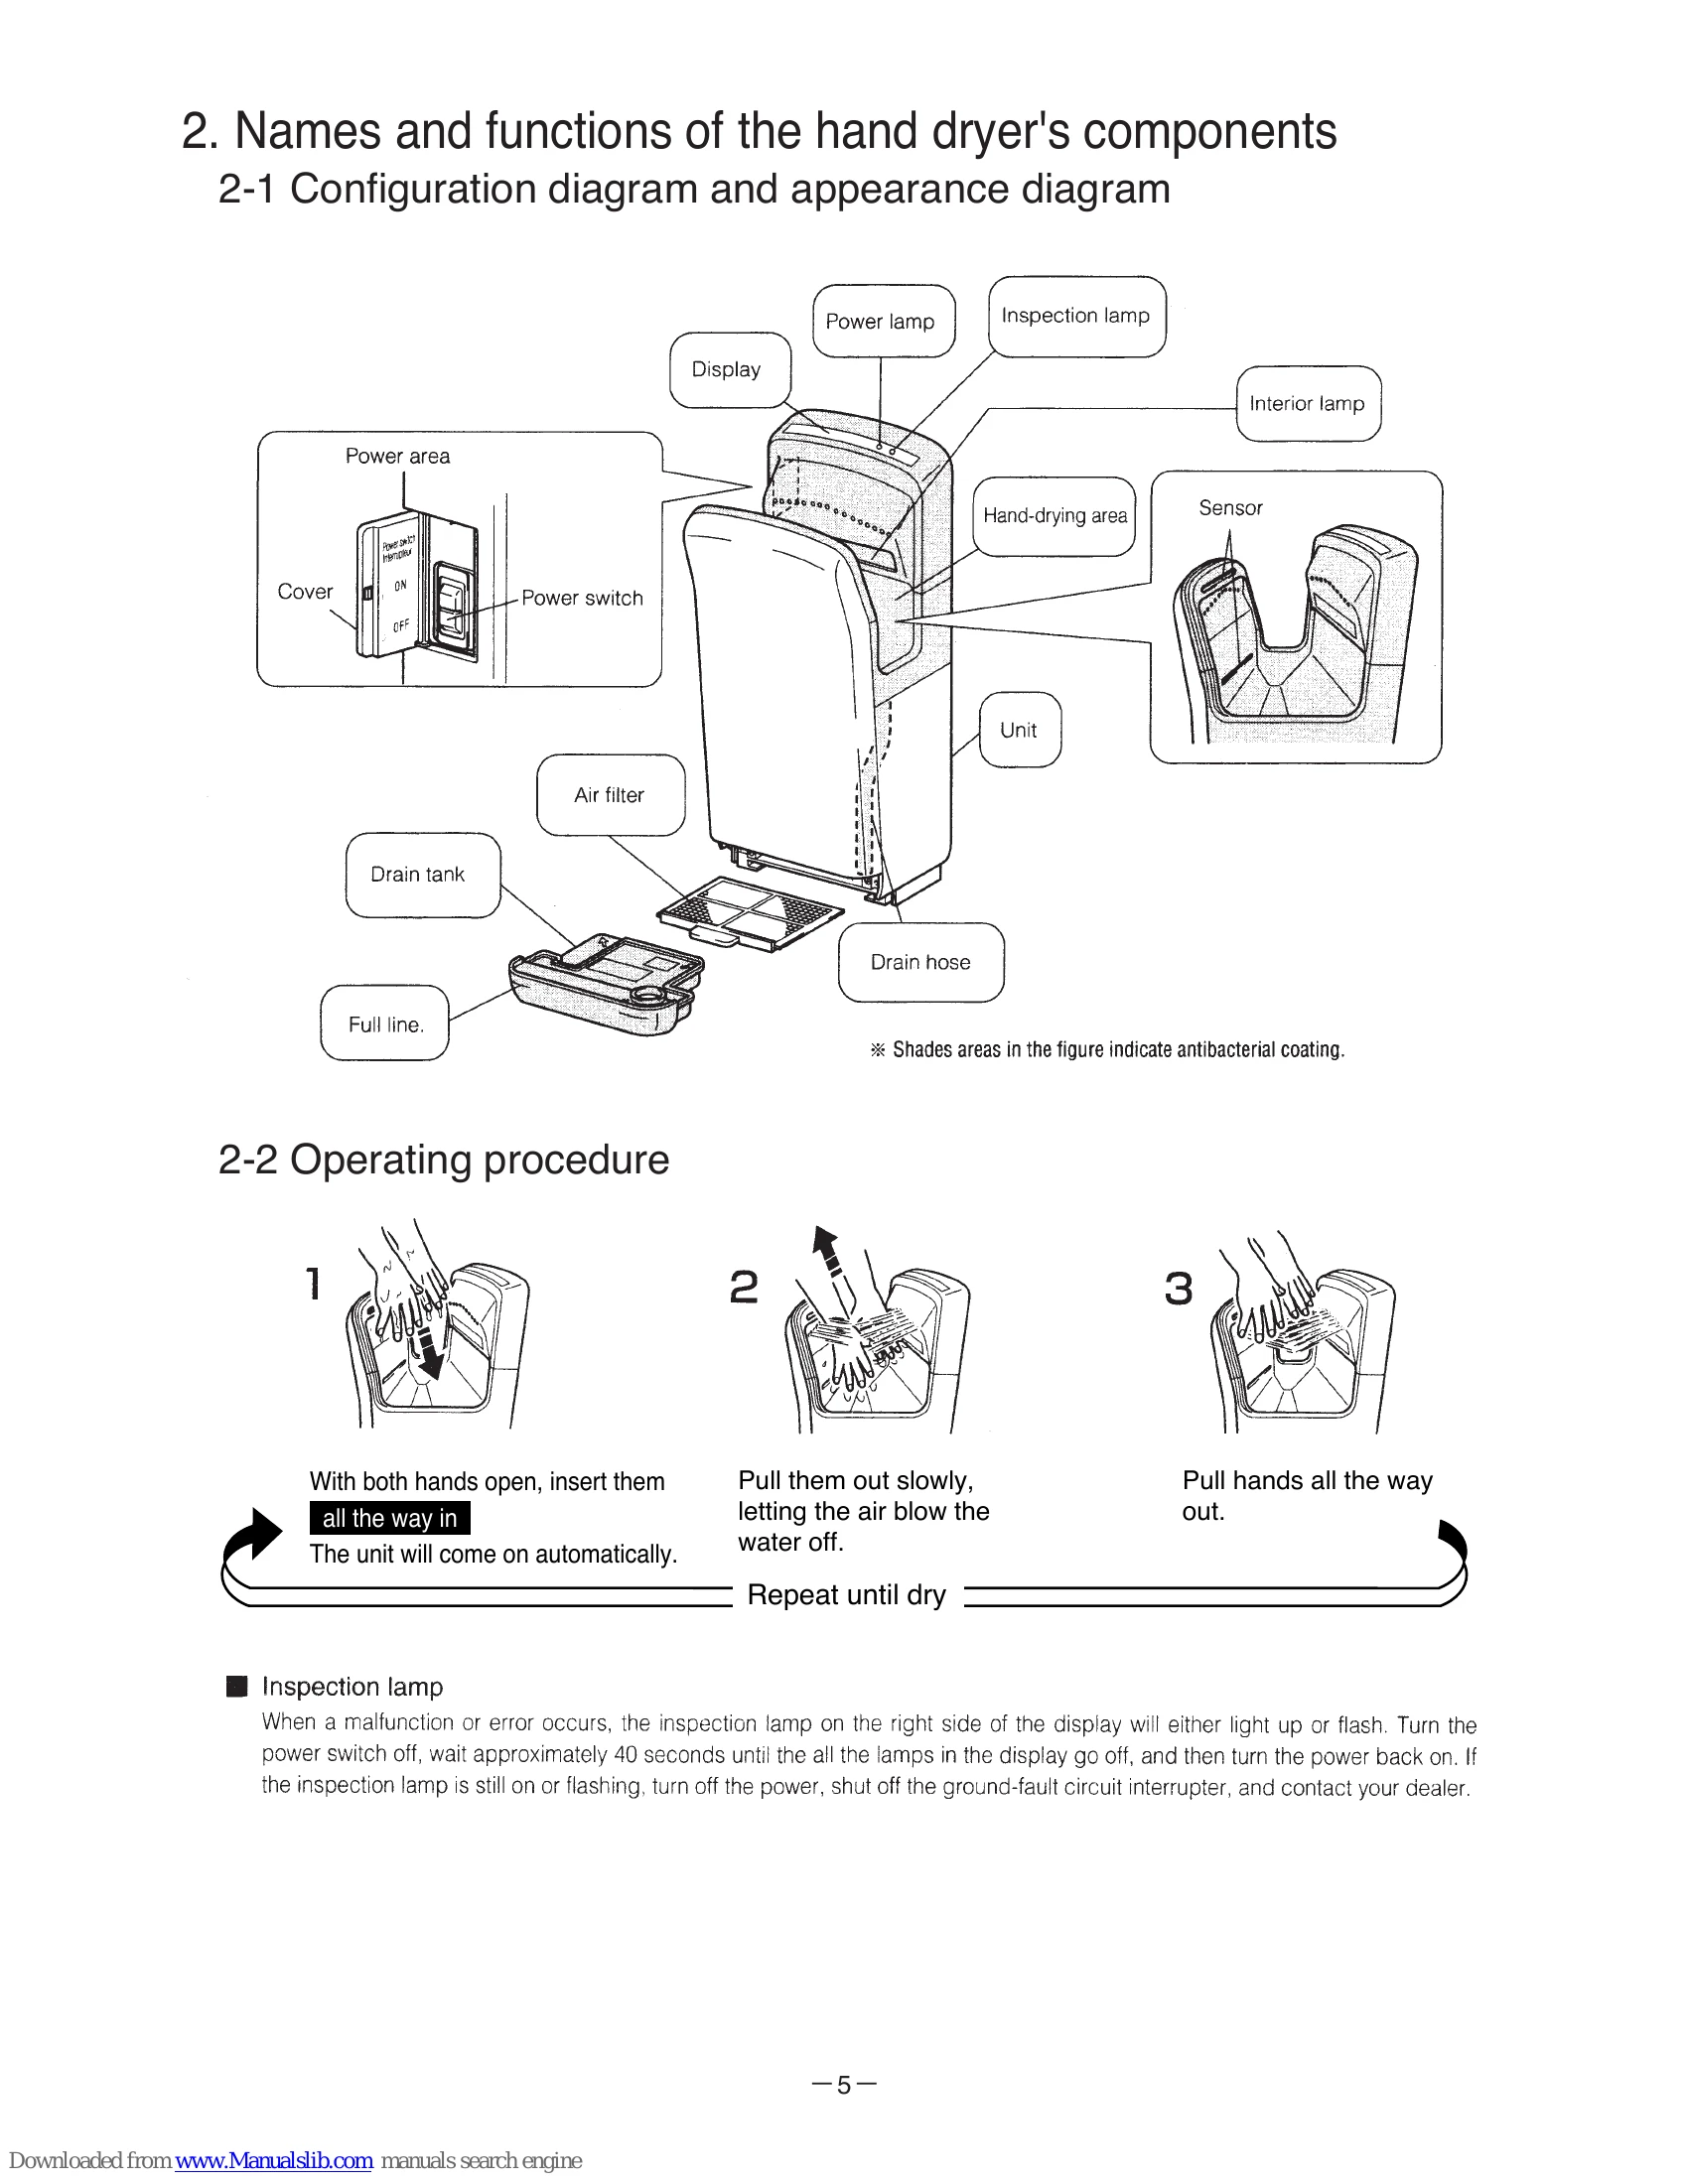
1. Features:

  • Speed drying: High-speed air jet from a turbo fan quickly dries hands.
  • Easy to use: Insert and slowly remove hands; no rubbing needed.
  • Hygienic: Automatic sensor start, no touching required.
  • Antibacterial: Uses a silver inorganic substance for long-lasting antibacterial effect.
  • Easy maintenance: No paper towels needed, easy to clean.
  • Highly safe: Built-in timer prevents continuous operation.
  • Economical: Low monthly electricity expense.

2. Operating procedure:

  1. With both hands open, insert them all the way in. The unit will come on automatically.
  2. Pull them out slowly, letting the air blow the water off. Repeat until dry.
  3. Pull hands all the way out.

Inspection lamp: Lights up or flashes to indicate malfunction. Follow troubleshooting steps.

Troubleshooting and error codes

Error mode display Cause Check procedure and action to take
LED1 LED2
(No display, no operation) Power Inspection 1. Power off
  • Is the power supply connected?
  • Is the power switch on?
2. Current fuse
  • Measure the resistance between the current fuses on the control board.
  • *Replace the control board if the measured resistance value is other than the normal value shown in the table at right.
3. Motor temperature fuse
  • Is the motor's lead wire connector connected?
  • Measure the resistance between the motor's two "blue" lead wires.
  • *Replace the motor if the measured resistance value is other than the normal value shown in the table at right.
(No display, no operation) Power Inspection 4. Power switch
  • Unplug the relay connector, and measure the resistance at two places between each pair of the power switch's "brown" and "blue" lead wires.
  • *Replace the power switch if the measured resistance values are other than those at left.
5. Control circuit
  • Replace the control circuit if other than above.
(Operates, but no display) Power Inspection 1. Display board
  • Is the sensor's lead wire connector (CN2) connected?
  • Unplug the control circuit's CN2 (3-pin connector), measure the voltage between pins 1 and 2 as well as pins 1 and 3 of the CN2 by diode check (measure on the lead wire side).
  • *Replace the control circuit if other than above.
2. Control circuit
  • Is the filter clogged with dust and the like? → If so, clean the filter.
  • Are the temperatures of the control circuit and electronic parts too high? → If so, turn OFF the power switch and lower the temperatures to normal temperatures (40 °C or less).
  • *Replace the control circuit if other than above.
3. Control circuit
When the operation time exceeds 30 seconds, the operation stops by the activated mischievous use prevention timer.
(Heat sink overheat) Power Inspection
(Mischievous use prevention timer) Power Inspection 1. Continuous operation
  • When the operation time exceeds 30 seconds, the operation stops by the activated mischievous use prevention timer.
2. Stained sensor's windows
  • Are the sensor's three windows stained?
3. Disengaged sensor
  • Is the sensor's lead wire connector connected?
  • Are the sensor's board positions displaced (top/bottom light emitting boards, light receiving board)?
  • Measure the forward voltages of the LEDs on the top/bottom light emitting boards and the photo diode (PHD) on the light receiving board with a measuring device that has a diode check function.
  • *Replace the top/bottom light emitting boards and the light receiving board if the measured values are other than the normal values shown in the table above.
4. Displaced sensor's board positions
5. Sensor light emitting/receiving diode failure
6. Control circuit
  • Replace the control circuit if other than above.
Privacy Policy