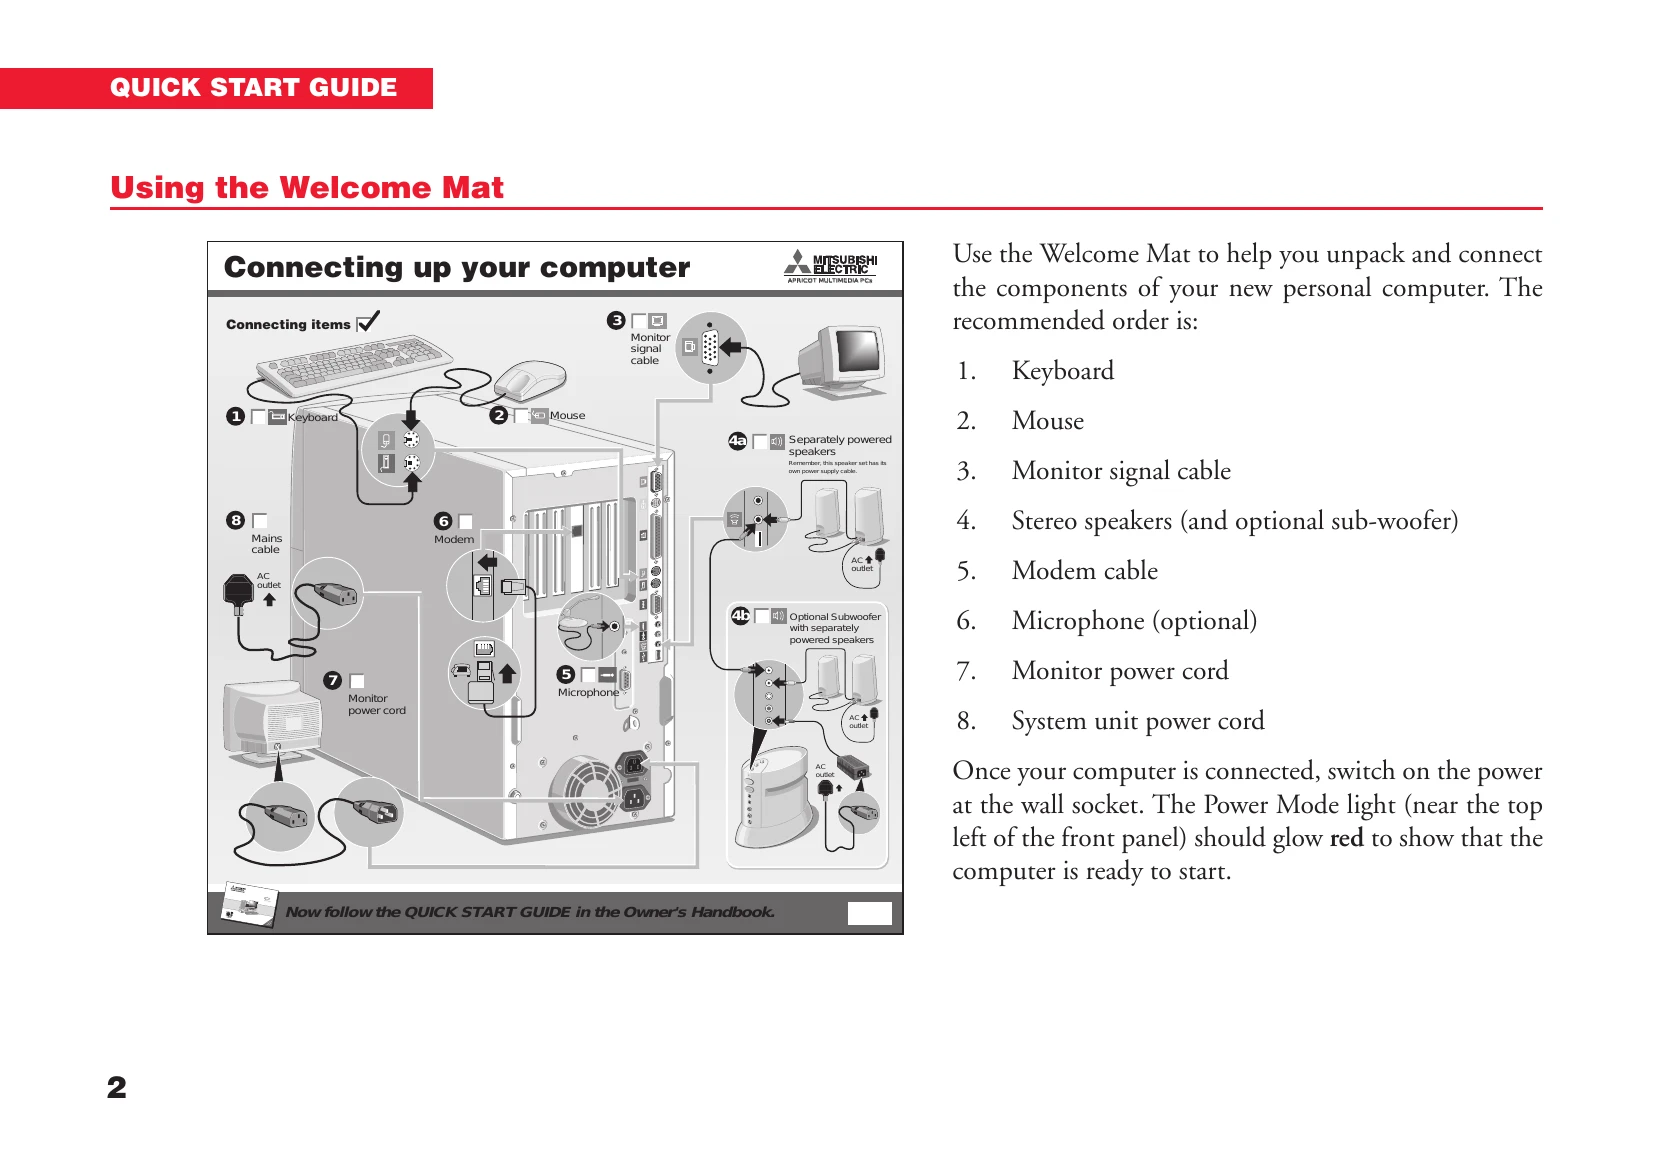
Connecting up your computer
- Keyboard
- Mouse
- Monitor signal cable
- Stereo speakers (and optional sub-woofer)
- Modem cable
- Microphone (optional)
- Monitor power cord
- System unit power cord
Once your computer is connected, switch on the power at the wall socket. The Power Mode light (near the top left of the front panel) should glow red to show that the computer is ready to start.
The Power button and Power Mode light
Press the POWER button to turn on the computer, to put it to sleep, and to wake it up.
The colour of Power Mode light shows whether the computer is in Off [red], On or Standby [green] or Suspend [yellow] mode.
Starting the computer
Press the POWER button to turn on the computer.
Turn on the monitor as described in its User Guide.
The colour of the Power Mode light turns from red to green to show that the computer is now working.
Suspending the computer
Once Windows has started, you can give the POWER button a brief press to suspend the computer when you aren't using it. Alternatively, you can click the Start button in the Windows taskbar, then click Suspend.
To wake up the computer, you have to press the POWER button again – just moving the mouse or using the keyboard won't work.
While the computer is suspended its processor stops, its hard disk stops spinning and the monitor goes blank, but none of your files are lost.
In Suspend mode the Power Mode light is yellow.
Shutting down the computer
To shut down the computer safely, do the following:
- Wait until all the activity indicators on the front bezel show 'not busy'.
- Turn off any attached peripherals, except for the monitor and other peripherals that are designed to be kept on permanently.
- Click the Start button in the Windows taskbar, then click Shut Down. Select Shutdown the computer and click Yes.
The Power Mode light goes from green to red.
Note that you do not have to press the POWER button if Windows is running.