Brand: Mio
Category: Automotive Electronics
Document Type: Manual
Language: EN
Brand: Mio
Category: Automotive Electronics
Document Type: Manual
Language: EN
Uploaded: Aug. 10, 2025, 12:46 a.m.
Manual Publish Date: 2024-02-01
None
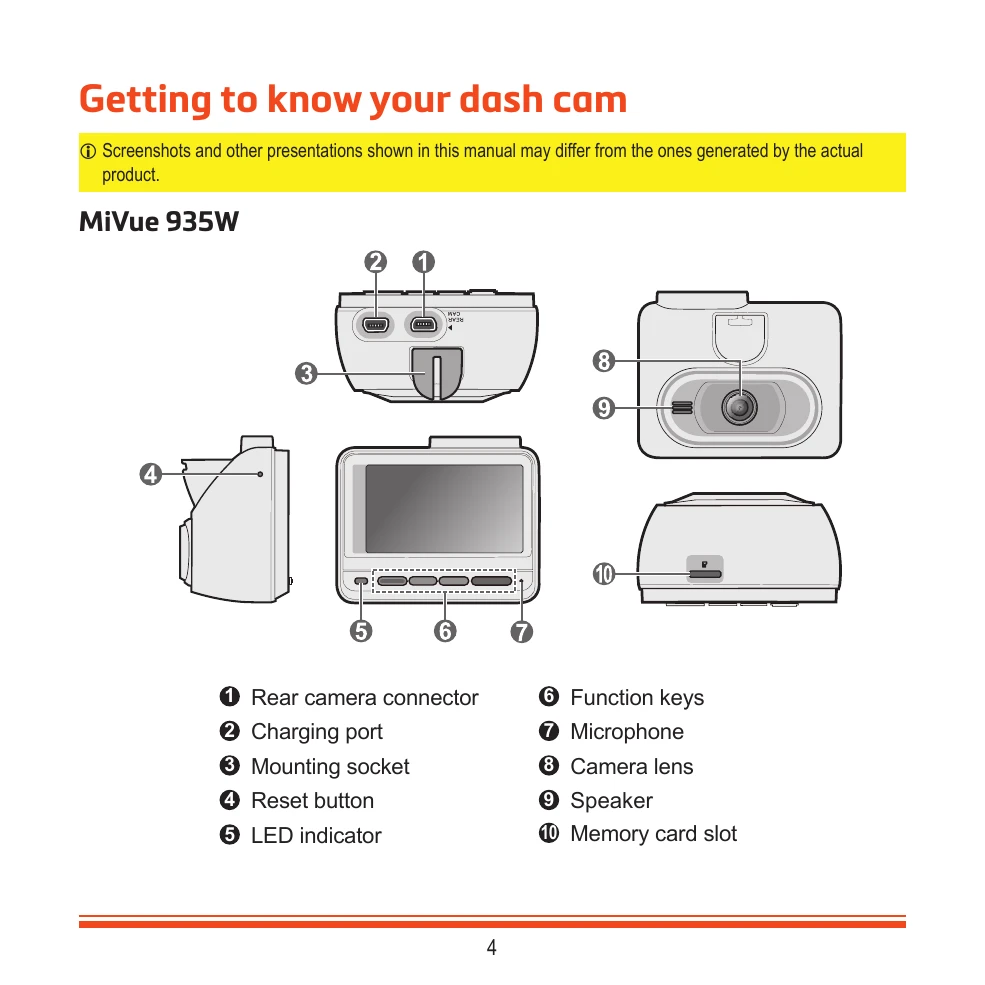
Familiarize yourself with the MiVue 935W's components, including the rear camera connector, charging port, mounting socket, reset button, LED indicator, function keys, microphone, camera lens, speaker, and memory card slot.
Insert a UHS Speed Class 3 (U3/V30) or better memory card. Format the card before use to avoid malfunctions. Follow the steps to insert and remove the card correctly.
Mount the dash cam securely to the windscreen, ensuring it doesn't obstruct the driver's view or airbags. Clean the mounting area and attach the static cling film. Route cables carefully and adjust the angle for optimal viewing.
The dash cam turns on automatically when the vehicle engine starts. Follow on-screen prompts for initial setup, including language, date/time, and distance unit. A reset button is available for hardware resets.
Understand the dash cam interface, including recording indicators, dual camera indicator, time display, microphone status, GPS signal, system menu access, adding safety cameras, taking photos, and emergency recording.
The system supports continuous recording and event recording. Event recording is triggered by the G-sensor for impacts or sudden changes. You can also manually start event recordings.
Supports parking recording triggered by G-sensor and motion detection. Requires an additional power source. Choose between Smart Mode and Passive Powered Mode.
Take photos while recording or by accessing the Camera mode.
Select and play back videos or photos. View front/rear footage if a rear camera is connected. Files can be deleted, but cannot be recovered.
Receive alerts for safety cameras to monitor speed. Customize safety cameras by adding up to 100 custom locations. Update safety camera data from the Mio website.
Connect to your smartphone via Wi-Fi using the MiVue Pro app to view, share, and back up recordings. Follow steps to set up the Wi-Fi connection.
Access system settings to customize file playback, Wi-Fi connection, sound recording, camera settings, safety camera alerts, parking mode, video recording, and system preferences.