Manual for KID60B12

Manual for KID60B12

Brand: KENWOOD

Category: Dishwasher

Document Type: Manual

Language: EN

Uploaded: Nov. 21, 2025, 6:31 p.m.

Warranty Information

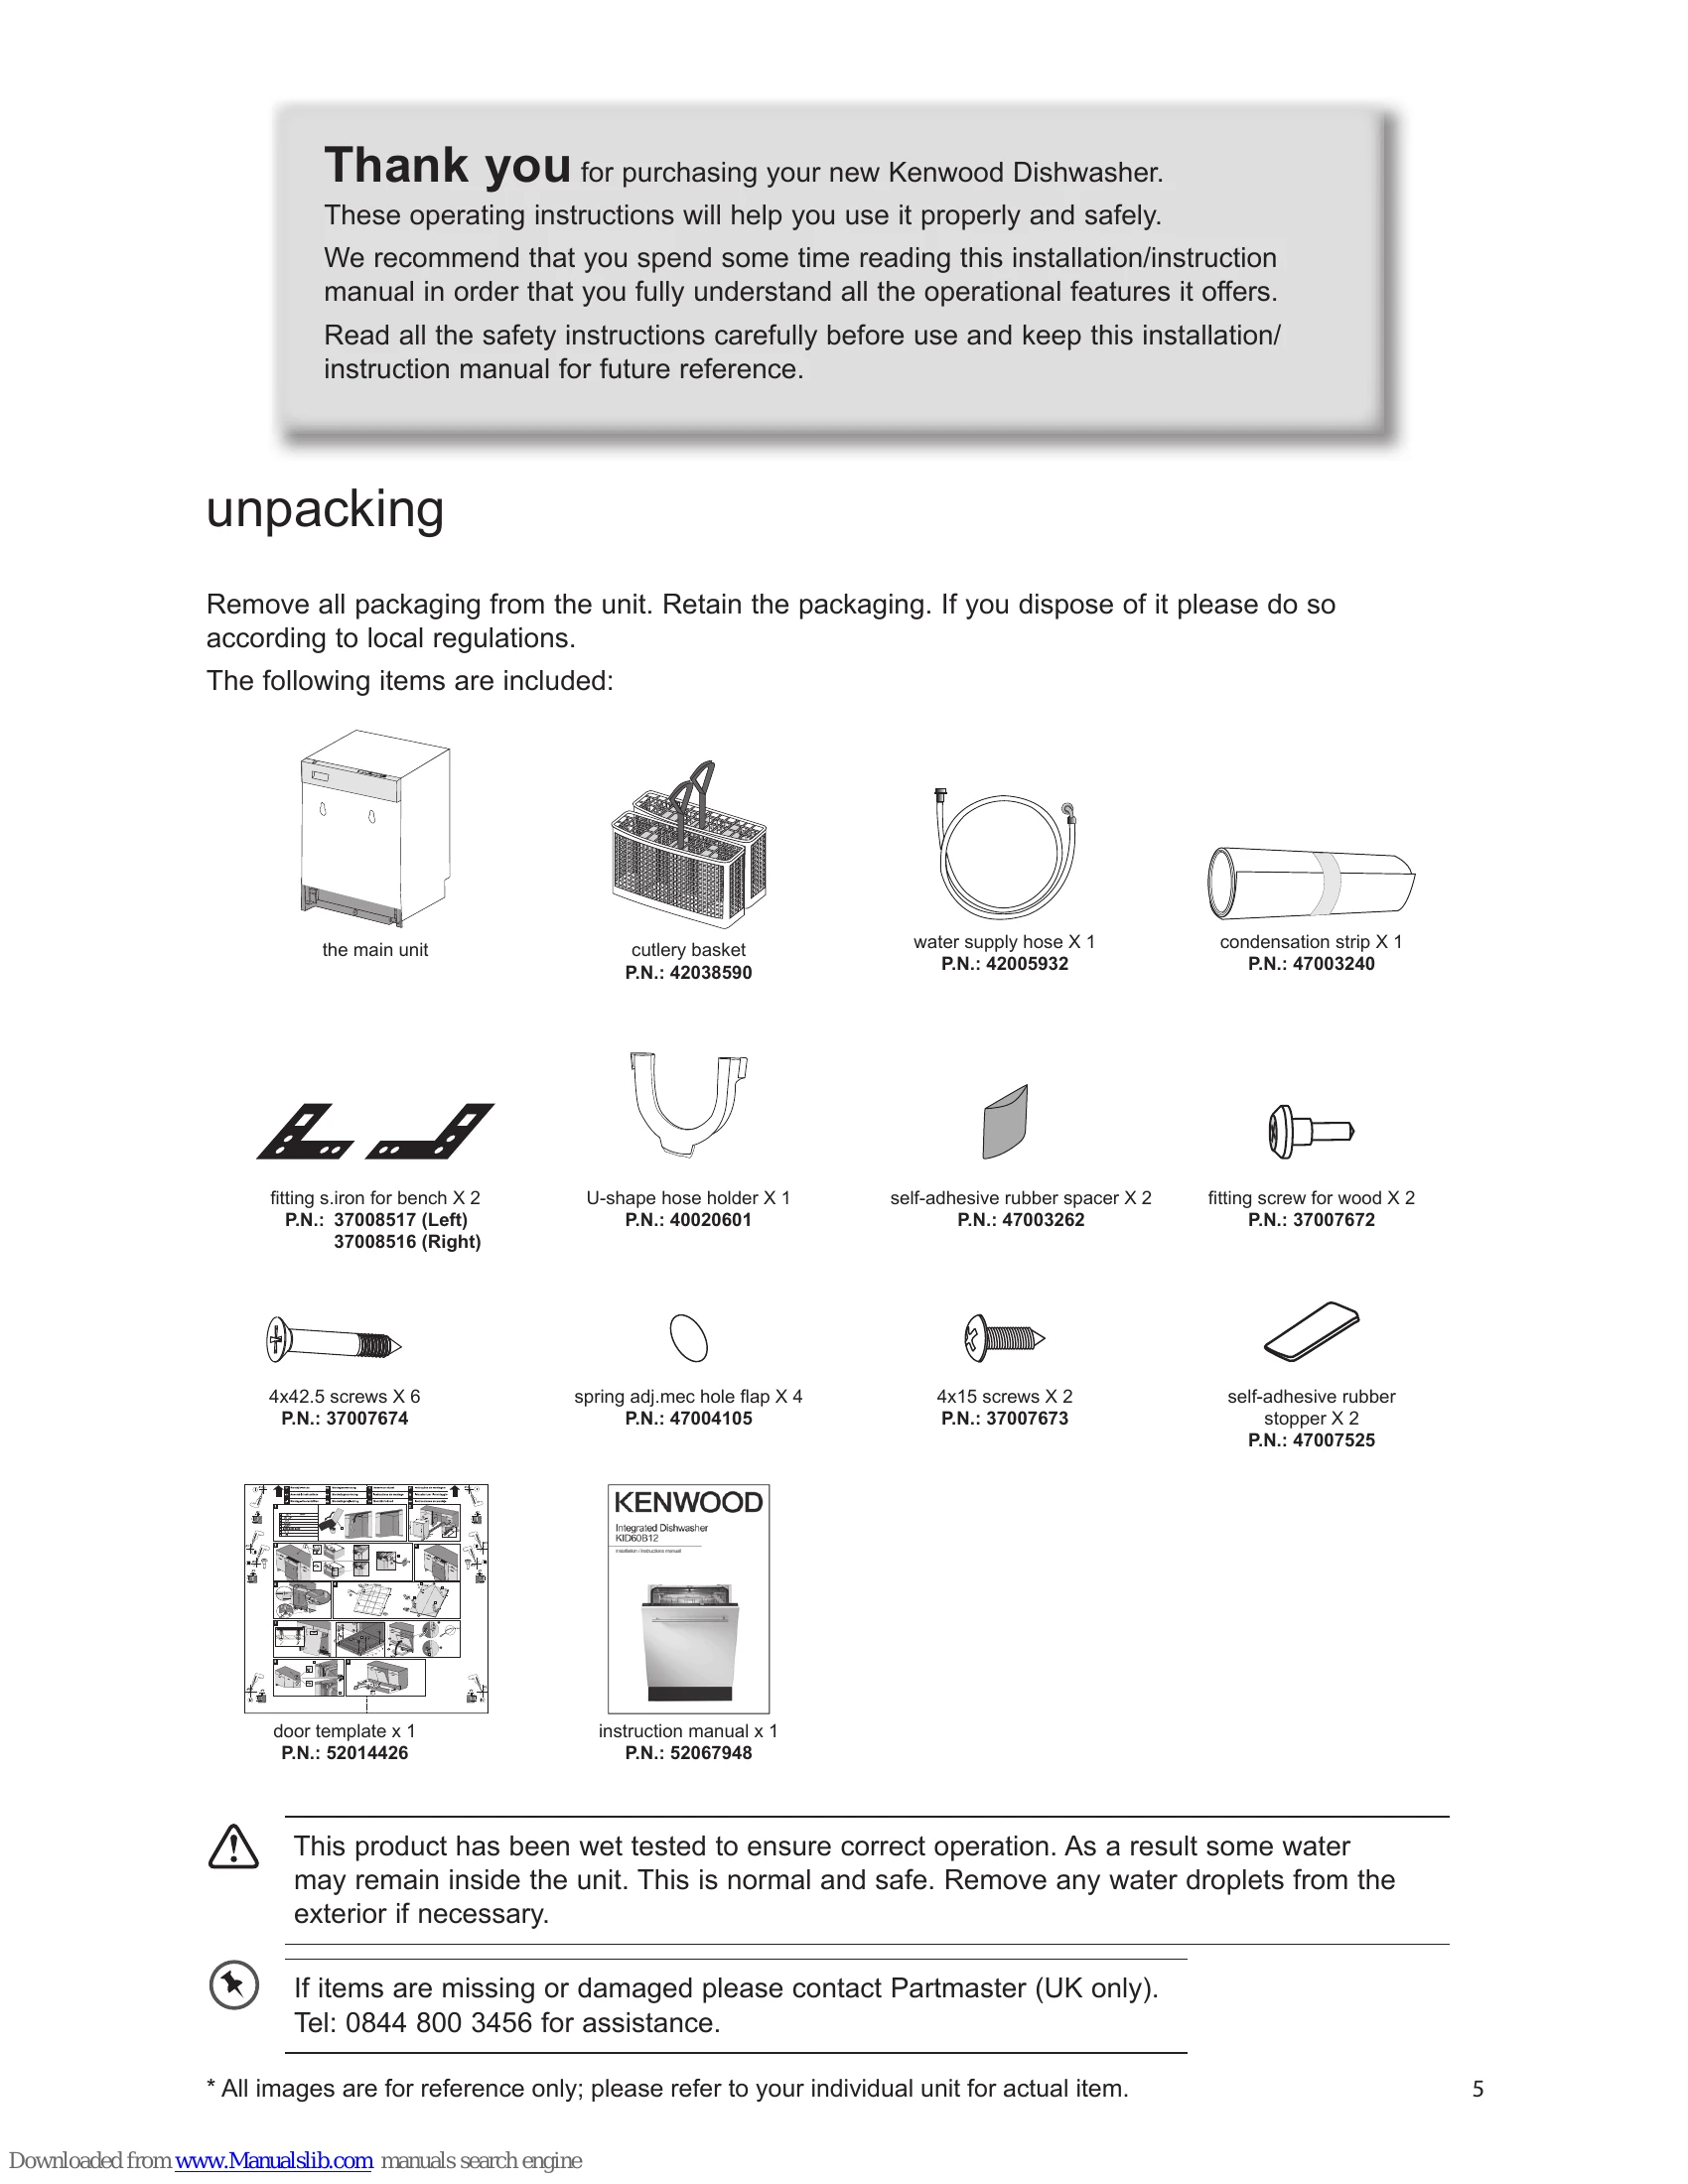
Contact Partmaster (UK only) at 0844 800 3456 for assistance with missing or damaged items.

  • Unpacking: Remove all packaging, retaining it for potential future use or disposing of it locally. Check included items against the list provided.
  • Installation: Select a flat, firm, well-ventilated location away from heat sources. Ensure sufficient clearance for servicing and proper levelling. Follow specific instructions for securing the unit and attaching the aesthetic door. Connect water and drainage according to instructions.
  • Before Operating: Learn how to open and close the door. Identify items not suitable for dishwasher use.
  • Adding Detergent/Tablet: Use only dishwasher-specific detergents. Fill the dispenser, choosing between powder (main wash and pre-wash) or a tablet.
  • Adding Rinse Aid: Fill the rinse aid reservoir until the indicator is black. Adjust the setting if dishes are not drying properly.
  • Adding Salt: Fill the salt reservoir with dishwasher salt, especially in hard water areas. Adjust salt consumption based on water hardness.
  • Loading the Dishwasher: Scrape off food residues, do not overlap items, and ensure water can reach all surfaces. Place items securely, hollow items upside down, and wide-based items at an angle. Avoid items that could block spray arms.
  • Starting a Wash Cycle: Ensure power and water are connected. Load dishes, add detergent, select a programme, and close the door.
  • Changing a Programme: Cancel and restart if necessary, or allow the cycle to finish if detergent has been dispensed.
  • At the End of a Programme: The unit will beep, and an indicator will light up. Leave the door closed initially to prevent steam damage.
  • Switching Off: Use the ON/OFF button. Disconnect power and water if not in use for a prolonged period.
  • Unloading: Allow dishes to cool. Unload the lower basket first, then the cutlery basket, then the upper basket.
  • Delay Start: Set a delayed start time using the dedicated button.
  • Half Load: Select this option to save water and energy when the load is not full.
  • Cleaning: Regularly clean the door seal, control panel, filter system, and spray arms.
  • Troubleshooting: Refer to fault codes and technical problems sections for solutions.

Troubleshooting and error codes

codes possible causes remedy
F1 Alarm is active against water overflow • Power off your machine and close the tap.
• Contact the service.
F2 The waste water in the machine cannot be discharged • Water discharge hose is clogged.
• The filters of your machine might be clogged.
• Power off-on your machine and activate the program cancellation command.
• If the error continues, contact the service.
F3 Error of continuous water input • Close the tap.
• Contact the service.
F5 Inadequate water supply • Make sure the water input tap is totally open and that there is no water cut.
• Close the water input tap, separate the water input hose from the tap and clean the filter at the connection end of the hose.
• Restart your machine, contact the service if the error resumes.
F6 Faulty heater sensor • Contact the service.
F7 Overheating error (temperature in the machine is too high) • Contact the service.
F8 Heater error • Contact the service.
F9 Divisor position error • Contact the service.
FE Faulty electronic card • Contact the service.
Privacy Policy