Brand: KENWOOD
Category: Audio
Document Type: Manual
Language: EN
Brand: KENWOOD
Category: Audio
Document Type: Manual
Language: EN
Uploaded: Nov. 21, 2025, 6:19 p.m.
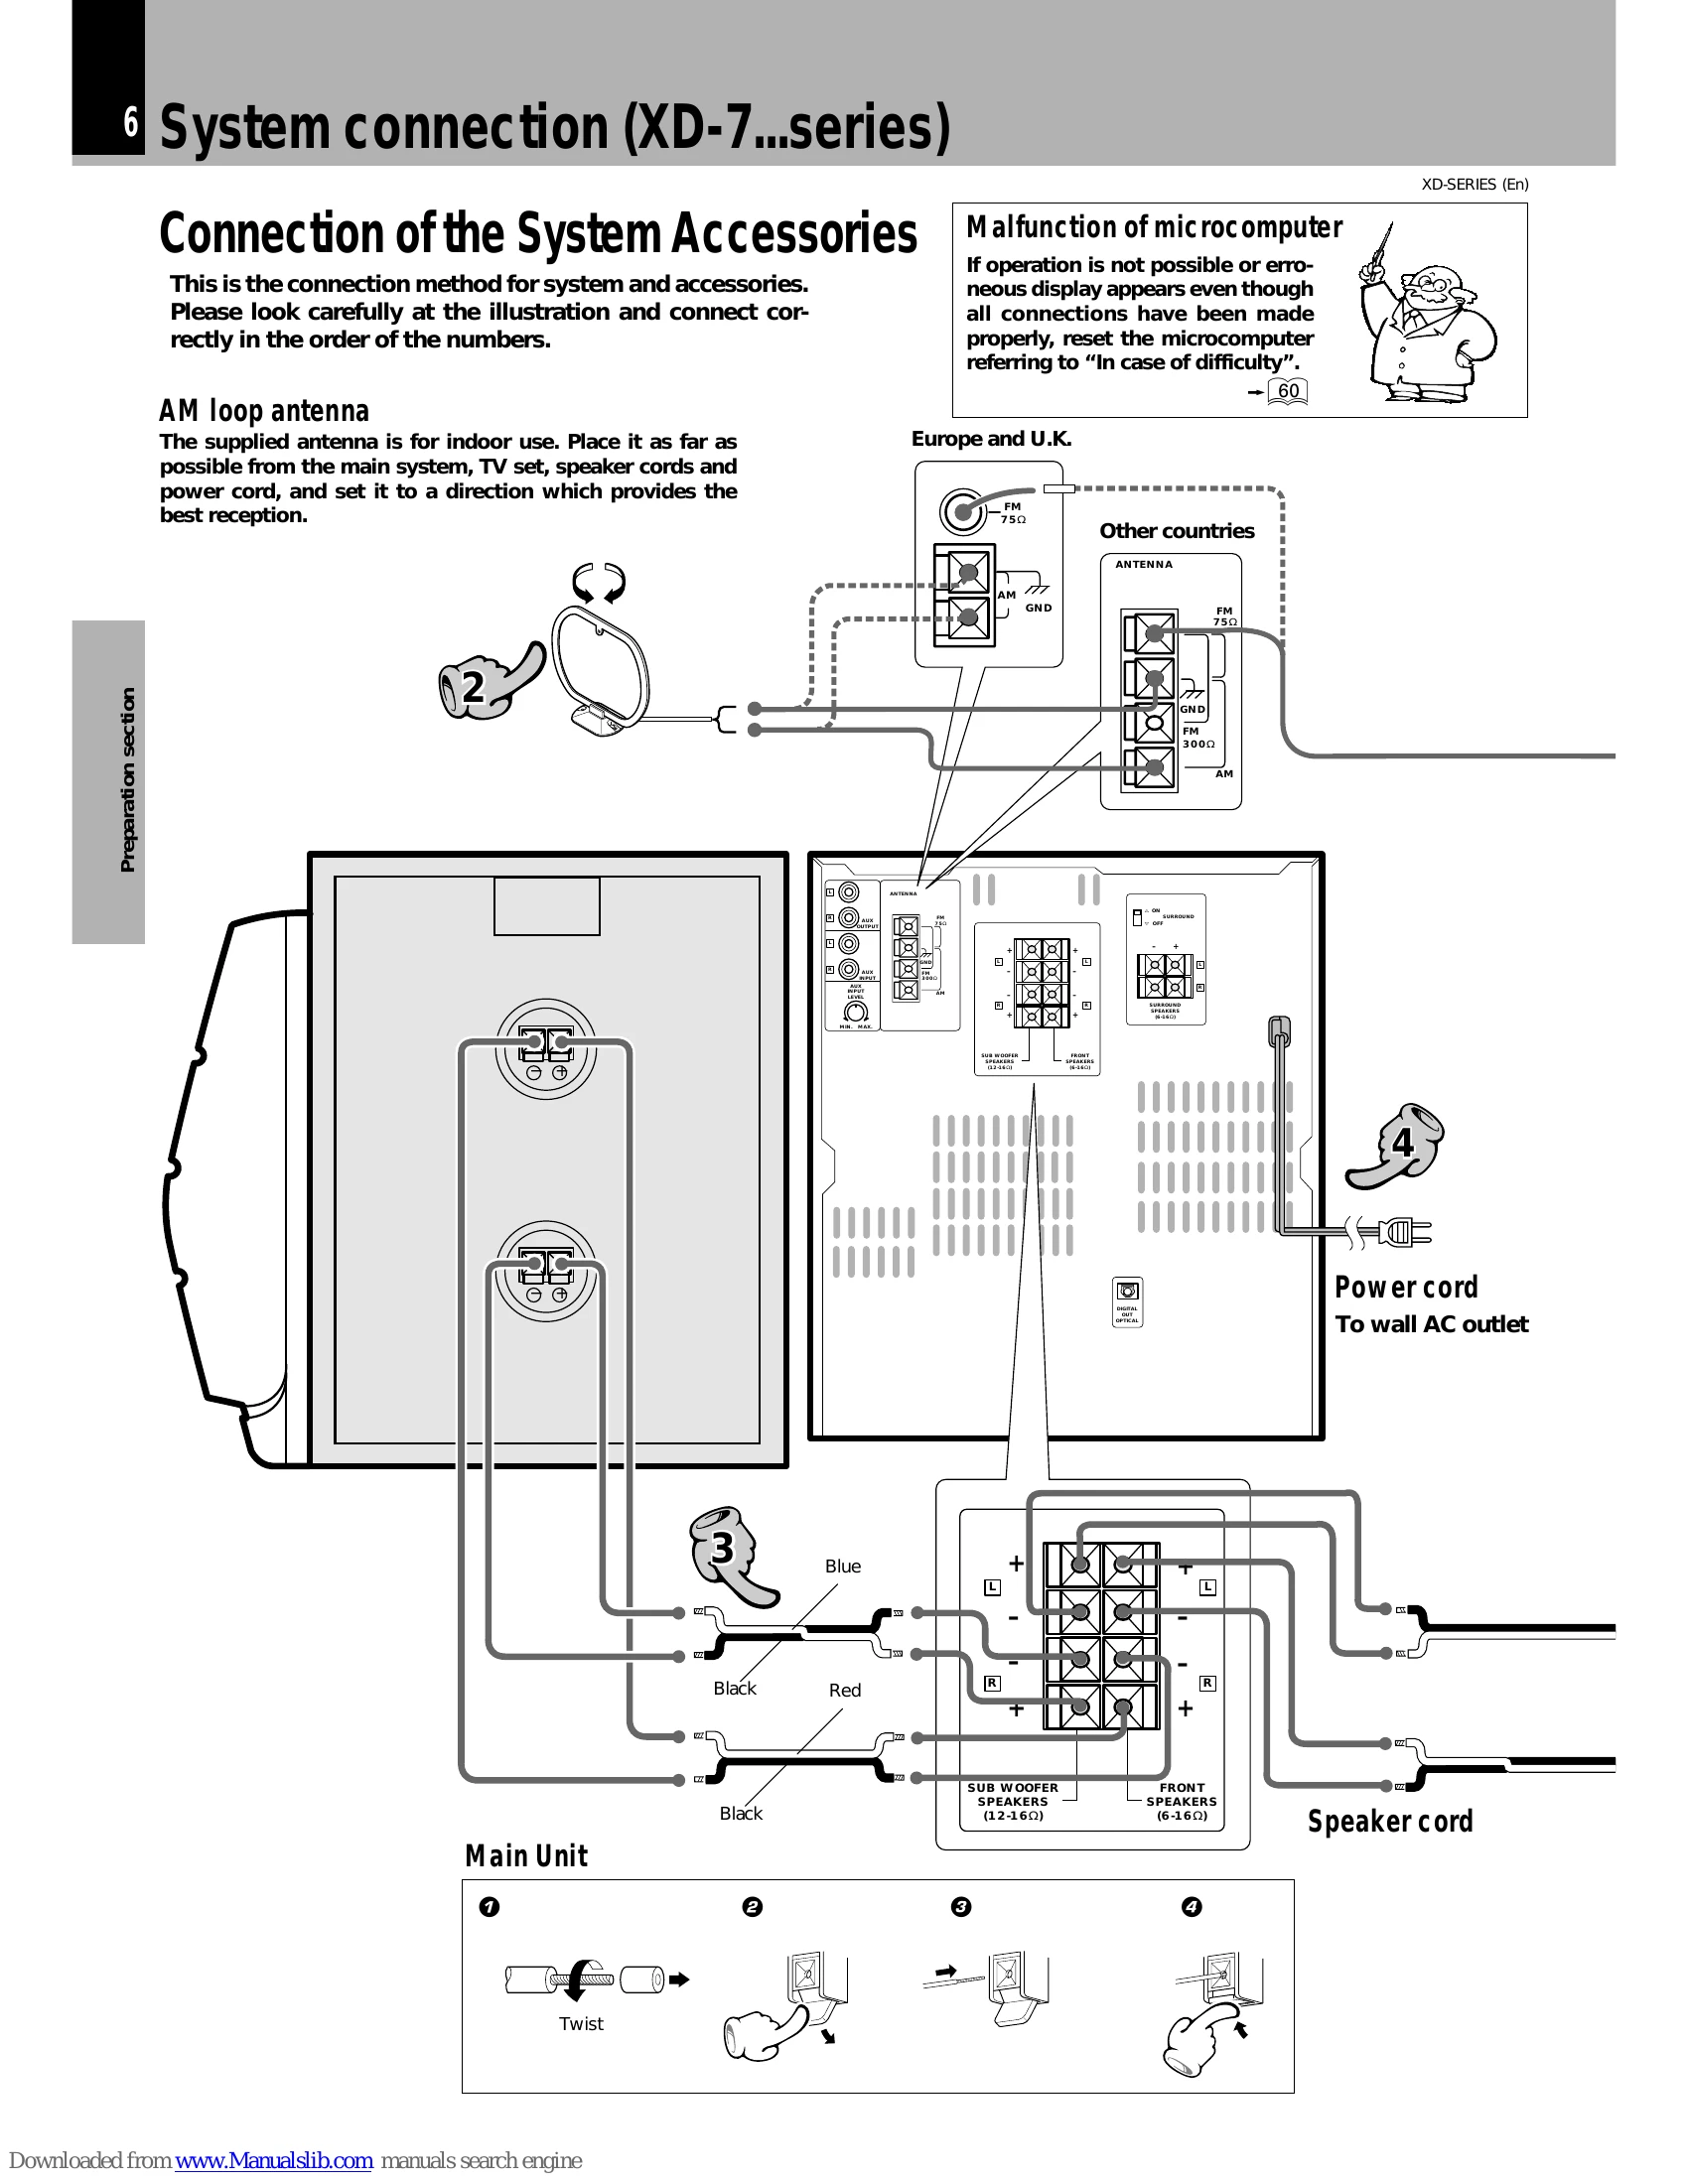
1. Switching the power ON (OFF)
The power can also be turned ON by pressing the play key of the CD player, the play key of the cassette deck or the BAND key of the tuner. When the ON/STANDBY key is pressed while the power is ON, the power will be switched OFF.
Note: The display part becomes dark when the power is switched OFF. (DIMMER function)
2. Selecting the desired output
Use the INPUT key to select TUNER (Radio), CD, TAPE, or AUX (External input).
Note: When the AUX input is selected, consult the component's manual. When CD or TAPE is selected, playback starts automatically if a disc or tape is inserted in deck B.
3. Volume adjustment
Turn the VOLUME CONTROL knob to adjust the volume. Quick turning produces a larger change amount.
| Symptom | Cause | Remedy | Page |
| Remote control operation is not possible. | • Batteries are exhausted. • The remote control is too far away from the system, the controlling angle is deviated or there is an obstacle in between. • There is no tape or CD set in the component to be played. • An attempt is made to play the cassette deck which is recording something. • The MULTI CONTROL setting mode is activated. |
• Replace with new batteries. • Operate the unit inside the remote controllable range. • Set a tape or CD in the component to be played. • Wait until the recording ends. • Cancel the MULTI CONTROL setting mode. |
18 18 19 |
| Sound is not produced. | • The speaker cords are disconnected. • The MUTE switch of remote control unit is switched ON. • The headphone plug is inserted into the jack. |
• Connect properly referring to "System connection". • Switch MUTE OFF. • Unplug the headphone plug. |
20 |
| AUX (external input) sound is not produced. | • The AUX INPUT LEVEL control on the rear panel is set to MIN. | • Adjust to an optimum level. | 49 |
| Sub-woofer sound is not produced. | • The LEVEL control is set to OFF. | • Adjust to an optimum level. | 21 |
| Sound is not output in the TUNER mode. | • Sound is not output when the radio wave is weak (DEMO ON). | • Switch the demonstration off. | 4 |
| The character display blinks and sound is not produced. | • The speaker cords are short-circuited. | • Turn the power OFF, remove the short-circuit and turn the power ON again. | |
| Sound is not produced from the left or right speakers. | • The speaker cords are disconnected. | • Connect properly referring to "System connection". | |
| The clock display shows "- - : - -". | • There was a power failure. • The power cord was unplugged from the outlet. |
• Adjust the present time again. • Adjust the present time again. |
54 54 |
| Timer operation is not possible. | • The present time has not been adjusted or there was a power failure. • The timer ON time and OFF time have not been set. • The timer execution was not set up. |
• Adjust the present time referring to "Clock adjustment". • Set the timer ON time and OFF time. • Execute the timer program. |
54 56 58 |
| Radio stations cannot be received. | • The antennas have not been connected. • A proper broadcasting band has not been selected. • The frequency of the station to be received is not tuned. |
• Connect antennas. • Select a band. • Tune to the frequency of the desired station. |
28 28 |
| Noise interferes. | • Car ignition noise. • Influence of an electric appliance. • A TV set is installed near the system. |
• Install the outdoor antenna in an apart position from the road. • Switch the suspected electric appliance OFF. • Install the TV or the system at an increased distance between them. |