Manual for GZ-R415

Manual for GZ-R415

Brand: JVC

Category: Camcorder

Document Type: Manual

Language: EN

Uploaded: Aug. 10, 2025, 12:36 a.m.

Warranty Information

No warranty period information is available in this document.
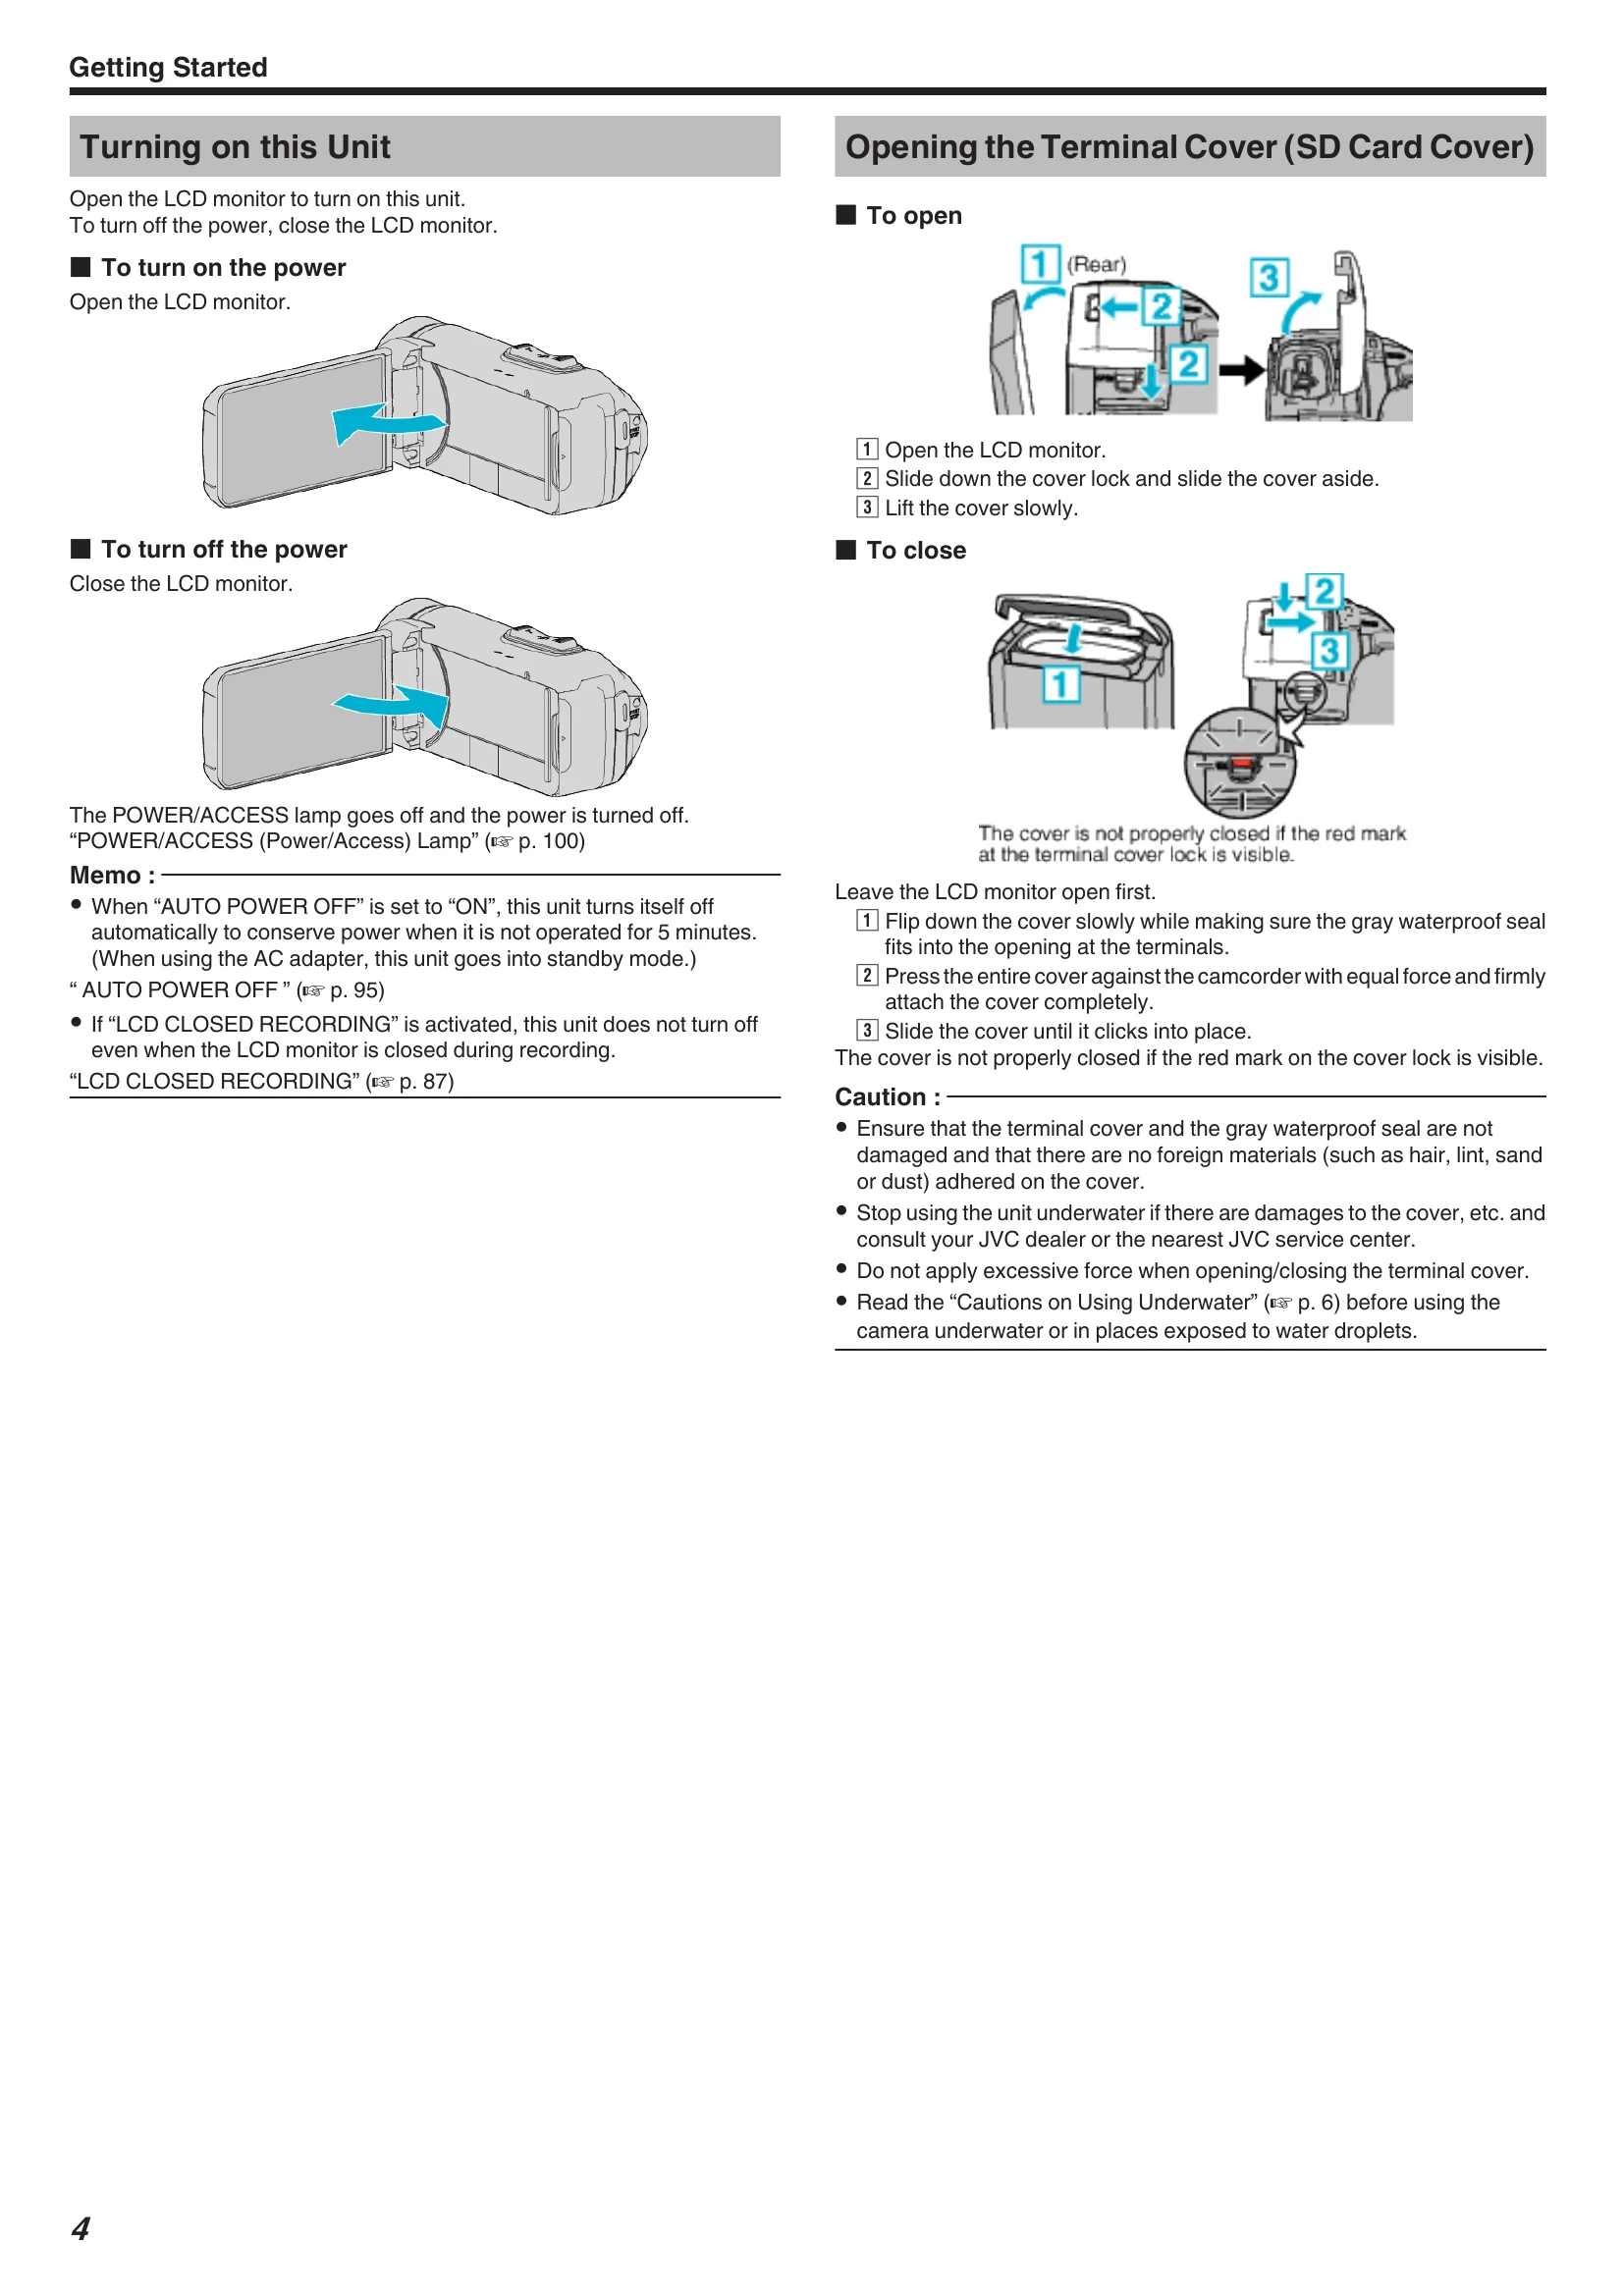
Getting Started:

  • Verifying Accessories: Check included accessories like AC adapter, cables, lens cap, etc.
  • Turning Unit On/Off: Open LCD monitor to turn on, close to turn off.
  • Charging: Connect AC adapter to built-in battery.
  • Quad Proof: Unit is waterproof, dust-proof, drop-proof, and freeze-proof. Follow specific guidelines for underwater use.
  • Grip Adjustment: Adjust grip belt for secure handling.
  • Inserting SD Card: Insert compatible SD/SDHC/SDXC card.
  • Touch Screen: Operate by tapping or dragging. Lock screen for underwater use.
  • Clock Setting: Set date and time upon first use or after battery depletion.
  • Changing Display Language: Select desired language via menu.
  • Holding Unit: Keep elbows close to sides for stability.
  • Tripod Mounting: Mount on tripod for stable recording.
  • Using Unit Overseas: Use appropriate converter plug for charging. Set local time for travel.
  • Setting Daylight Saving Time: Enable for 1-hour ahead adjustment.

Recording:

  • Taking Videos in Auto Mode: Camera automatically adjusts settings.
  • Scenes of Intelligent Auto: Camera detects scenes for optimal settings.
  • Using Silent Mode: Darkens LCD and mutes operation sounds for quiet recording.

Troubleshooting and error codes

When the unit is not working properly Troubleshooting Steps
Resetting this Unit

1. Open the terminal cover.
• Remove the power cord and all connecting cables.
2. Close the LCD monitor to turn off this unit.
3. Press the Reset button gently using an object with pointed tip.

Charging Issues

Unable to charge the battery:
• Ensure using supplied AC adapter.
• Check connections.
• Charge within 10°C to 35°C range.
• Using non-original AC adapter may cause damage.

Battery Issues

The remaining battery display is not correct:
• Display may be inaccurate after prolonged use in extreme temperatures or repeated charging.
The battery runs out quickly even after charging:
• Battery performance may temporarily drop in cold temperatures (-10°C to 0°C).
• If recording time is extremely short even after full charge, battery may need replacement. Contact service center.

Power Supply

Unable to turn on the power:
• Camera won't turn on if battery power is low. Charge for at least 40 minutes before turning on.

Recording Issues

Recording cannot be performed:
• Check REC button.
• Set to recording mode by tapping REC button.

Recording Stops Automatically

• Stops after 12+ consecutive hours.
• Turn off unit, wait, then turn on if overheating.

Slow Still Image Shooting

• Speed may drop with repeated use, SD card, or recording conditions.

Focus Not Adjusted Automatically

• Adjust manually in dark or low-contrast scenes.
• Clean lens.
• Cancel manual focus if needed.

Zoom Does Not Work

• Digital zoom unavailable in still image/time-lapse modes.
• Set "ZOOM" in menu.

Mosaic Noise

• Set "VIDEO QUALITY" to "UXP" or "XP".

Foggy Lens

• Open terminal cover, close LCD, let unit reduce temperature.

Preventing Fogging

• Avoid direct sunlight, record in shade, use tripod, keep terminal cover open (but sacrifices waterproof features). Turn off when not recording.

Charging Fogging

• Charge in low humidity, air-conditioned room.

SD Card Issues

Cannot insert: Ensure correct orientation, do not use miniSD/microSD.
Unable to copy: Format SD card or use "FORMAT SD CARD" function.
Check write protection: Ensure SD card switch is off.

Playback Issues

Sound/Video Interrupted: Normal between scenes.
No Sound: Turn off Silent Mode, set "OPERATION SOUND" to "ON".
Same Image for Long Time: Use high-speed SD card, clean terminals, format card. Verify PC system requirements.
Choppy Motion: Use high-speed SD card, clean terminals, format card. Verify PC system requirements.
Cannot Find File: Change playback media, select "PLAYBACK OTHER FILE".
Images Not Appearing on TV Properly: Disconnect/reconnect cable, reset unit.
Images Vertical on TV: Set "VIDEO OUTPUT" to "4:3".
Image Too Small on TV: Set "VIDEO OUTPUT" to "16:9".
HDMI Output Issues: Disconnect/reconnect HDMI cable, power cycle unit.

Editing/Copying

Unable to delete file: Release protection first.

Computer Issues

Cannot copy to HDD: Install software, ensure sufficient free space.

Cannot upload to YouTube

• Ensure YouTube account exists.
• File format conversion not done on unit.

Mac Computer Issues

• Use specified method for copying to Mac.

SDXC Card Not Recognized

• Confirm and update OS.

Screen/Image Issues

LCD Difficult to See: Use in shade or adjust settings.
Stripes/Flickers: Not a malfunction; may occur under certain lighting. Try "ON (AIS)".
Bright Light Band/Ball: Adjust unit's direction.
Subject Too Dark: Use backlight compensation, GAIN UP, or adjust brightness to "+".
Subject Too Bright: Set backlight compensation to "OFF", adjust brightness to "-".
Strange Colors: Wait for auto adjustment, or set WHITE BALANCE to MANUAL.
Spots on Screen: Not a malfunction; spots are not recorded.

Other Problems

Touch Screen Buttons Not Working: Use fingers, disable "SCREEN LOCK", connect to PC if necessary.
Grainy Image: Occurs with digital zoom.
Unit Heats Up: Normal for extended use. Stop if too warm.
Language Changed: May occur when connecting via HDMI.

Error Messages

Various error messages are explained with corresponding solutions (e.g., SET DATE/TIME!, COMMUNICATION ERROR, FORMAT ERROR!, MEMORY CARD ERROR!, etc.). Specific steps are provided for each error.

Privacy Policy