Brand: JVC
Category: Camcorder
Document Type: Manual
Language: EN
Brand: JVC
Category: Camcorder
Document Type: Manual
Language: EN
Uploaded: Aug. 10, 2025, 12:34 a.m.
Charging: Refer to the detailed user guide for charging instructions.
Recording: Refer to the detailed user guide for recording instructions.
Playback: Refer to the detailed user guide for playback instructions.
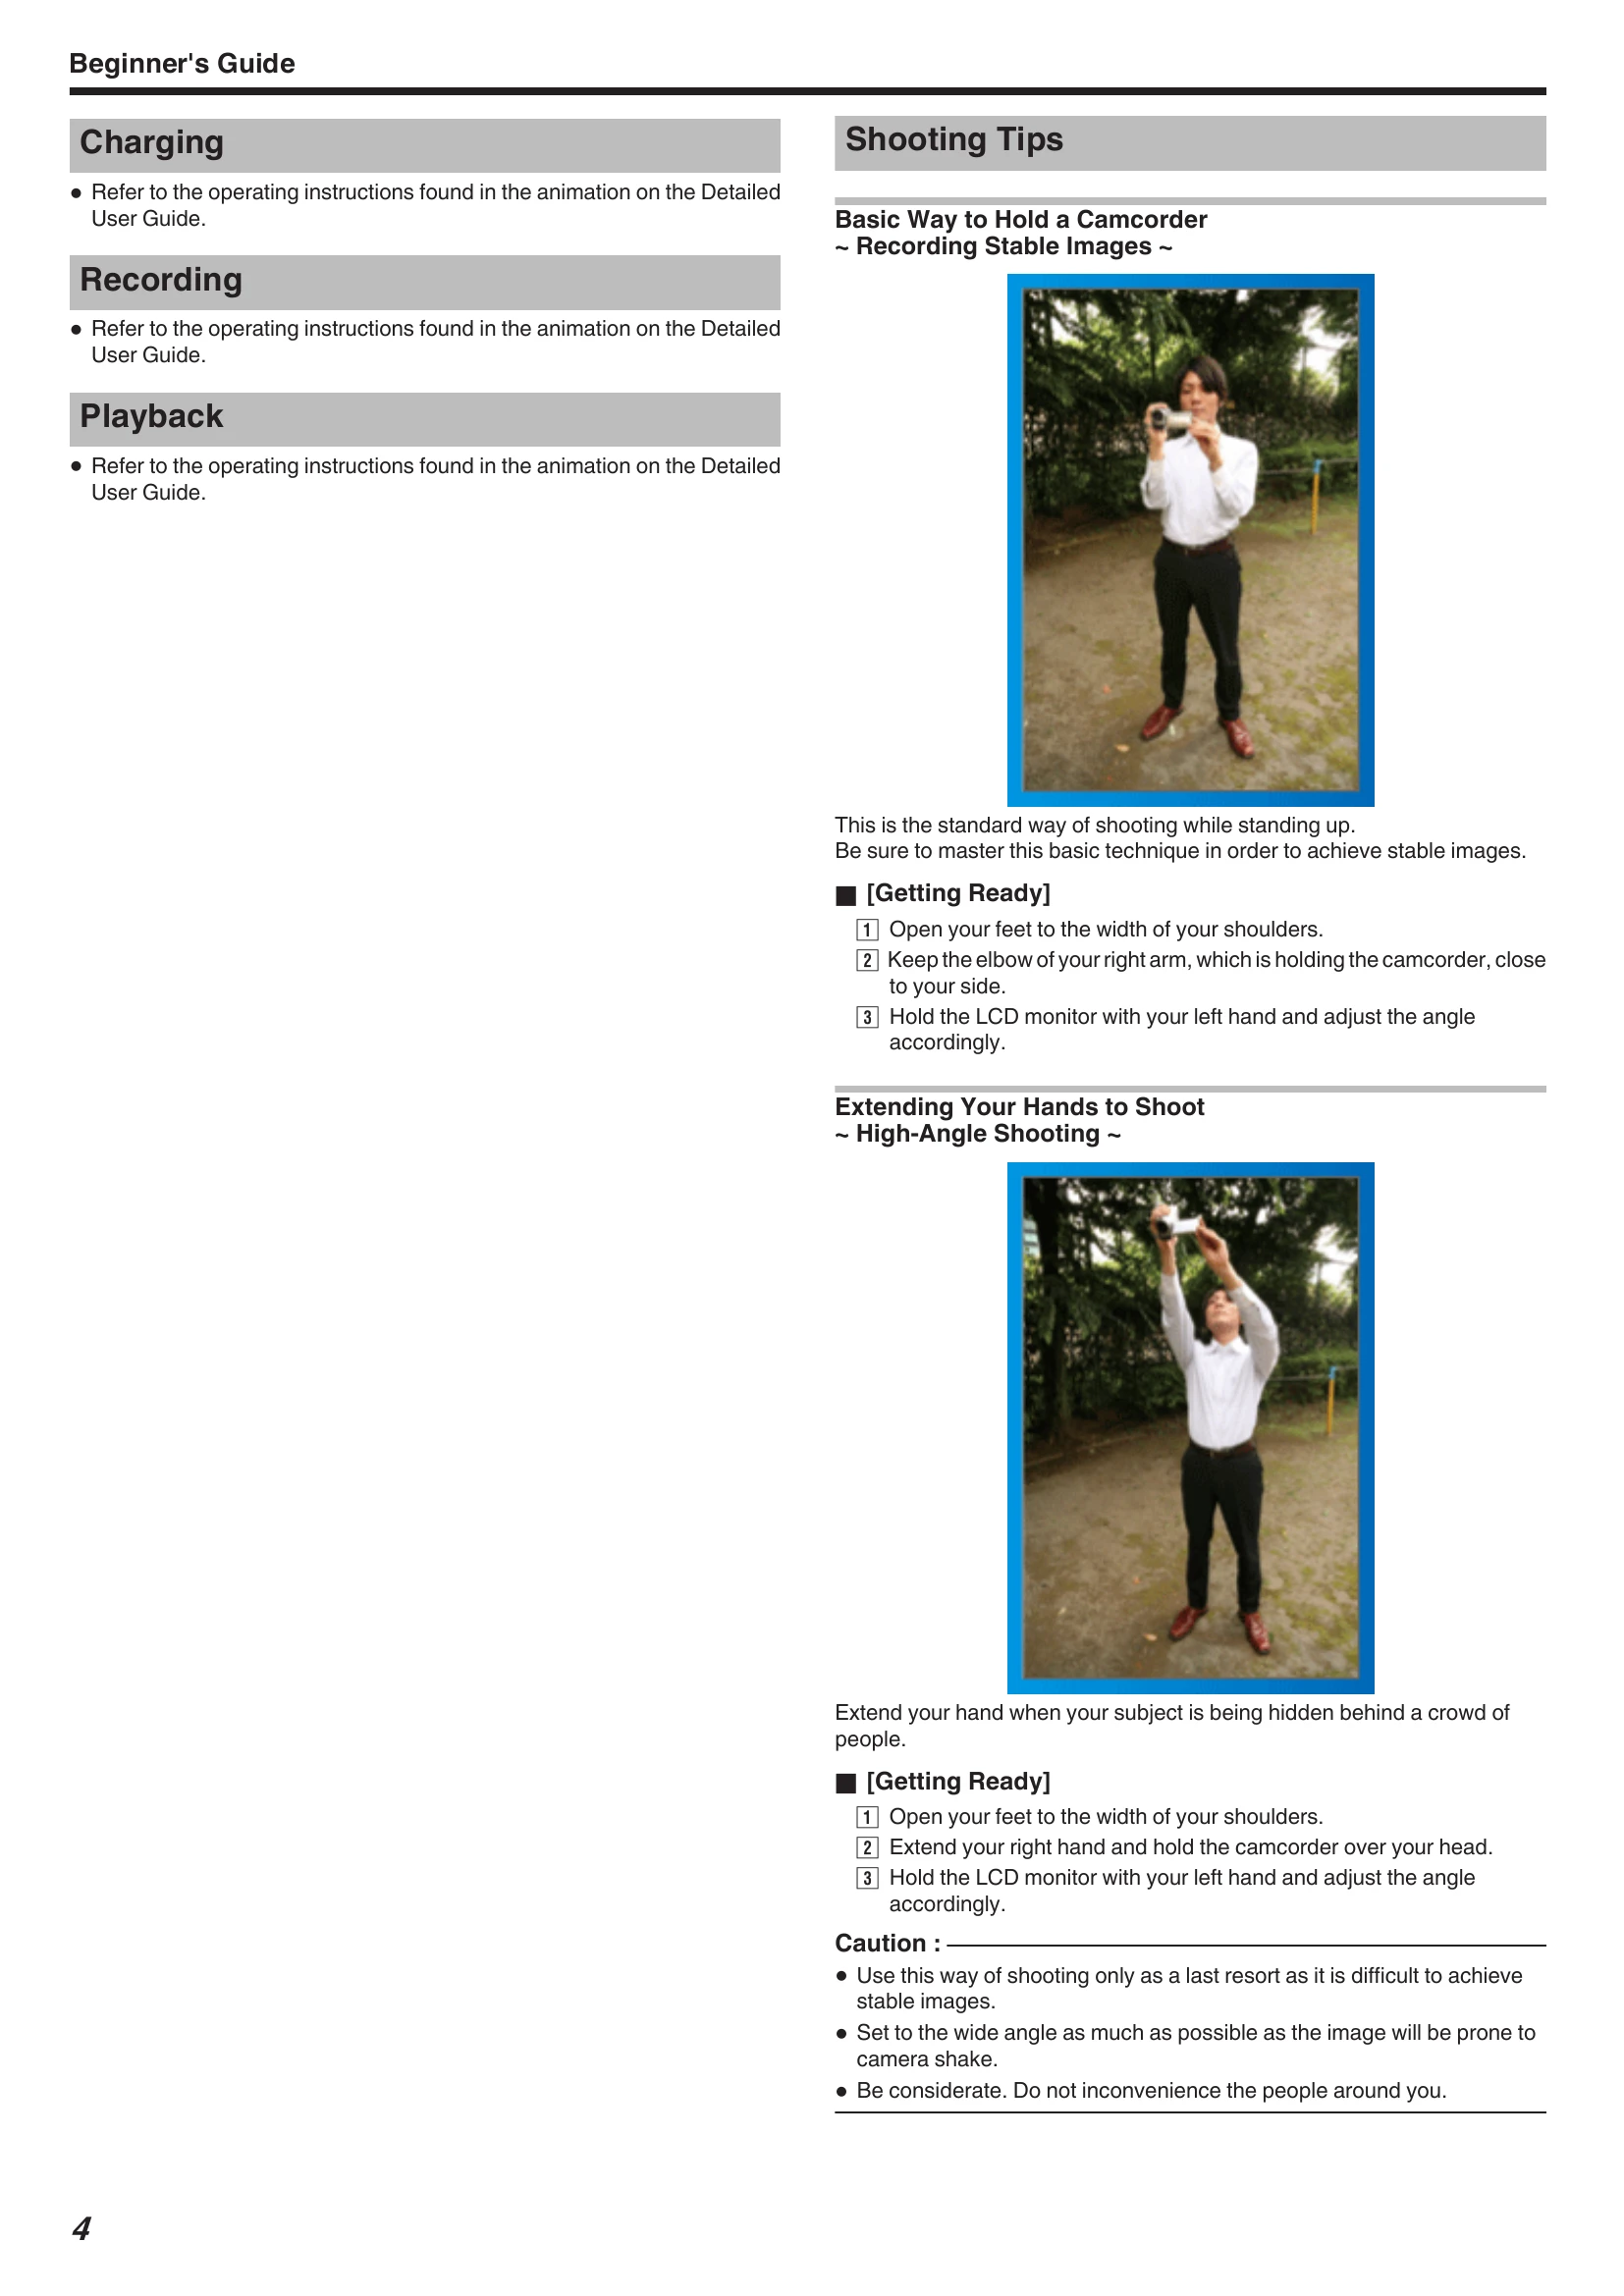
Basic Way to Hold a Camcorder: Stand with feet shoulder-width apart, keep the right elbow close to your side, and hold the LCD monitor with your left hand. This technique is for stable images.
Extending Your Hands to Shoot (High-Angle Shooting): Stand with feet shoulder-width apart, extend your right hand holding the camcorder overhead, and hold the LCD monitor with your left hand. Use this for shooting over crowds. Caution: This makes stable images difficult; use the wide angle and be considerate of others.
Squatting and Shooting at Eye Level: Kneel with your left knee, keep your right foot on the ground, place your right elbow on your right knee, and hold the LCD monitor with your left hand. This is for shooting small children at their eye level.
Panning: Rotate your body instead of your arms. Stand facing where you want to end, twist your body to start recording, record for 2 seconds, twist back to the front, record for another 2 seconds, and stop. This creates a slow-motion effect.
| Issue | Solution |
|---|---|
| Unable to turn on the power when using the battery pack. | Recharge the battery pack. Wipe the terminal of this unit or the battery pack with a cotton swab or similar. Ensure you are using JVC battery packs. |
| Short usage time even after charging. | Battery deterioration may occur with repeated charging. Replace the battery pack. |
| Unable to charge the battery pack. | When fully charged, the lamp may not flash. Wipe the terminal of this unit or the battery pack with a cotton swab or similar. Use an original AC adapter. |
| The remaining battery display is not correct. | This may occur with prolonged use in extreme temperatures or with repeated charging. |
| The battery depletes even when the AC adapter is connected. | Use a JVC AC adapter (AC-V11U). |
| Recording cannot be performed. | Check the REC button. Set to recording mode by tapping the button. |
| Recording stops automatically. | Recording stops automatically after 12 consecutive hours. Turn off the unit, wait, and turn it on again. The unit may stop automatically to protect the circuit if it overheats. |
| The continuous shooting speed of still images is slow. | Continuous shooting speed may drop with repeated use, depending on the SD card, or under certain recording conditions. |
| The focus is not adjusted automatically. | Adjust focus manually in dark or low-contrast conditions. Wipe the lens with a cleaning cloth. Cancel manual focus if necessary. Digital zoom is not available in still image recording or time-lapse recording. |
| Mosaic-type noise occurs when recording scenes with fast movements or extreme changes in brightness. | Set "VIDEO QUALITY" to "UXP" or "XP". |
| Vertical lines appear on recorded images. | This may occur when shooting a subject illuminated by bright light. This is not a malfunction. |
| Cannot insert the SD card. | Ensure the card is inserted in the correct direction. Turn off the unit before inserting or removing. Do not touch the metal contact area. |
| Unable to copy to SD card. | Perform media settings. Use compatible SD cards. Format the card if it has been used on other devices. |
| Playback sound or video is interrupted. | This may occur at the connecting section between two scenes and is not a malfunction. |
| The same image is displayed for a long time. | Use a high-speed SD card (Class 4 or higher). Clean SD card terminals. Format the SD card. Verify PC system requirements for Everio MediaBrowser 3. |
| The motion is choppy. | Use a high-speed SD card (Class 4 or higher). Clean SD card terminals. Format the SD card. Verify PC system requirements for Everio MediaBrowser 3. |
| Cannot find a recorded file. | Cancel date search. Change playback media. Check "REC MEDIA" settings. Select "PLAYBACK OTHER FILE" if management information is damaged. |
| Images do not appear on the TV properly. | Disconnect and reconnect cables. Turn the unit off and on again. Check "COMPONENT OUTPUT" settings. Set "VIDEO OUTPUT" to "4:3" or "16:9". Reconnect HDMI mini cable if necessary. |
| CHECK LENS COVER | Open the lens cover. |
| SET DATE/TIME! | Connect AC adapter, charge battery, and set clock. If the message persists, the clock battery may be exhausted. Consult a dealer. |
| COMMUNICATION ERROR | Reconnect USB cable. Turn off/on connected devices. Reattach battery pack. |
| FORMAT ERROR! | Check procedures, perform again. Turn off/on unit. |
| DATA DELETION ERROR | Check procedures, perform again. Turn off/on unit. |
| ERROR IN BUILT-IN MEMORY! | Turn off/on unit. Back up files and format built-in memory if the problem persists. |
| MEMORY CARD ERROR! | Turn off/on unit. Remove and re-insert SD card. Clean terminals. Back up files and format SD card if the problem persists. |
| NOT FORMATTED | Select "OK" and then "YES" to format. |
| RECORDING FAILURE | Turn off and on unit again. Protect from vibration and shock. |
| CANNOT TAKE MORE STILL IMAGES AT THE MOMENT | Stop video recording before taking still images. Do not remove/insert SD card during video recording. |
| PLAYBACK FAILED | Remove/re-insert SD card. Clean terminals. Insert SD card before powering on. Avoid impact/vibration. |
| VIDEO MANAGEMENT FILE IS DAMAGED, RECOVERY IS REQUIRED TO RECORD/PLAYBACK, RECOVER? | Select "OK" to restore. Unrestored videos may not be displayed on the index screen. Try "PLAYBACK OTHER FILE". |
| UNSUPPORTED FILE! | Use files recorded with this unit. |
| UNSUPPORTED SCENE! | Use files recorded with this unit. |
| THIS FILE IS PROTECTED | Turn off "PROTECT/CANCEL" function in "EDIT" menu. |
| CHECK CARD'S WRITE PROTECTION SWITCH | Set the write protect switch of the SD card to off. |
| INSUFFICIENT AVAILABLE SPACE | Delete files or move them to a computer. Replace the SD card. Ensure sufficient free space before combining seamless videos. |
| MAXIMUM QUANTITY RECORDING FOLDERS/ FILES HAS BEEN REACHED | Move files/folders to a computer. Select "FILE + MANAGEMENT NO" in format settings. |
| SCENE QUANTITY EXCEEDED LIMIT | Move files/folders to a computer. Select "FILE + MANAGEMENT NO" in format settings. |
| NUMBER OF FOLDERS OVERFLOW | Move files/folders to a computer. Select "FILE + MANAGEMENT NO" in format settings. |
| FILE QUANTITY LIMIT EXCEEDED | Move files/folders to a computer. Select "FILE + MANAGEMENT NO" in format settings. |
| CAMERA TEMPERATURE IS TOO COLD KEEP CAMERA POWER ON PLEASE WAIT | Leave the unit on for a while. Move to a warmer place if the warning persists. Turn on again after a while. |
| NO FILES | Change "REC MEDIA" settings. Ensure files are not recorded to other media. |
| RECORDING CANCELLED | Set "REC MEDIA FOR VIDEO" to "SD" and record to an SD card. Turn off/on unit again. Protect from vibration and shock. |