Brand: JVC
Category: Camcorder
Document Type: Manual
Language: EN
Brand: JVC
Category: Camcorder
Document Type: Manual
Language: EN
Uploaded: Aug. 10, 2025, 12:36 a.m.
Manual Publish Date: 2003-01-01
Powering On/Off: Align the Power Switch to 'A' or 'M' while pressing the Lock Button to turn on. Open the LCD monitor or pull out the viewfinder to turn on/off the camcorder when the Power Switch is set to 'A' or 'M'.
Basic Recording: Remove lens cap, open LCD monitor/viewfinder, set Recording Mode Switch to HD/SD/DV, set Power Switch to 'A' or 'M'. Press Recording Start/Stop Button to start recording (tally lamp and 'REC' appear). Press again to stop.
Loading/Unloading Cassette: Loosen grip strap, slide and hold OPEN/EJECT, open cassette holder cover, insert/remove tape, press 'PUSH HERE' to close. Ensure camcorder is powered on for proper loading/ejecting.
Loading/Unloading Memory Card: Ensure power is off, slide to open card cover, insert memory card with clipped edge first. To unload, push card once, then pull out.
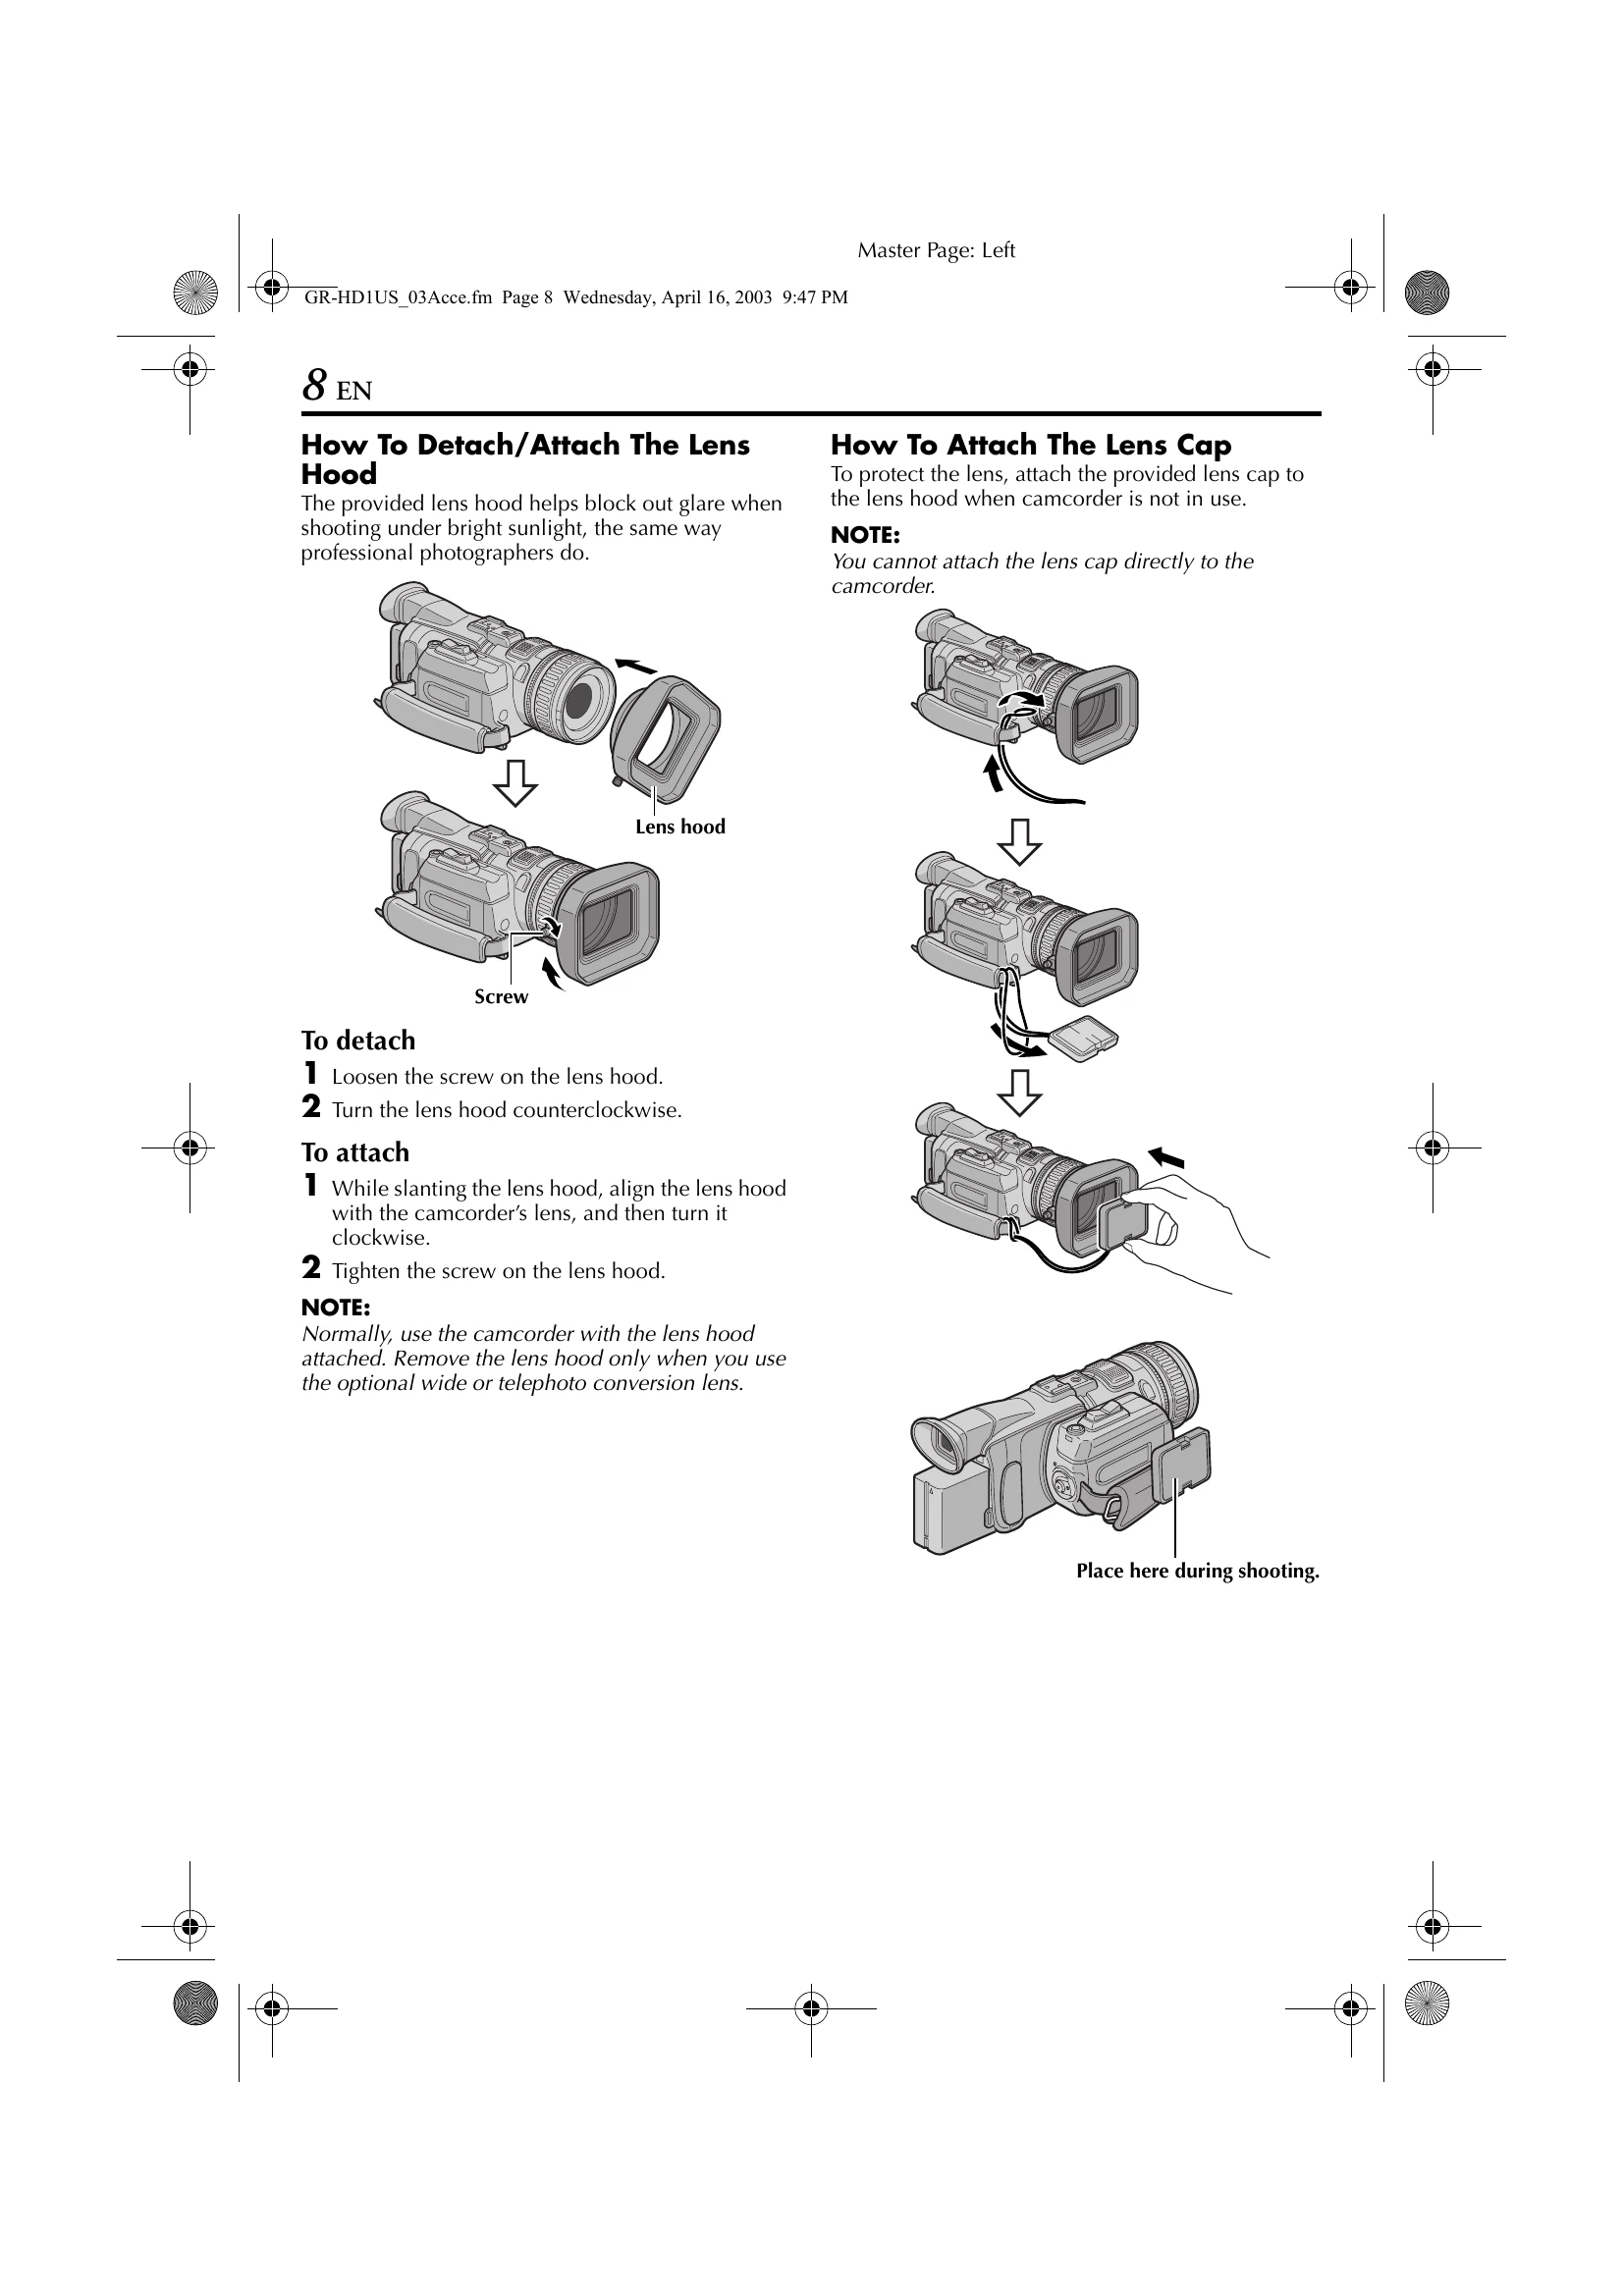
Attaching Accessories: Lens hood screws on. Lens cap attaches to lens hood. Strap threads through eyelets and buckle. Handle mounts on the Shoe.
Charging Battery: Unplug camcorder DC cord, plug AC adapter cord into outlet. Attach battery pack. CHARGE indicator blinks during charging.
| Symptom | Possible Cause | Remedy |
|---|---|---|
| Camcorder does not operate. | Battery pack not loaded properly. | Load the battery pack properly. |
| Camcorder does not operate. | Battery pack is not charged. | Charge the battery pack. |
| Camcorder does not operate. | AC Power Adapter/Charger is not connected properly. | Connect the AC Power Adapter/Charger properly. |
| No picture or sound. | Power is off. | Turn on the power. |
| No picture or sound. | Cassette not loaded. | Load a cassette. |
| The screen is dark. | LCD monitor brightness is too low. | Adjust the brightness. |