Brand: JVC
Category: Camcorder
Document Type: Manual
Language: EN
Brand: JVC
Category: Camcorder
Document Type: Manual
Language: EN
Uploaded: Nov. 21, 2025, 6:53 p.m.
Manual Publish Date: 2000-01-01
Power: Charge the battery pack using the AC adapter. Ensure proper connection to AC outlet. The CHARGE indicator will blink during charging and stay lit when finished.
Attaching Battery Pack: Tilt viewfinder up, align battery pack, push down until it locks.
Using AC Power: Connect AC adapter to camcorder and AC outlet.
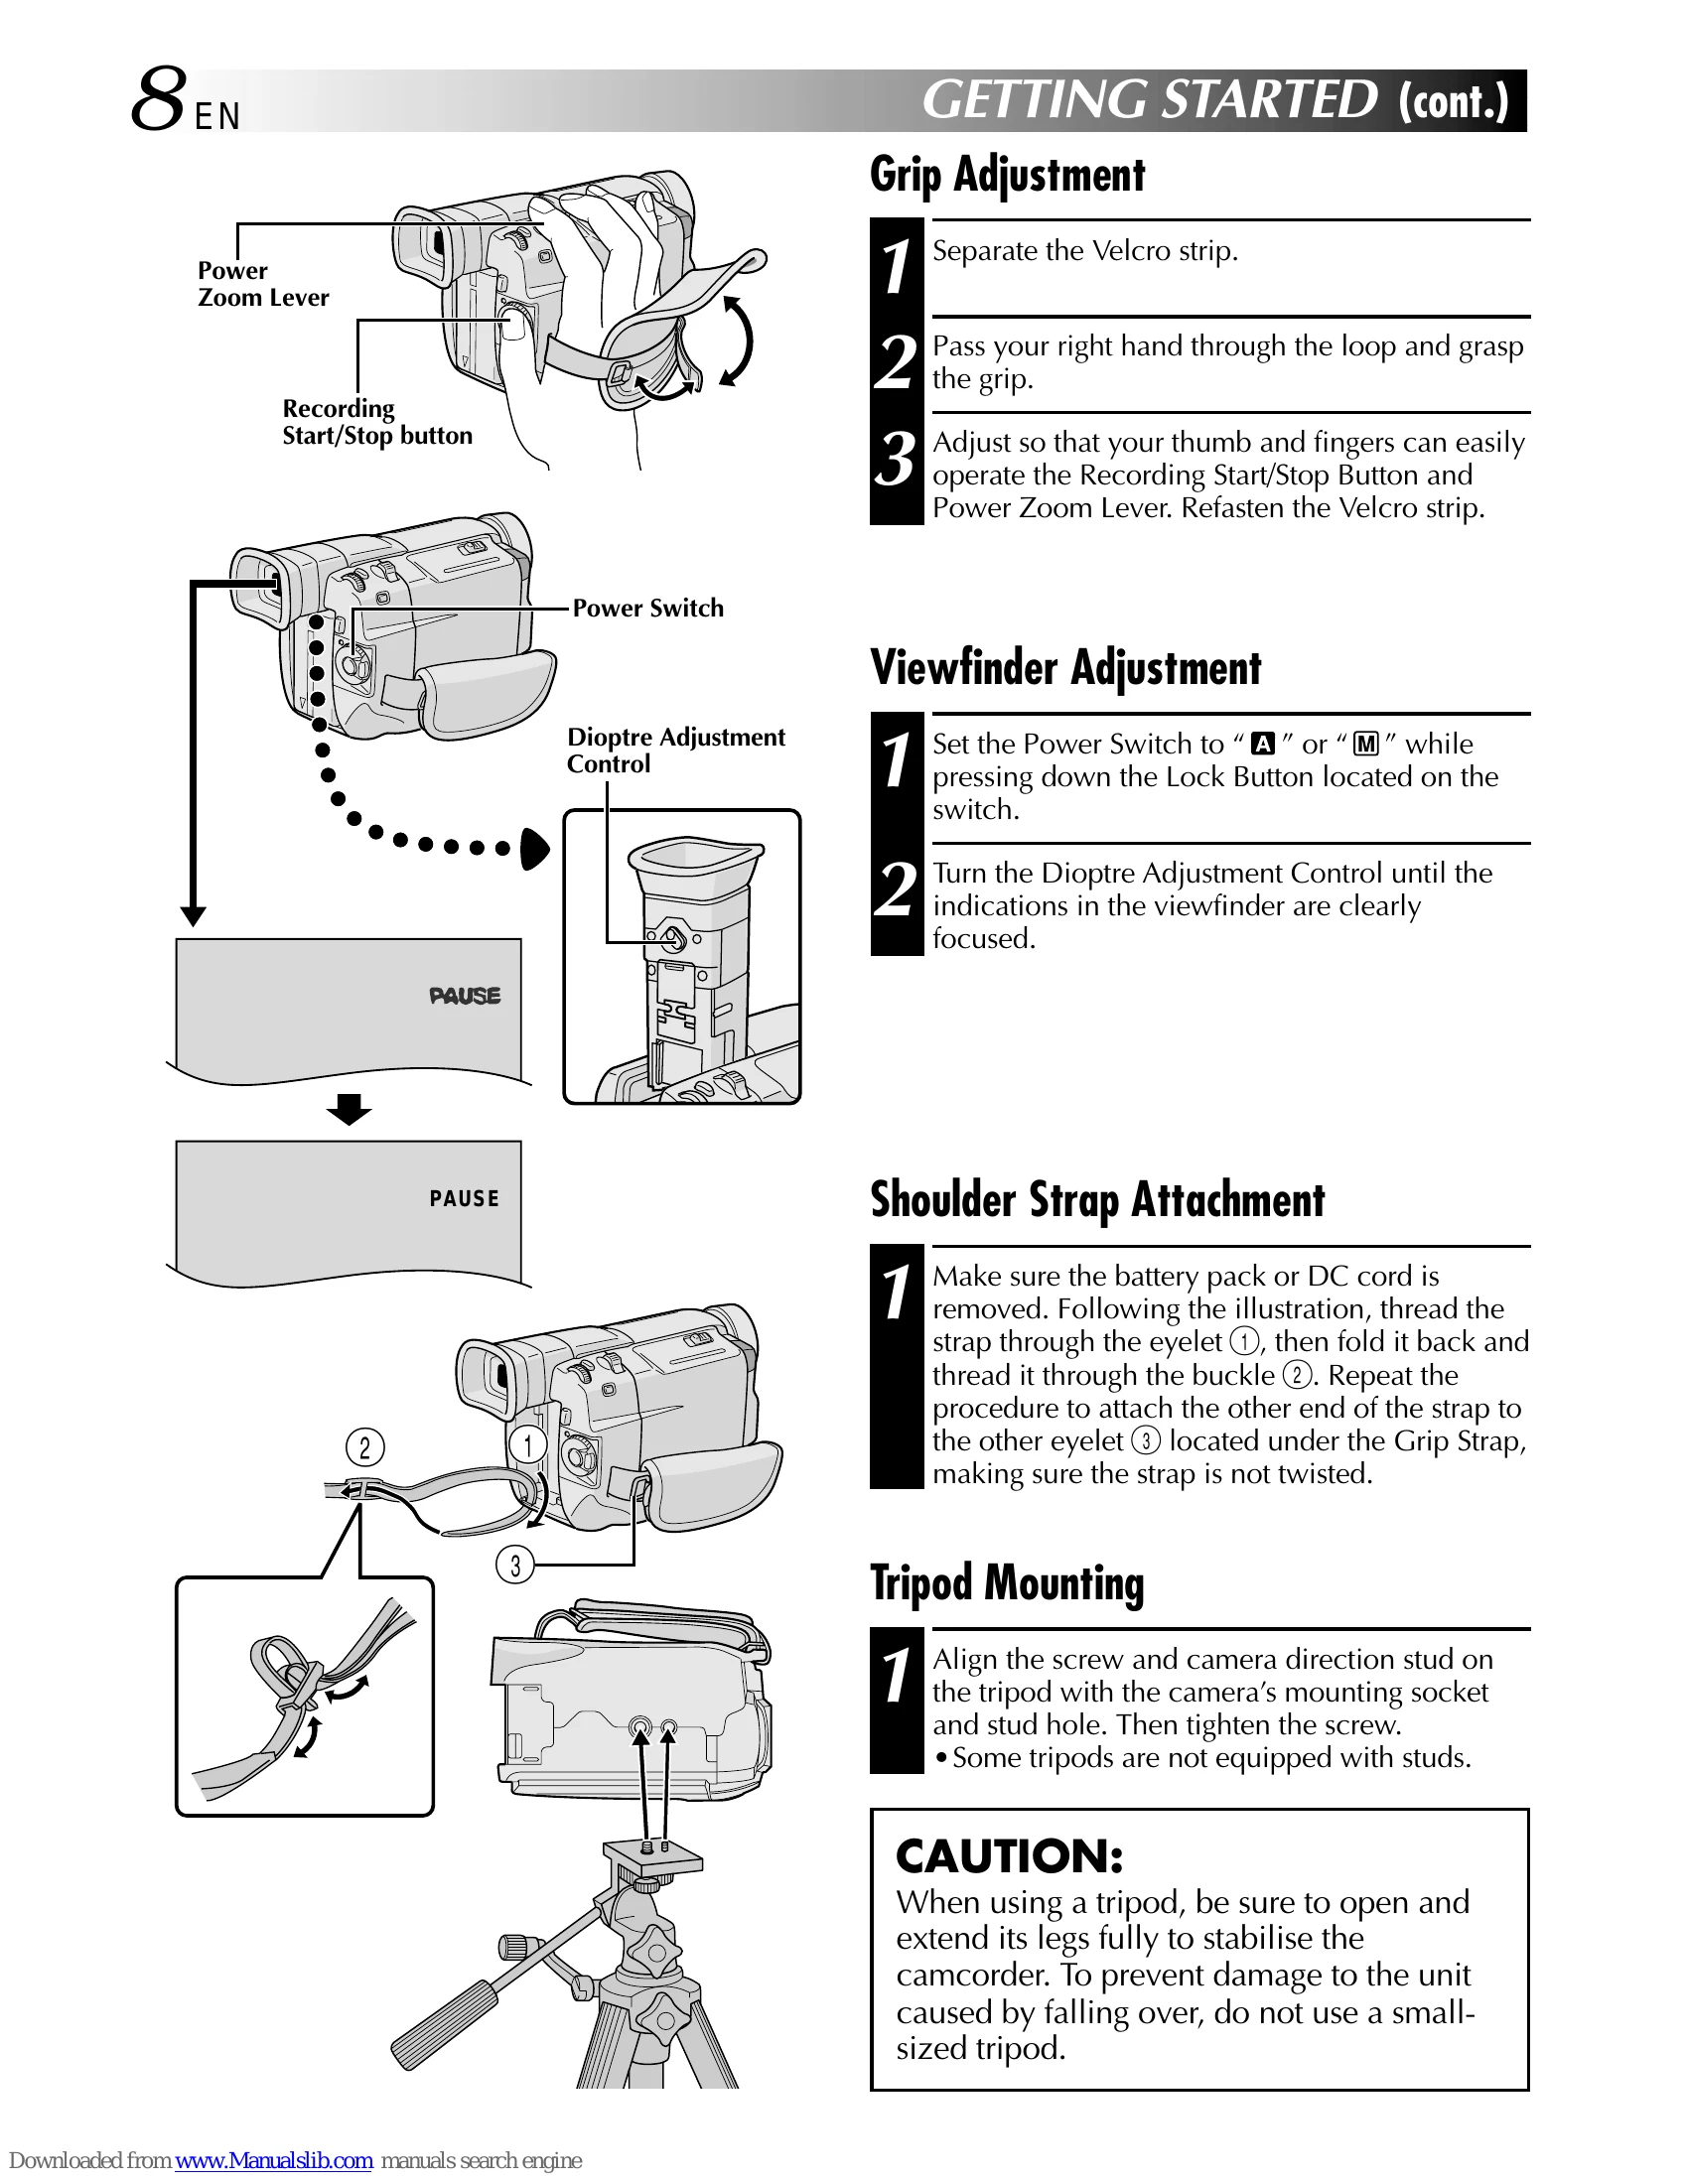
Grip Adjustment: Separate Velcro, pass hand through loop, adjust for comfortable operation of buttons and levers.
Viewfinder Adjustment: Set power to 'A' or 'M', press Lock Button, adjust Dioptre Control for clear focus.
Shoulder Strap: Remove battery/DC cord, thread strap through eyelets and buckle.
Tripod Mounting: Align tripod screw with camera socket and tighten. Extend tripod legs for stability.
Setup: Ensure power, grip, viewfinder, cassette, and recording mode are set. Remove lens cap.
Shooting: Set Power Switch to 'A' or 'M'. Use LCD monitor or viewfinder. Press Recording Start/Stop Button to begin. 'REC' appears. Press again to stop.
Brightness: Adjust display brightness using the MENU/BRIGHT wheel.
Power Switch Positions: 'M' for manual control, 'A' for full auto, 'OFF' to switch off, 'PLAY' for playback.
Snapshot Mode: Set Power Switch to 'A' or 'M', select Snapshot mode using MODE button, press SNAPSHOT to record stills.
Zooming: Slide Power Zoom Lever towards 'T' to zoom in, 'W' to zoom out. Further sliding increases speed.
| Problem | Possible Cause | Solution |
|---|---|---|
| Remote control not functioning | Batteries exhausted | Replace with fresh AAA (R03) batteries. |
| Video light too hot to touch | In operation or soon after turning off | Do not touch. Wait for it to cool. |
| Immediately after use, placed in carrying case | Do not place in carrying case while hot. | |
| Too close to people or objects | Maintain at least 30 cm distance. | |
| Near flammable or explosive materials | Do not use. | |
| Requires replacement | Consult JVC dealer. | |
| Low battery charge | Camcorder may turn off automatically when video light is turned on or recording starts. | Replace battery or ensure it's fully charged. |
| Automatic demonstration not starting/stopping properly | Cassette in camcorder | Remove cassette. |
| DEMO. MODE not set to ON | Set DEMO. MODE to ON. | |
| Cannot record (erase protection tab set to 'SAVE') | Erase protection tab set to 'SAVE' | Slide tab to 'REC' before loading tape. |
| Cassette holder won't open/close | No power supply attached | Connect battery pack or AC adapter. |
| Cassette holder doesn't open fully | Use force | Do not use force. Wait for it to open. |
| Cassette holder won't close (low battery) | Low battery charge | Replace with fully charged battery. |
| Cassette holder damage when closing before holder retracts | Closed too soon | Wait for holder to recede completely. |
| Cassette loading/unloading issues | Camcorder moved from cold to warm environment | Wait a short time. |
| Blank portion recorded, time code interrupted | Recording resumed after interruption | Perform 'Recording From The Middle of A Tape'. |
| No picture during playback / Blocks of noise / Head Clog Warning | Dirty video heads | Use optional cleaning cassette. If problem persists, consult JVC dealer. |
| Serious malfunctioning | External noise/interference or internal issue | Disconnect power, wait, reconnect. Consult JVC dealer. |