Brand: JVC
Category: Camcorder
Document Type: Manual
Language: EN
Brand: JVC
Category: Camcorder
Document Type: Manual
Language: EN
Uploaded: Aug. 10, 2025, 12:33 a.m.
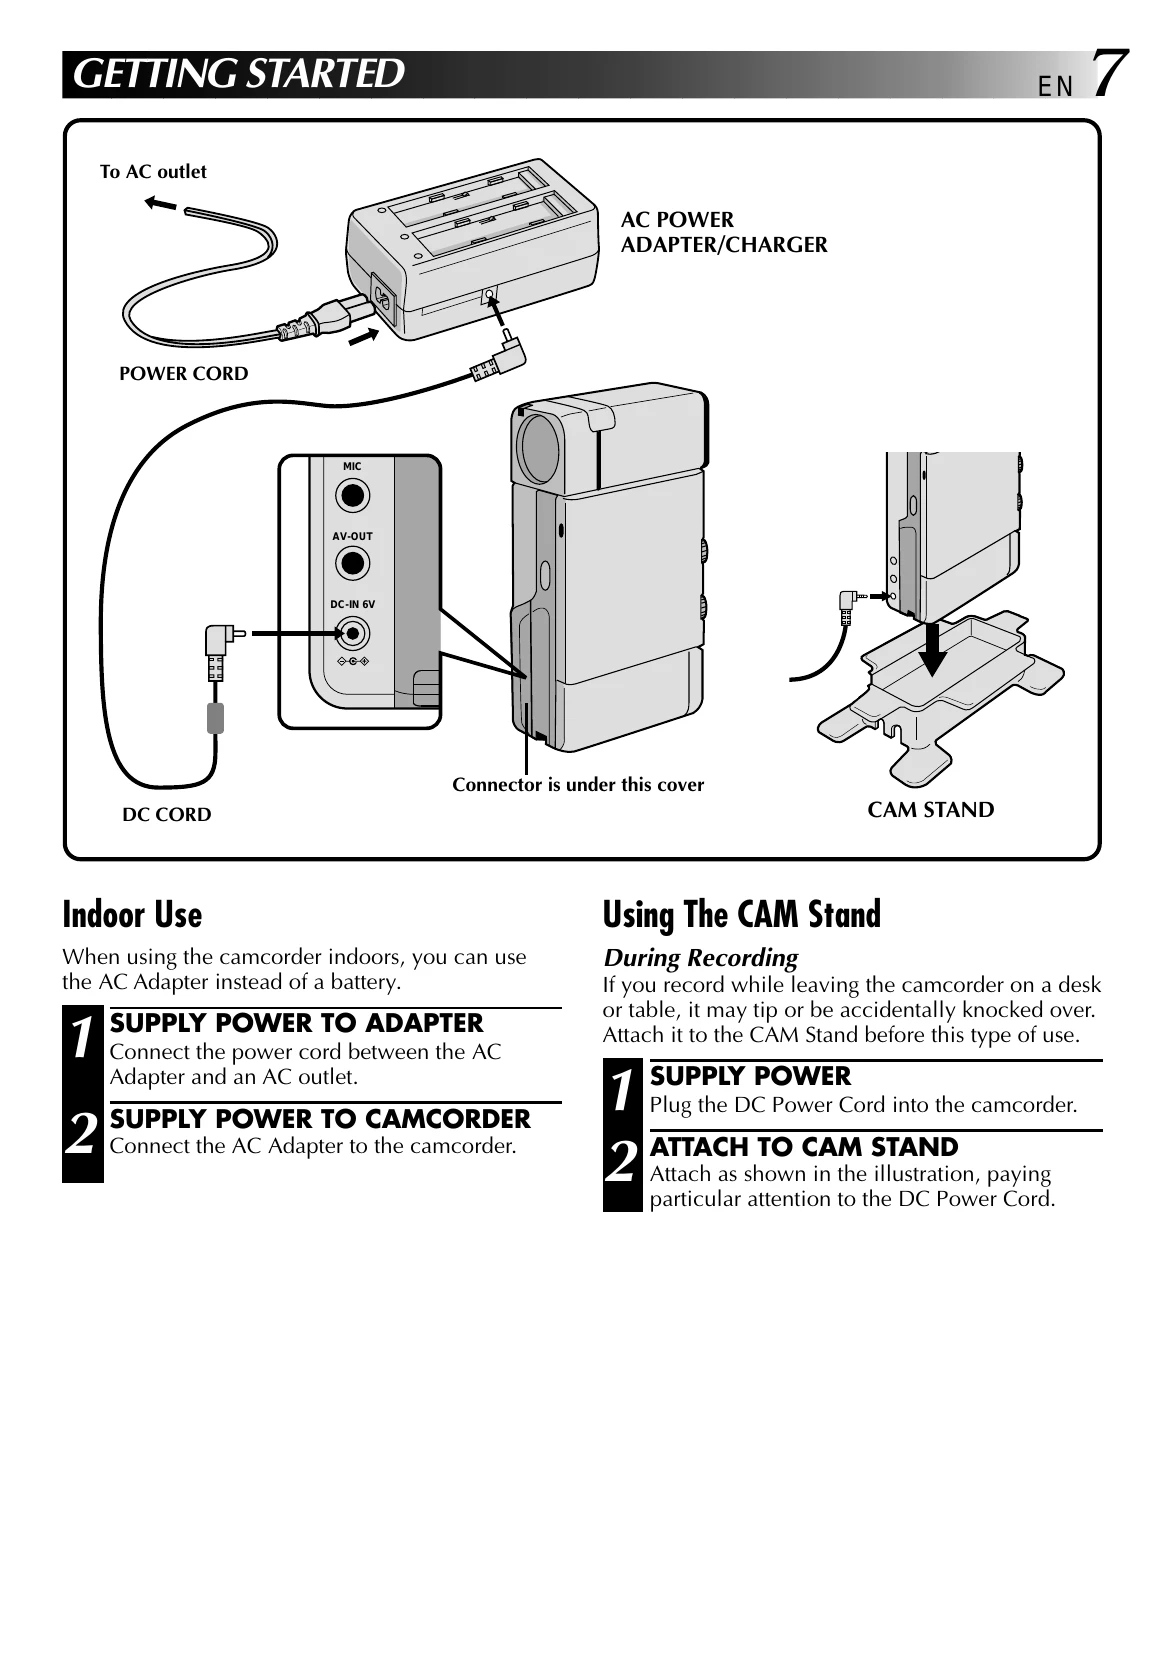
Indoor Use: Connect the AC adapter to the camcorder and an AC outlet for indoor power.
Using the CAM Stand: Attach the camcorder to the CAM Stand for stability during recording, ensuring the DC Power Cord is connected properly.
Charging the Battery: Connect the AC adapter to an AC outlet. Attach a fully charged battery pack, ensuring correct polarity. The charge indicator blinks during charging and stays on when finished. Charging time varies by battery pack model.
Installing the Battery Pack: Open the battery cover, remove the protective cap, and insert the battery pack with the positive (+) terminal facing the front.
Clock (Lithium) Battery: Slide off the battery cover, remove the old battery, insert a new CR2025 battery with the (+) side up, and close the cover. Reset the date and time after replacement.
Date/Time Settings: Select "REC" and "MANUAL" operation modes. Access the Recording Menu, then the Date/Time Menu. Input the date and time using the Zoom Lever and SET button.
Loading/Unloading a Cassette: Open the cassette door using the OPEN/EJECT switch. Insert or remove the tape and press PUSH HERE to close the holder. Close the cassette cover. Protect recordings by sliding the erase protection switch to "SAVE".
Hand Strap Attachment: Slide the strap through the eyelet and pull firmly to secure the camcorder.
Diopter Adjustment: Pull out the viewfinder and adjust the Diopter Adjust Lever while looking at the display for optimal clarity.
Remote Control Unit: Use the optional RM-V708U or RM-V710U to control the camcorder when docked. Install a CR2025 battery in the remote.
| SYMPTOM | POSSIBLE CAUSES | CORRECTIVE ACTION |
|---|---|---|
| 1. No power is supplied. |
|
|
| 2. Recording cannot be performed. |
|
|
| 3. There is no picture. |
|
|
| 4. Some functions are not available. |
|
|
| 5. The focus does not adjust automatically. |
|
|
| 6. The cassette won't load properly. |
|
|
| 7. Play, Rewind and Fast-Forward functions don't work. |
|
|
| 8. The tape is moving, but there's no picture. |
|
|
| 9. When shooting a subject illuminated by bright light, vertical lines appear. |
|
|
| 10. In the 5-Second mode, recording ends before 5 seconds have elapsed. |
|
|
| 11. Even though “GAIN UP” was set to "A", scenes shot in dark places are not brightened. |
|
|
| 12. Snapshot mode cannot be used. |
|
|