Brand: JVC
Category: Camcorder
Document Type: Manual
Language: EN
Brand: JVC
Category: Camcorder
Document Type: Manual
Language: EN
Uploaded: Nov. 21, 2025, 8:19 p.m.
Manual Publish Date: 1998-01-01
Warranty information is not explicitly detailed in this manual.
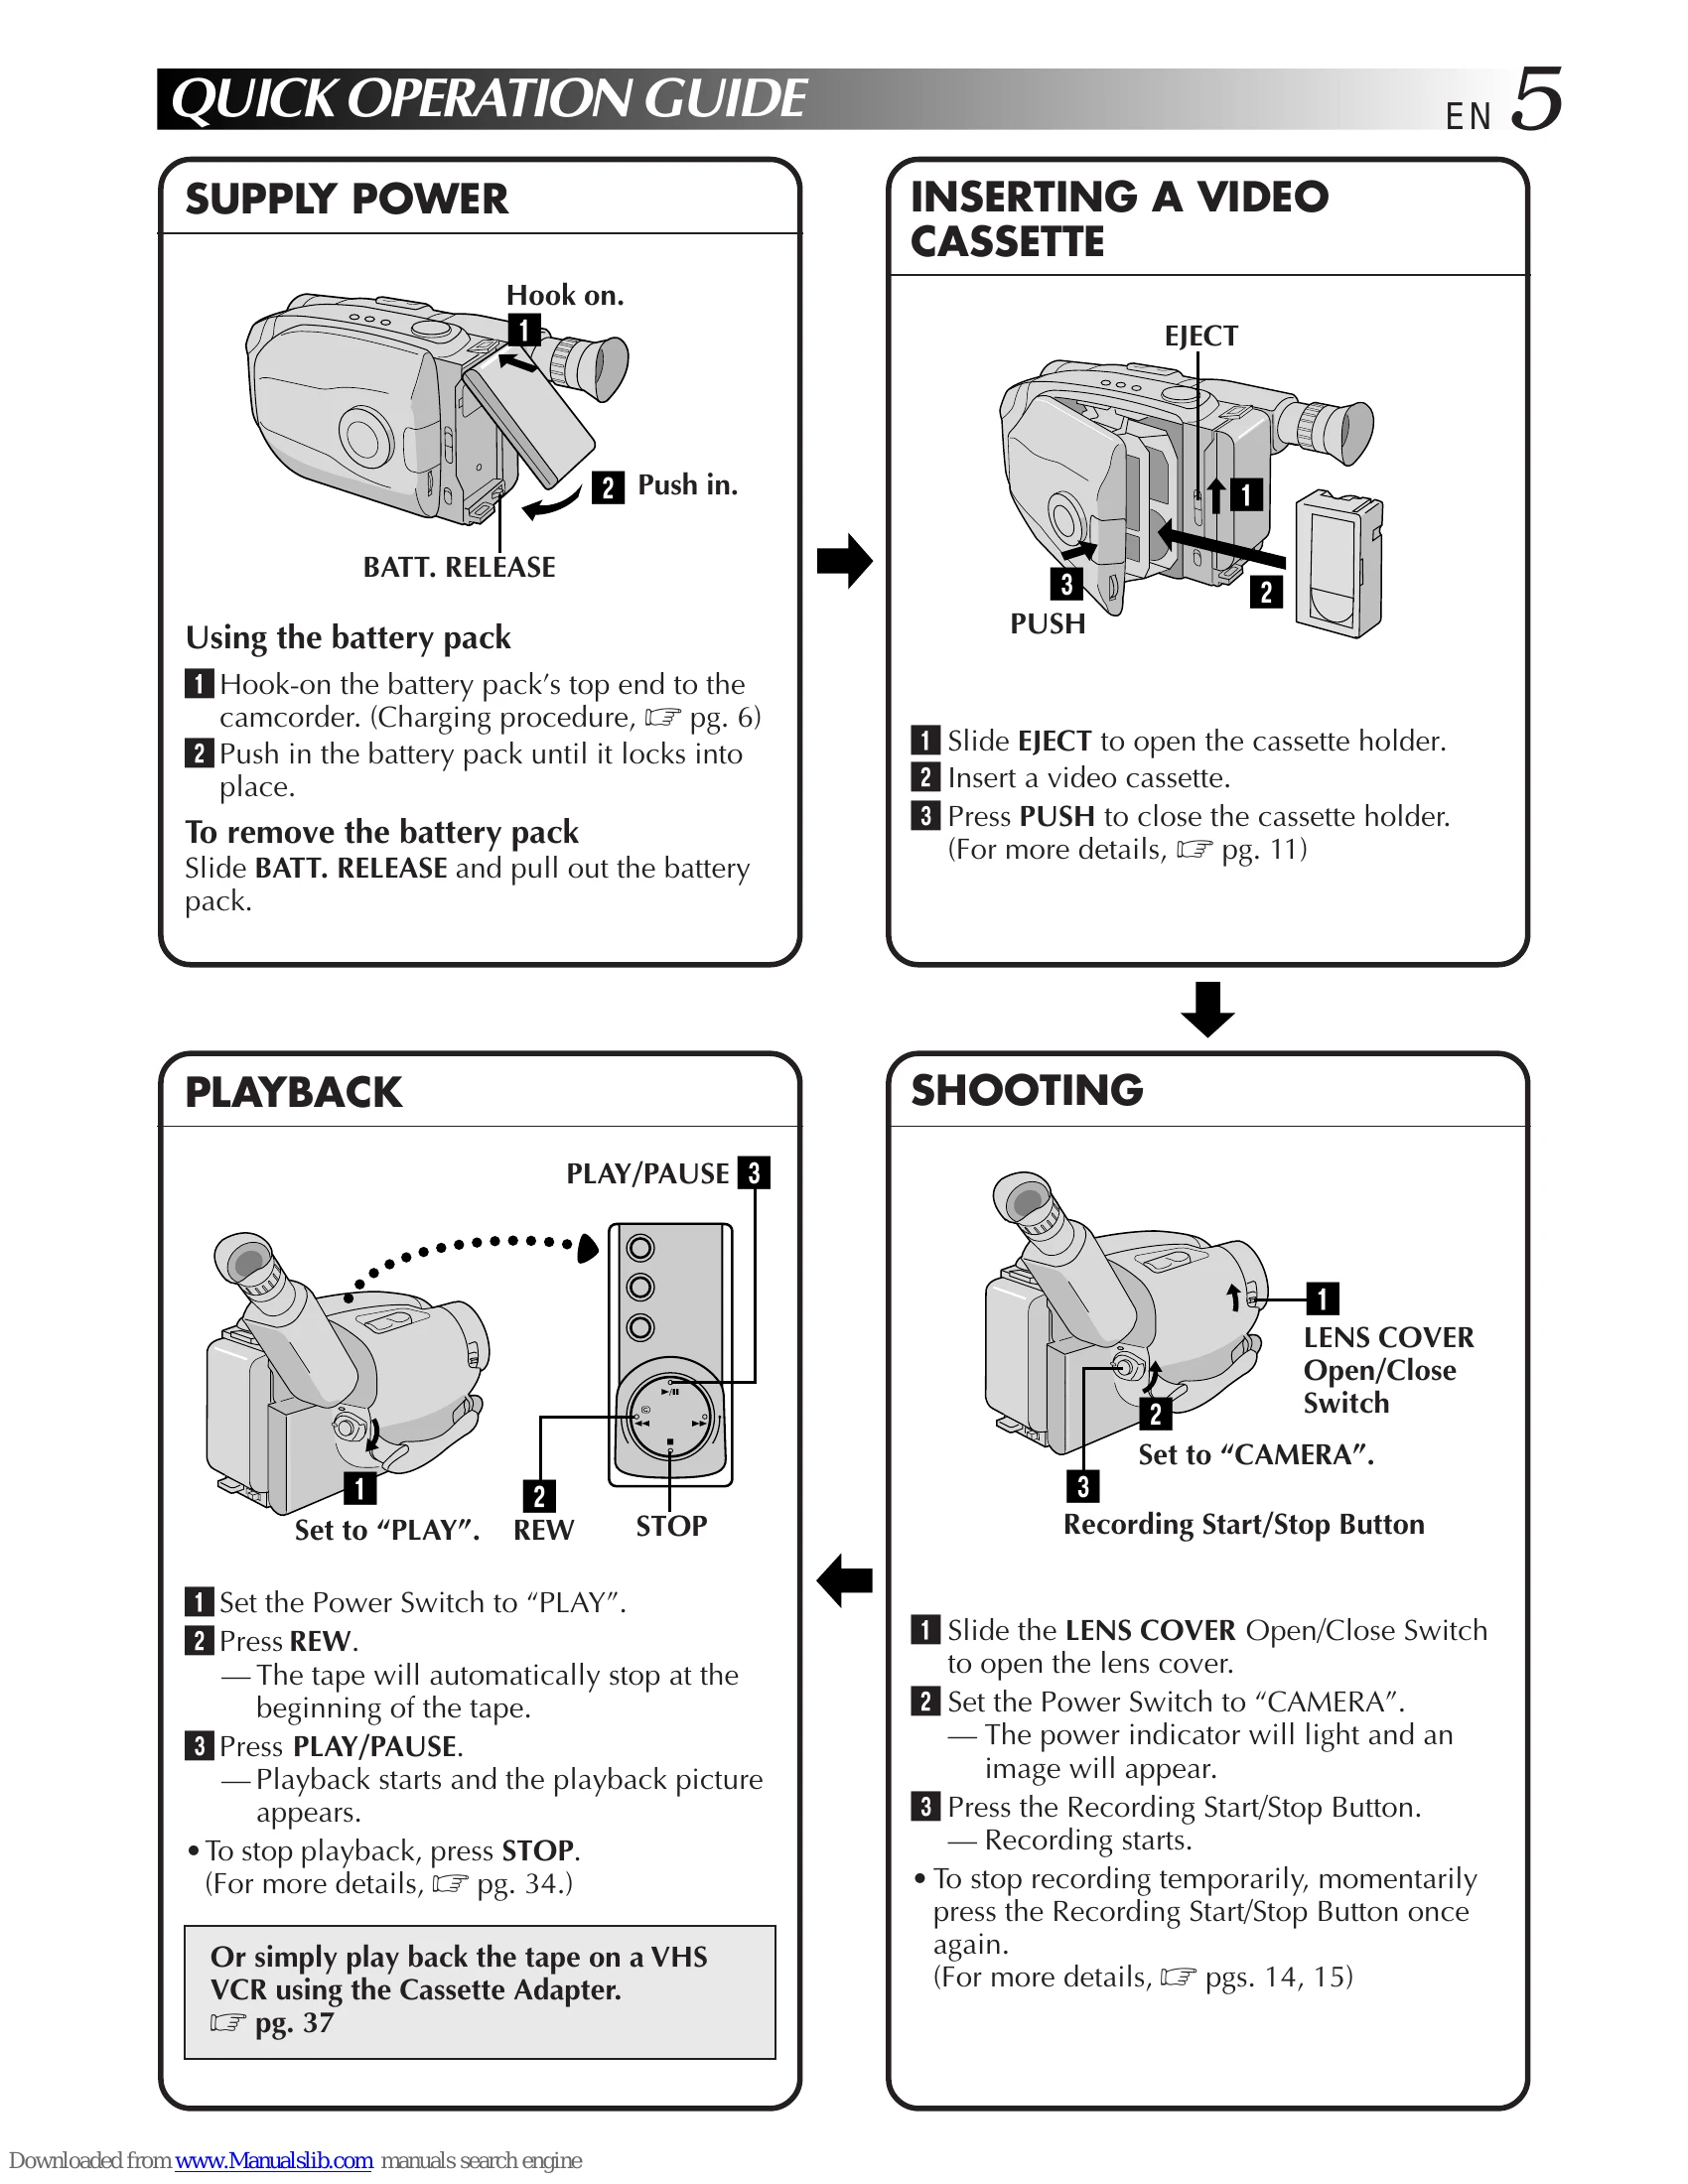
Using the battery pack: Hook the top end to the camcorder and push until it locks. To remove, slide BATT. RELEASE and pull.
Slide EJECT to open the holder, insert cassette with label facing outward, press PUSH to close and lock.
Set Power to "PLAY", press REW to go to the beginning, then press PLAY/PAUSE to start playback. Press STOP to stop.
Slide LENS COVER to open, set Power to "CAMERA". Press Recording Start/Stop Button to begin recording. Press again to stop.
| SYMPTOM | POSSIBLE CAUSE(S) |
| POWER | |
| No power is supplied. | • The battery pack has not been attached correctly (pg. 6). • The battery pack is not charged (☞ pg. 6). • The power supply has not been correctly connected (pg. 7). |
| The power suddenly goes off and doesn't come back on by itself. | The battery pack has completely discharged. Remove the cassette and disconnect the power source, then after a few minutes, try turning the power back on. If it still doesn't come on, consult your nearest JVC dealer. |
| RECORDING | |
| Recording cannot be performed. | • Make sure the Erase Protection tab is in the position that allows recording. If not, slide the tab. Some cassettes have removable tabs. If the tab has been removed, cover the hole with adhesive tape. |
| Recording does not start. | • The camcorder Power Switch has not been set to "CAMERA" (☞ pg. 14). |
| PLAYBACK | |
| The tape is running, but there's no playback picture. | The TV has not been set to its VIDEO mode. • If A/V connection is used, the TV's VIDEO/TV Switch has not been set to VIDEO. • The RF unit has not been set to the correct channel. |
| Playback picture is blurred or interrupted. | The video heads are dirty or worn out. Consult your nearest JVC dealer for head cleaning or replacement. |
| The counter indication is blurred during Still playback. | This is normal. |
| TAPE TRANSPORT | |
| The tape stops during fast-forward or rewind. | The Counter Memory Function has been activated (☞ pg. 36). |
| Rewinding or fast-forwarding cannot be performed. | • The tape is already fully wound on one reel or the other. |
| OTHER | |
| The tape won't eject. | • The battery pack is running low. |
| Some functions are not available. | • The Select Dial is set to "AUTO LOCK". |
| Vertical white lines appear when shooting a very bright object. | This sometimes occurs when the contrast between the background and the object is great. It is not a defect of the camcorder. |
| Bright, crystal-shaped spots appear in the viewfinder. | Sunlight is directly entering the lens. This is not a defect of the camcorder. |
| The viewfinder and the lens have become dirty (ex. fingerprints). | • Wipe them gently with soft cloth. |
| The picture is blurred in the Quick Review or Retake mode. | This is normal while recording in the LP mode. Some noise may be present while recording in the SP mode (pg. 10). |
| An error number (i.e. E03) appears. | Turn the camcorder's power off, then disconnect the power source. After a few minutes, try turning the power on again. If the error number still appears in the viewfinder, consult your nearest JVC dealer. |
| The image is out of focus. | The dioptre needs to be adjusted (☞ pg. 12). The scene being shot is adversely affecting the operation of Auto Focus (pg. 28). |
| The date and time displays disappear. | • If you remove the power source from the camcorder while the power is on, all settings and selections are erased. Make sure to turn the camcorder's power off before disconnecting the power source. |
| The wrong date and time are displayed/recorded. | • If you have not performed Date/Time Setting (☞ pg. 9), the date and time are not displayed/recorded correctly. Be sure that Date/Time setting is carried out. |
| Even though the Lens Cover is open, the Lens Cover Warning indicator blinks. | • The Lens Cover Warning indicator may blink when the camcorder is used in dark areas, regardless of the position of the Lens Cover. |