Unpack and Check: Verify all included parts are present: documentation kit, switch, accessory kit, and AC power cord.
Prepare for Installation: Review safety precautions on page 3 to avoid injury or damage.
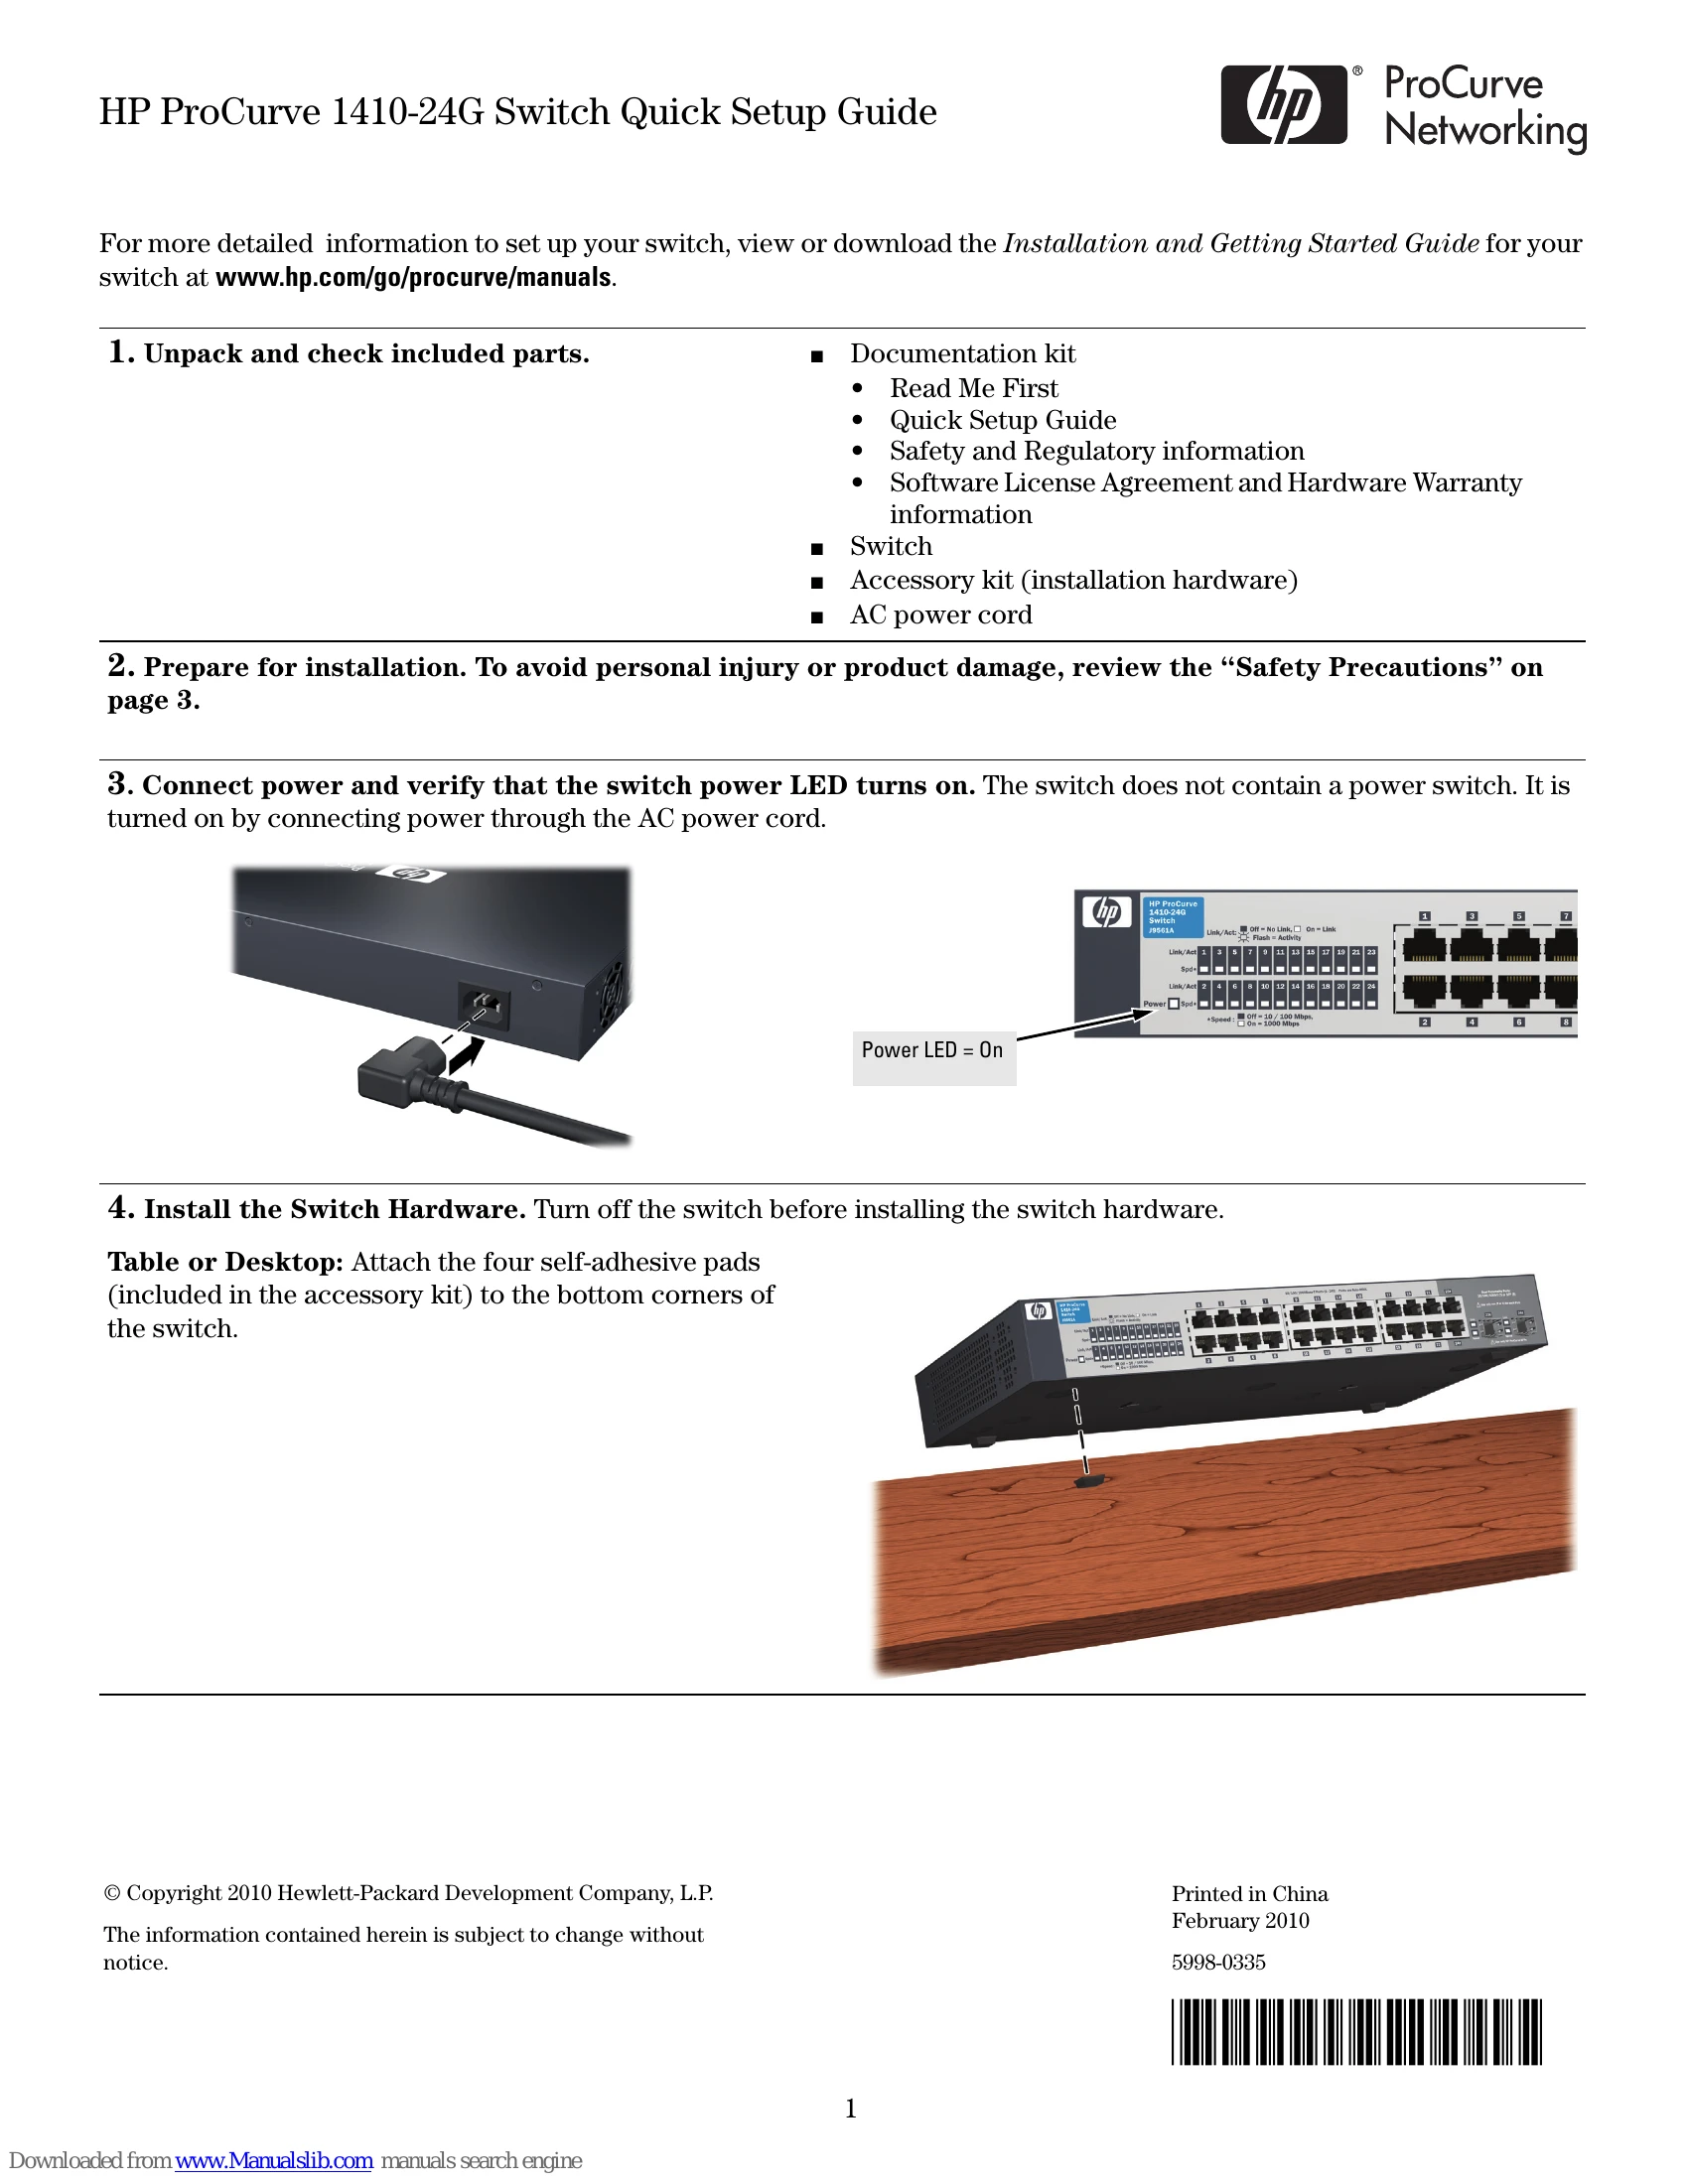
Connect Power: Plug in the AC power cord. The switch powers on automatically; there is no power switch. Check that the power LED turns on.
Install Hardware:
Table/Desktop: Attach the four self-adhesive pads to the bottom corners.
Wall/Under-Table: Use M4 tap screws and a Phillips screwdriver. For wall-mounting, ensure network ports face upwards. Refer to the template on page 4 for screw positions.
Rack Mounting: Use the provided rack-mounting kit, M4 screws, and number 12-24 screws to attach brackets to the switch and then to the rack.
(Optional) Lock Switch: Use a Kensington lock or similar device to secure the switch.
Power On and Connect Network: Connect network cables to the switch ports. For transceiver connections, use supported HP ProCurve mini-GBIC/SFP transceivers. Allow transceivers a few seconds to initialize after installation.