Brand: HP
Category: Digital Camera
Document Type: Quick Start Guide
Language: EN
Brand: HP
Category: Digital Camera
Document Type: Quick Start Guide
Language: EN
Uploaded: Nov. 21, 2025, 7:48 p.m.
Manual Publish Date: 2013
HP shall not be liable for technical or editorial errors or omissions. Visit hp.com/support for the latest version.
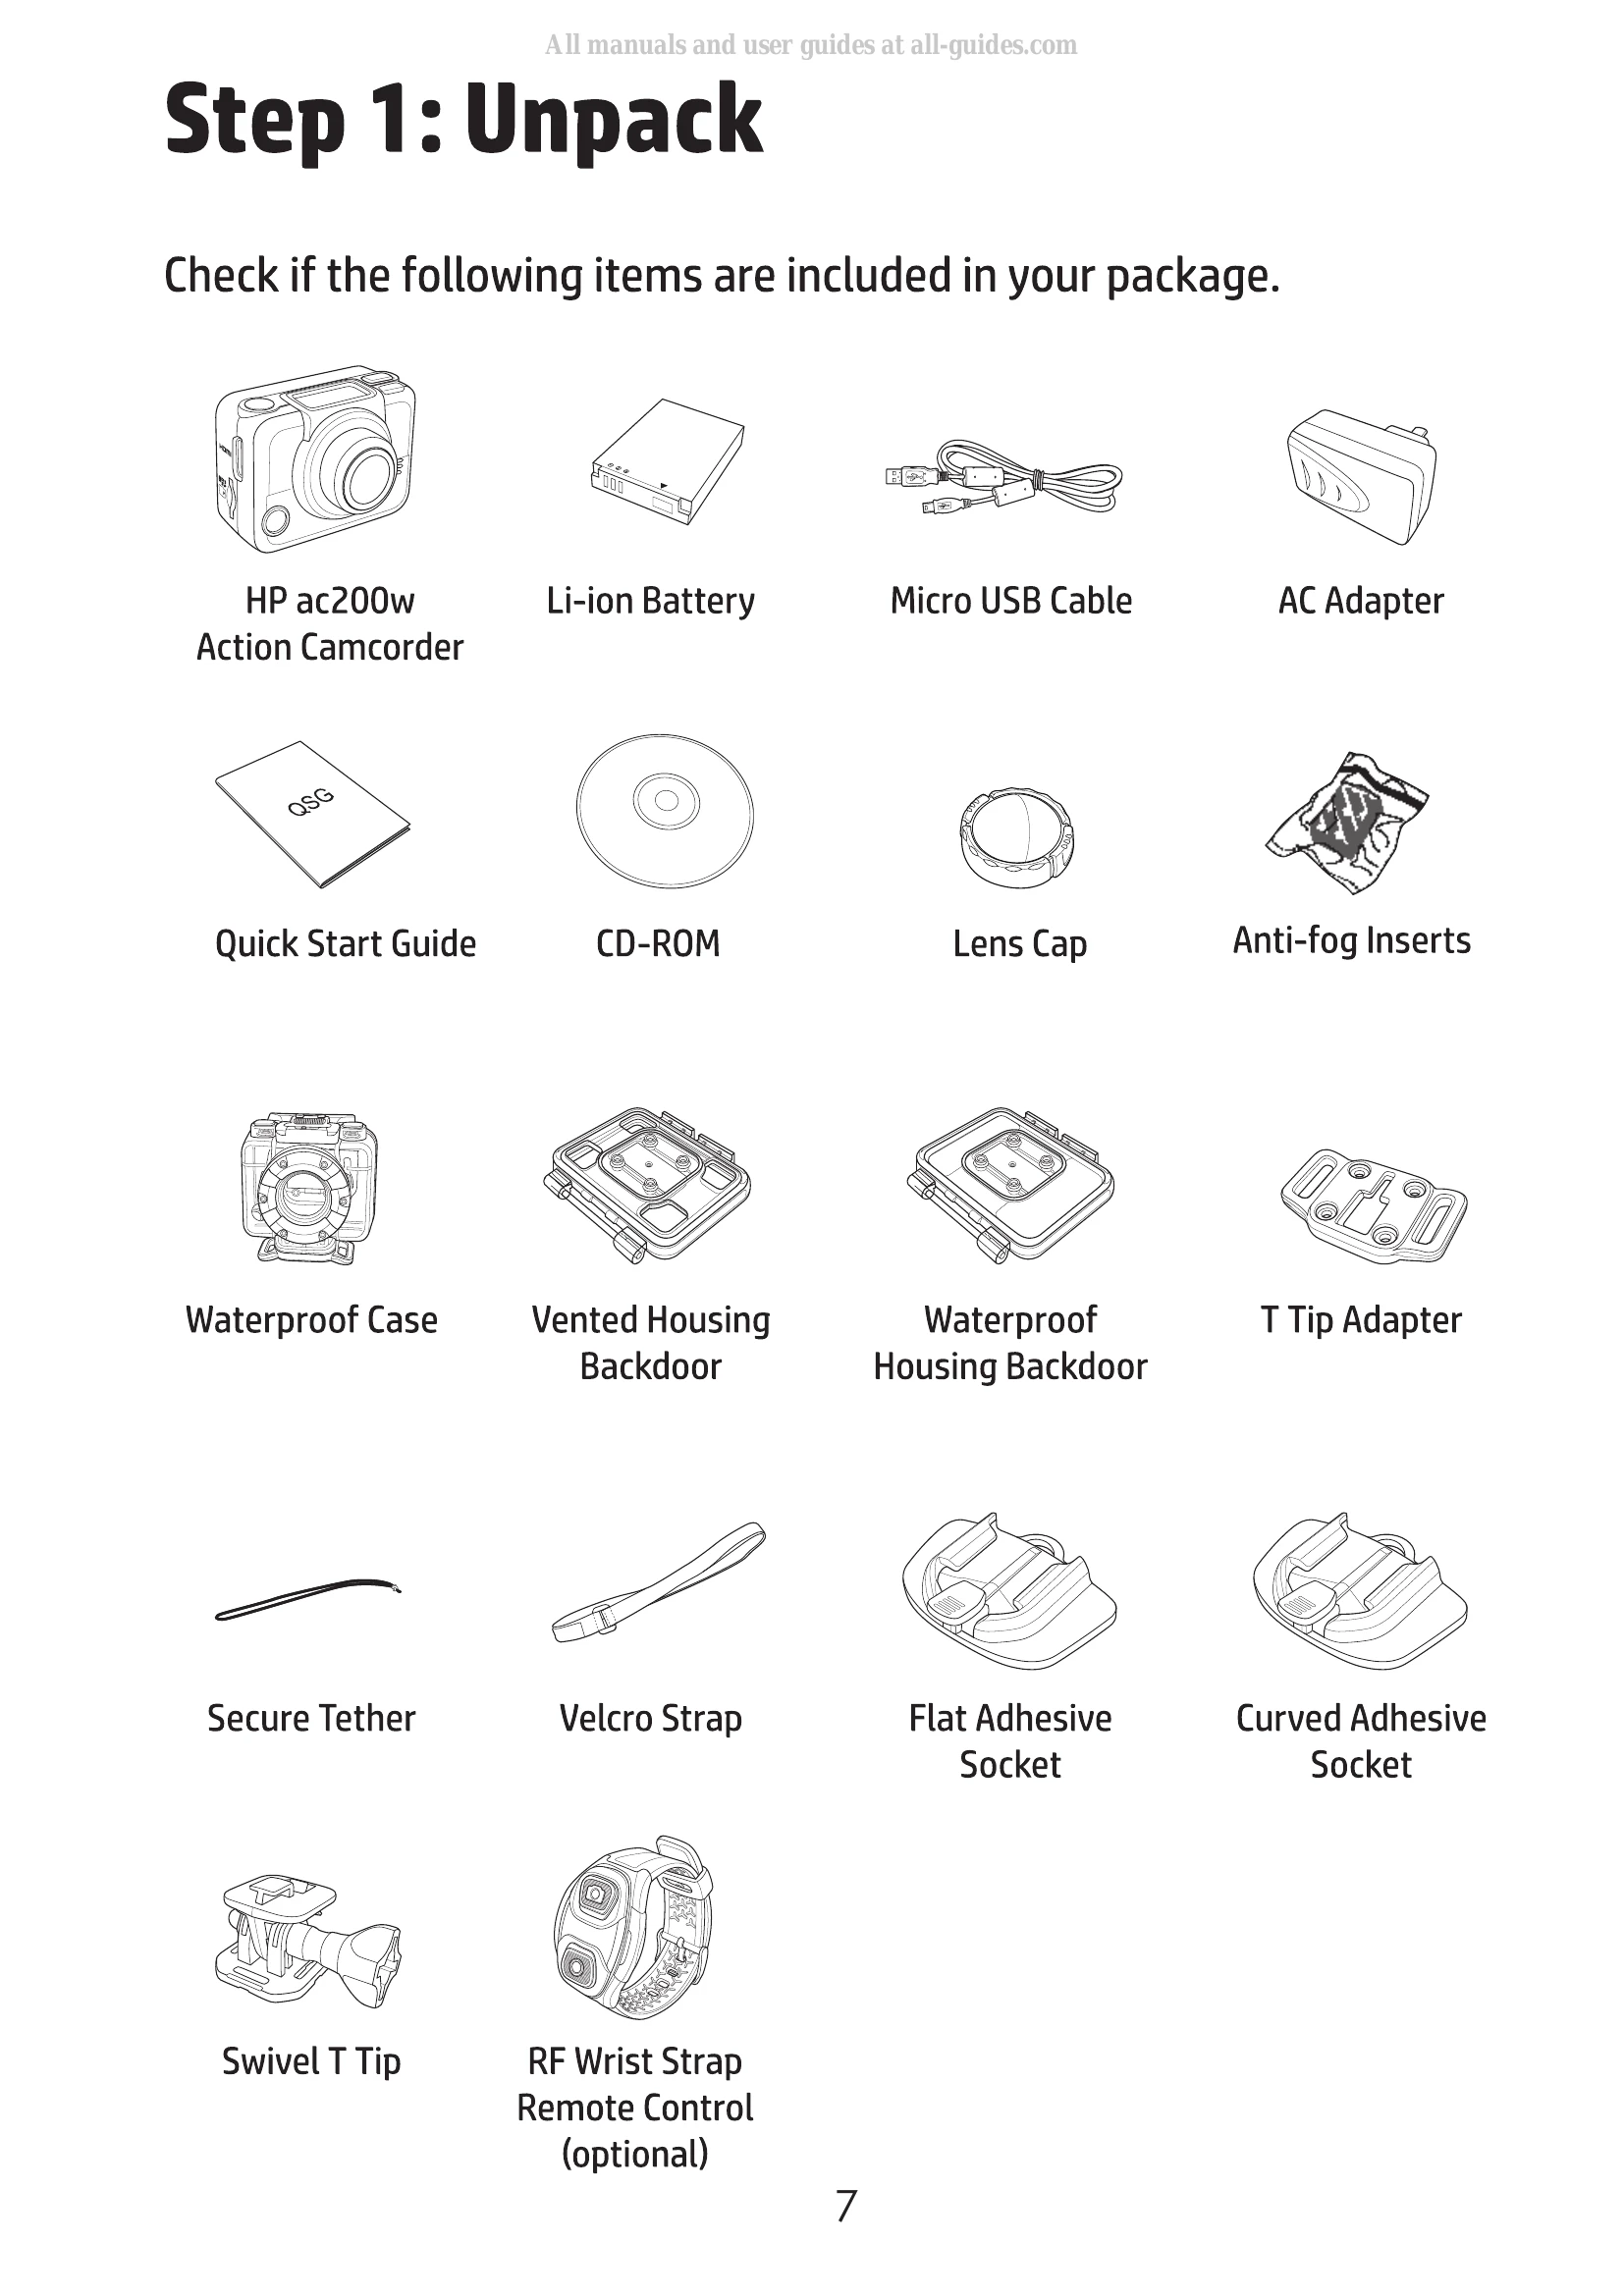
1. Unpacking: Verify all included items such as the camcorder, battery, cables, and accessories.
2. Install Battery: Open the compartment cover, align battery contacts, insert the battery, and close the cover.
3. Install microSD Card: Insert the microSD card with gold contacts facing the front until it clicks.
4. Charge Battery: Connect the micro-USB cable to the camcorder and a power source (computer or AC adapter). The battery LED will turn red while charging and off when fully charged.
5. Turn On Camcorder: Press the Power button.
6. Set Date and Time: Navigate through the Set mode to adjust year, month, day, hour, and minute.
7. Record Videos: Ensure Video mode is selected, press the Shutter button to start recording, and press it again to stop.
8. Shoot Photos: Switch to Photo mode and press the Shutter button to take a photo. Explore Burst, Time Lapse, and Self-timer modes for different shooting options.
9. View Videos/Photos: Connect the camcorder to a PC via USB or to a TV via HDMI to view content. You can also connect to a smartphone via Wi-Fi using the HP Xcam app.
10. Use Accessories: Follow instructions for using the waterproof case, T tip adapter, and other accessories.
RF Wrist Strap Remote Control: Pair and use the remote for controlling recording and taking photos.