Brand: Honeywell
Category: Security System
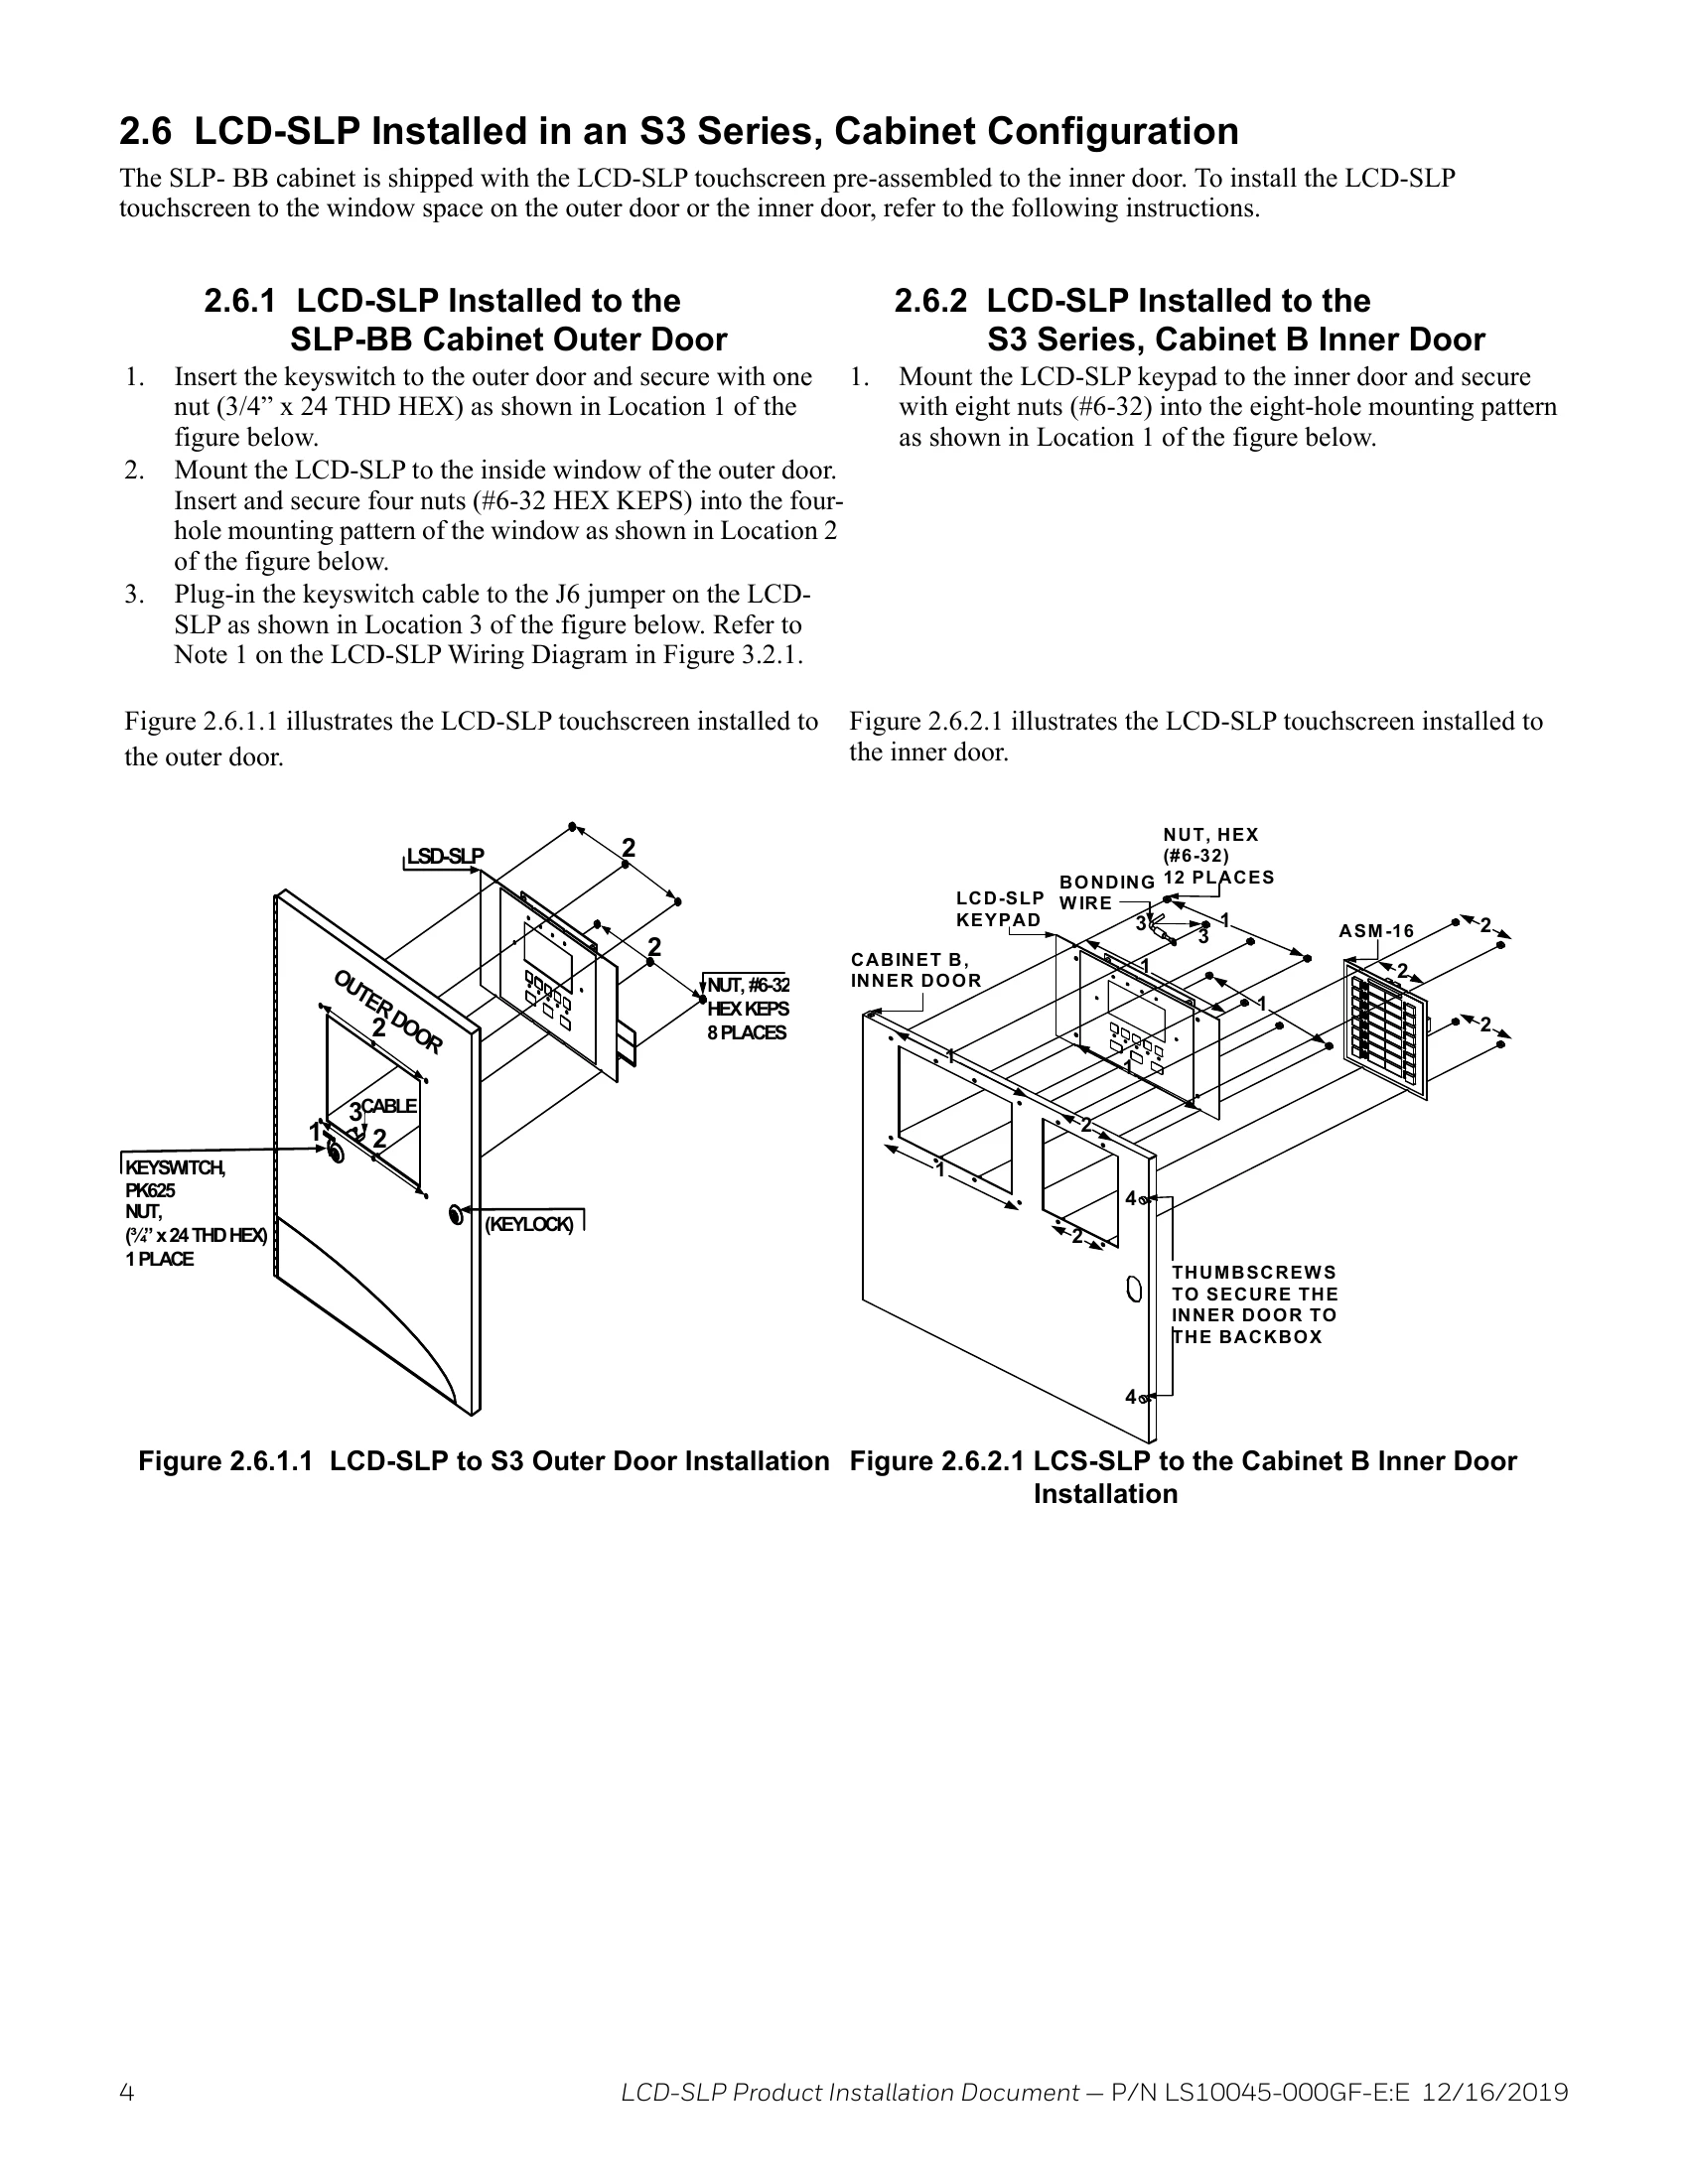
Document Type: Installation Guide
Language: EN
Brand: Honeywell
Category: Security System
Document Type: Installation Guide
Language: EN
Uploaded: Nov. 21, 2025, 6:43 p.m.
Manual Publish Date: 2019-12-16
Refer to the E3 Series Control Panel, Releasing Applications Supplement for warranty information.
| Designation | Description | Comments |
|---|---|---|
| TB1-1 | RS-485 COMM A | Communications IN (See Notes 1 and 2) |
| TB1-2 | RS-485 COMM B | Communications IN (See Notes 1 and 2) |
| TB1-3 | RS-485 COMM A | Communications OUT (See Note 3) |
| TB1-4 | RS-485 COMM B | Communications OUT (See Note 3) |
| TB2-1 | +24 V | +24 V non-resettable power IN (See Notes 1 and 2) |
| TB2-2 | GND IN | GROUND IN (See Notes 1 and 2) |
| TB2-3 | +24 V OUT | +24 V non-resettable power OUT (See Note 2) |
| TB2-4 | GND OUT | GROUND OUT (See Note 2) |
| TB2-5 | GND | Extra Ground |
| TB2-6 | Earth Ground | Earth Ground |
| J5 | Local Connection | RS-485 communications and power (ribbon cable local only) (See Note 3) |
| J6 | Keypad Lock | Jumper or Keyswitch: 1. To use the Jumper, do either of the following: JMP IN = Disabled JMP OUT = Enabled OR 2. To use the keyswitch, connect the PK-625 keyswitch. This keyswitch is keyed alike with the door lock, and must be operated to activate the keypad. |
| W1 | RS-485 Termination | W1 should be ON (top 2 pins), if it is the first or last device on the RS-485 bus. Otherwise, W1 should be OFF (bottom 2 pins). |
| SW1 | Display Address | Binary Switch Addressing |