Out of the Box: Verify contents include Thor VM1A computer and Regulatory Sheet. Keep original packaging.
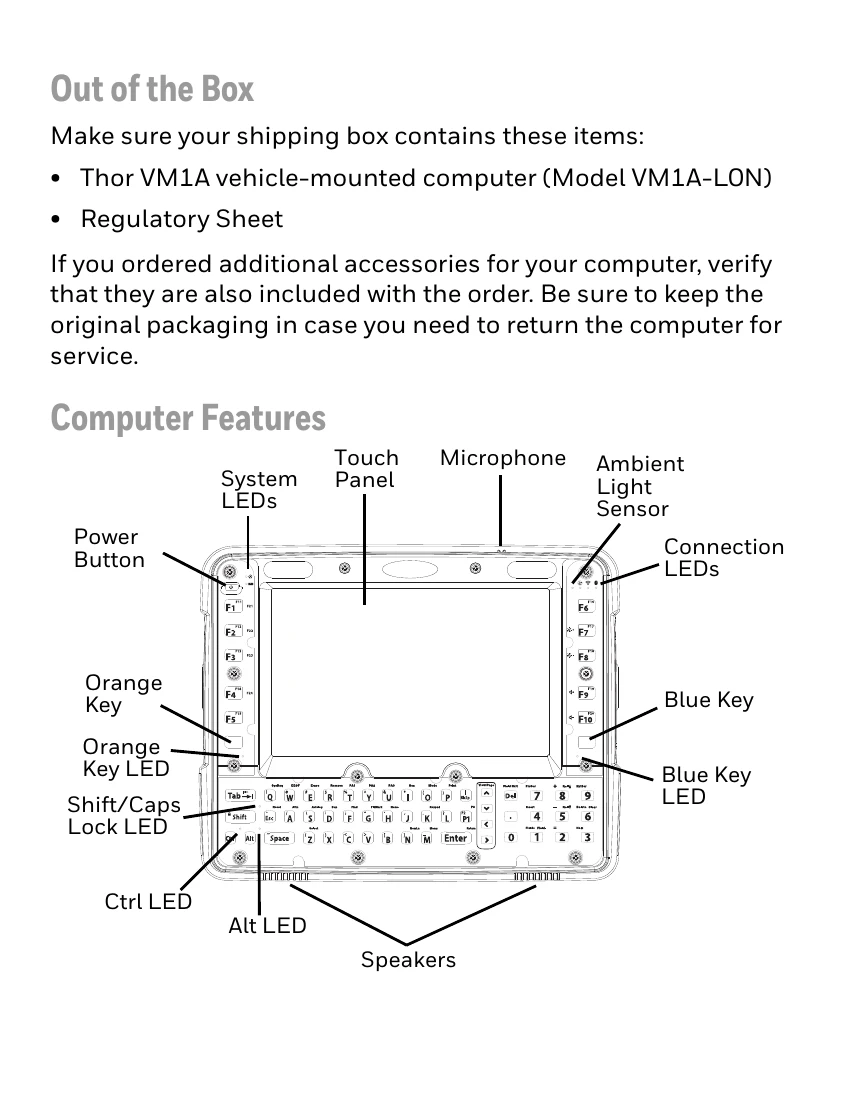
Computer Features: Familiarize yourself with buttons, LEDs, touch panel, microphone, ambient light sensor, and speakers.
Dock Features: Understand the components of Standard and Enhanced Docks, including connectors and ports.
Mount to Vehicle: Secure the VM1A in a location that doesn't obstruct vision, is protected from weather and debris, and is easily accessible. Use a RAM mount system by attaching the base to the vehicle, the RAM ball to the Smart Dock, and then the VM1A assembly to the RAM base.
Power Cable Connection: Connect the 12-48 VDC power cable to a fused circuit. Follow specific fuse requirements based on input voltage (10A for 12VDC, 6A for 24VDC, 4A for 36VDC, 3A for 48VDC). Route the cable safely, avoiding interference and extreme temperatures. Connect the power cable to the dock and the VM1A.
Power On: Turn on the power switch on the dock, then press the power button on the VM1A. Configure Auto-ON behavior.
Restart Computer: Press and hold the Power button until the options menu appears, then select Reboot and OK. For unresponsive displays, press and hold the Power button for approximately 8 seconds.