Brand: GE
Category: Other
Document Type: Installation Guide
Language: EN
Brand: GE
Category: Other
Document Type: Installation Guide
Language: EN
Uploaded: Nov. 21, 2025, 6:13 p.m.
Manual Publish Date: 2010-04-01
None
This document includes an overview of the product and detailed instructions explaining how to install and operate the unit. There is also information describing how to contact technical support if you have questions or concerns.
To use this document effectively, you should have the following minimum qualifications:
Read these instructions and all ancillary documentation entirely before installing or operating this product. The most current versions of this and related documentation may be found on our website.
Note: A qualified service person, complying with all applicable codes, should perform all required hardware installation.
Note: Notes contain important information about a product or procedure.
* This symbol indicates electrical warnings and cautions.
** This symbol indicates general warnings and cautions.
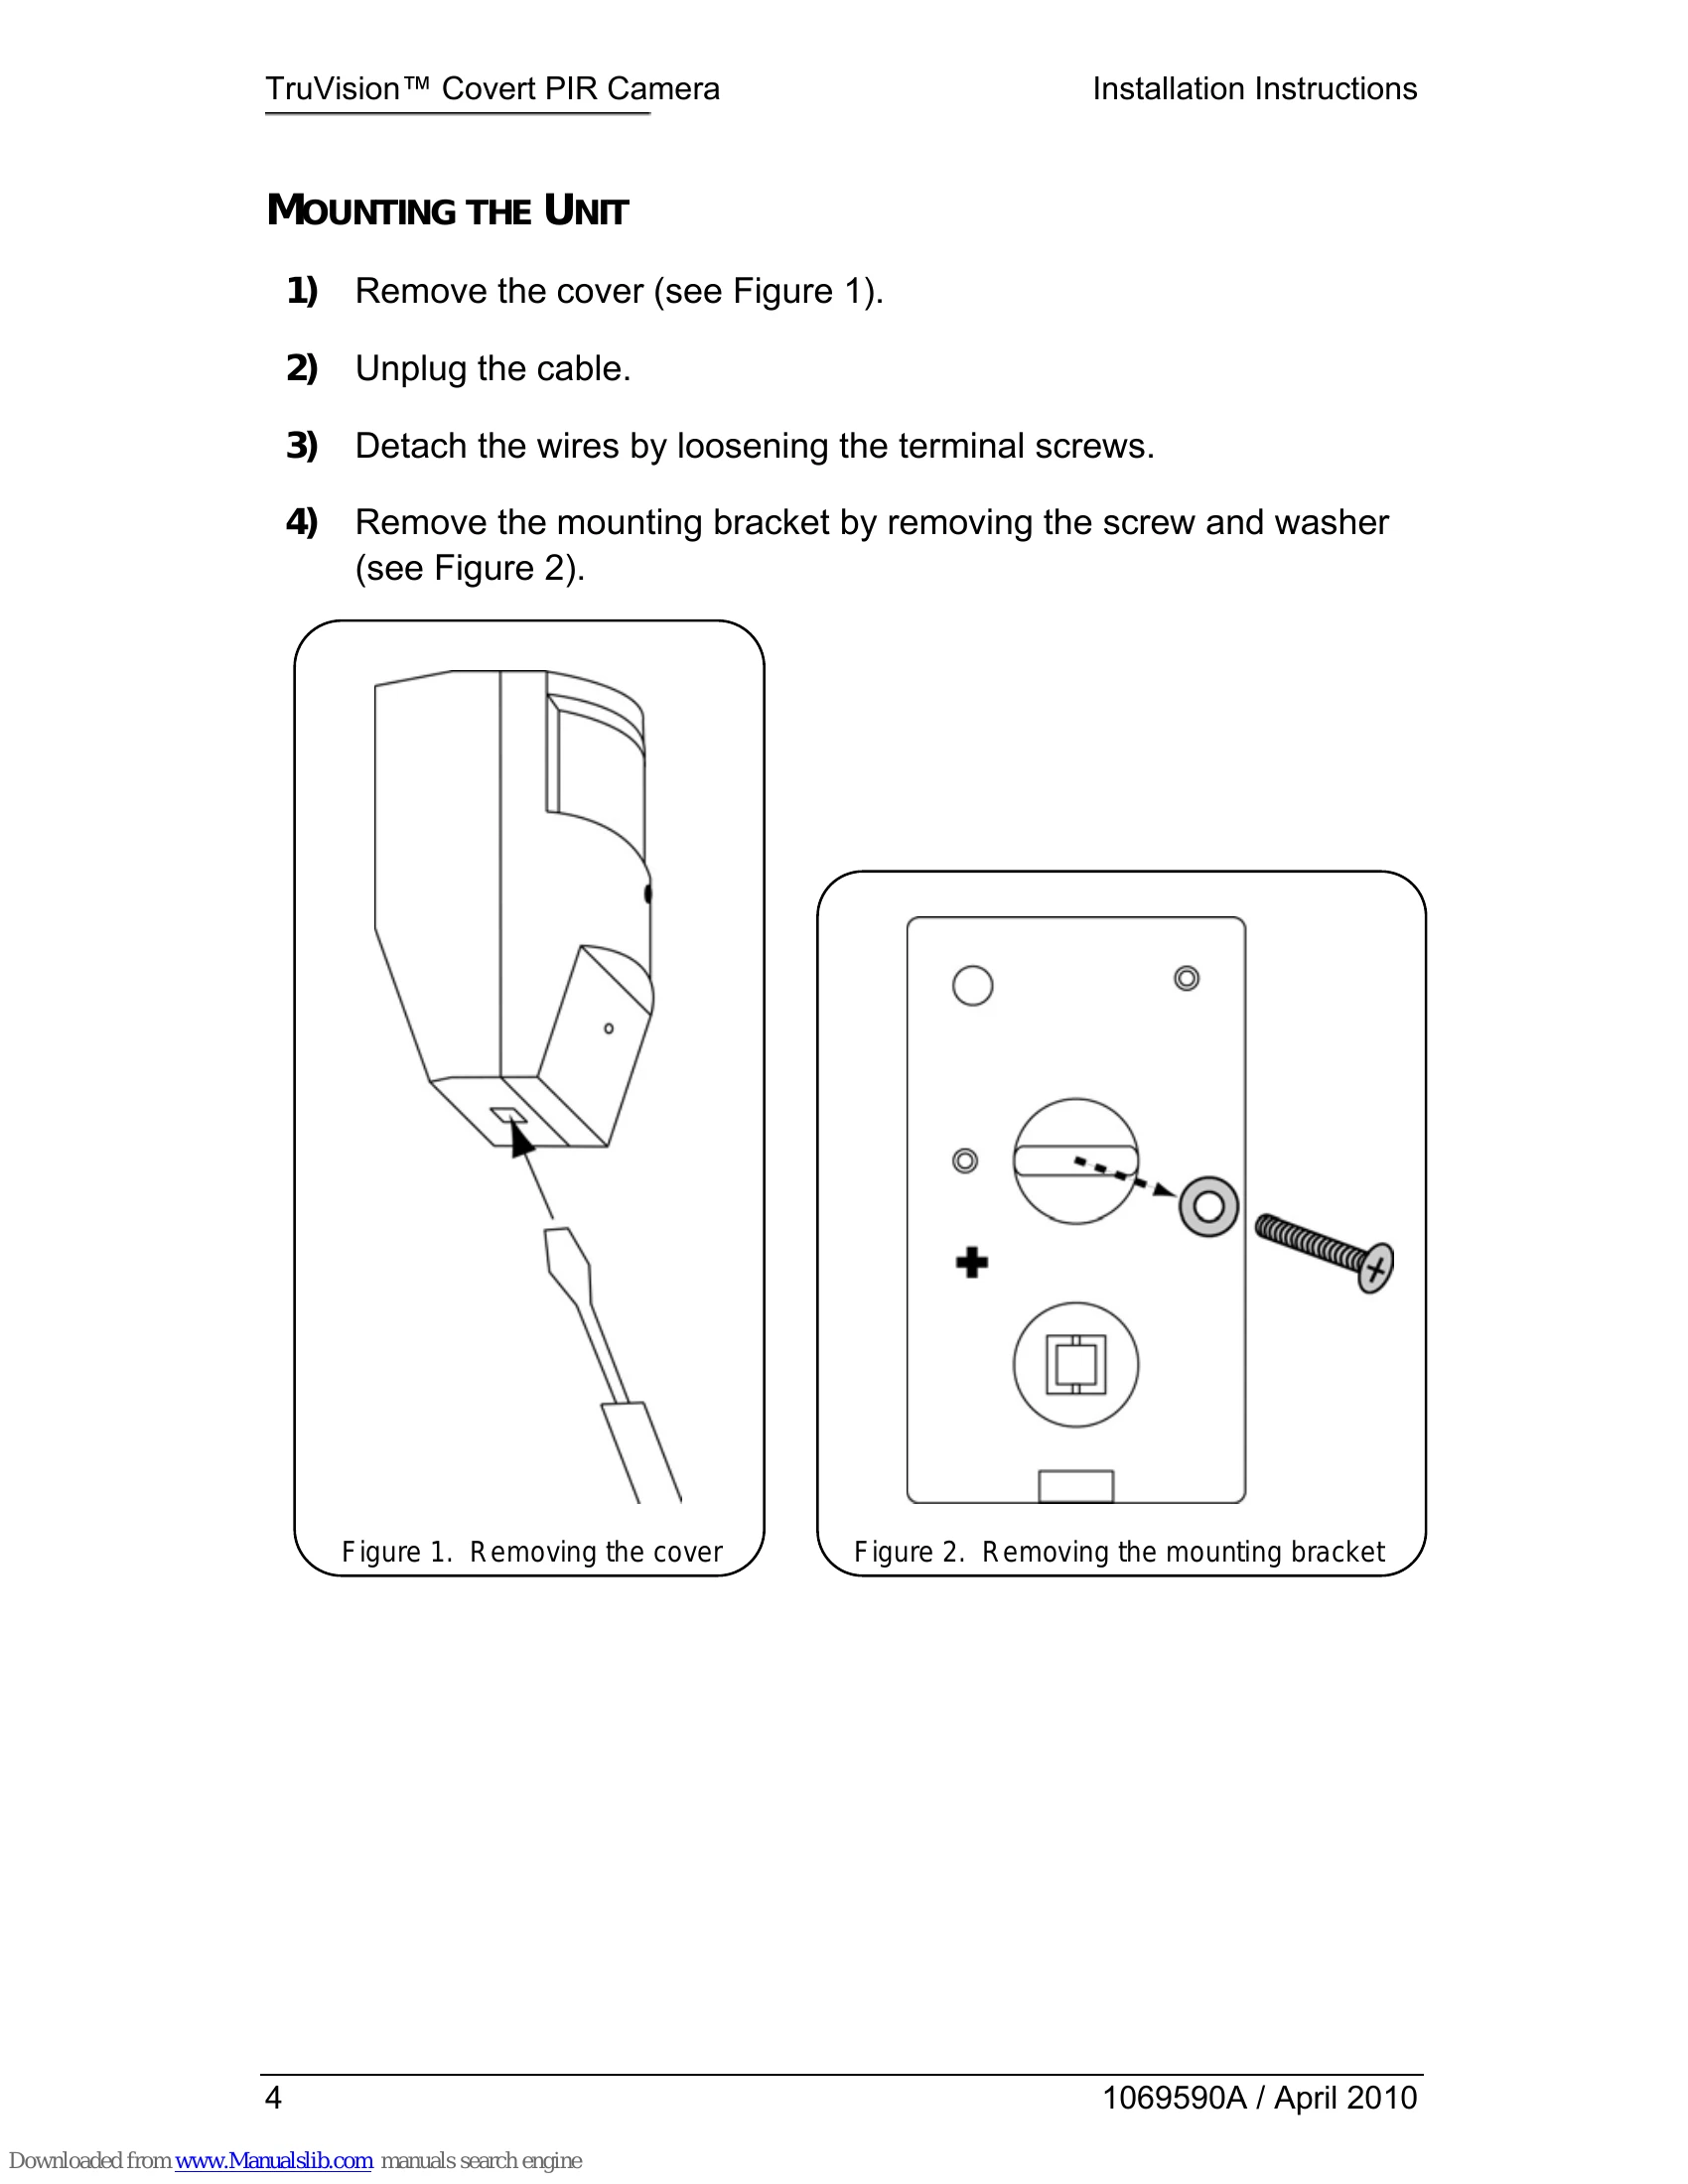
Note: Mount the camera with a 3/8-inch (1 cm) clearance from the ceiling. For optimal PIR coverage using the standard lens, mount the PIR 7 feet (2 m) above the floor. You may have to compromise to get good camera coverage.
Note: The corner-mounting tabs can be removed for surface mounting.