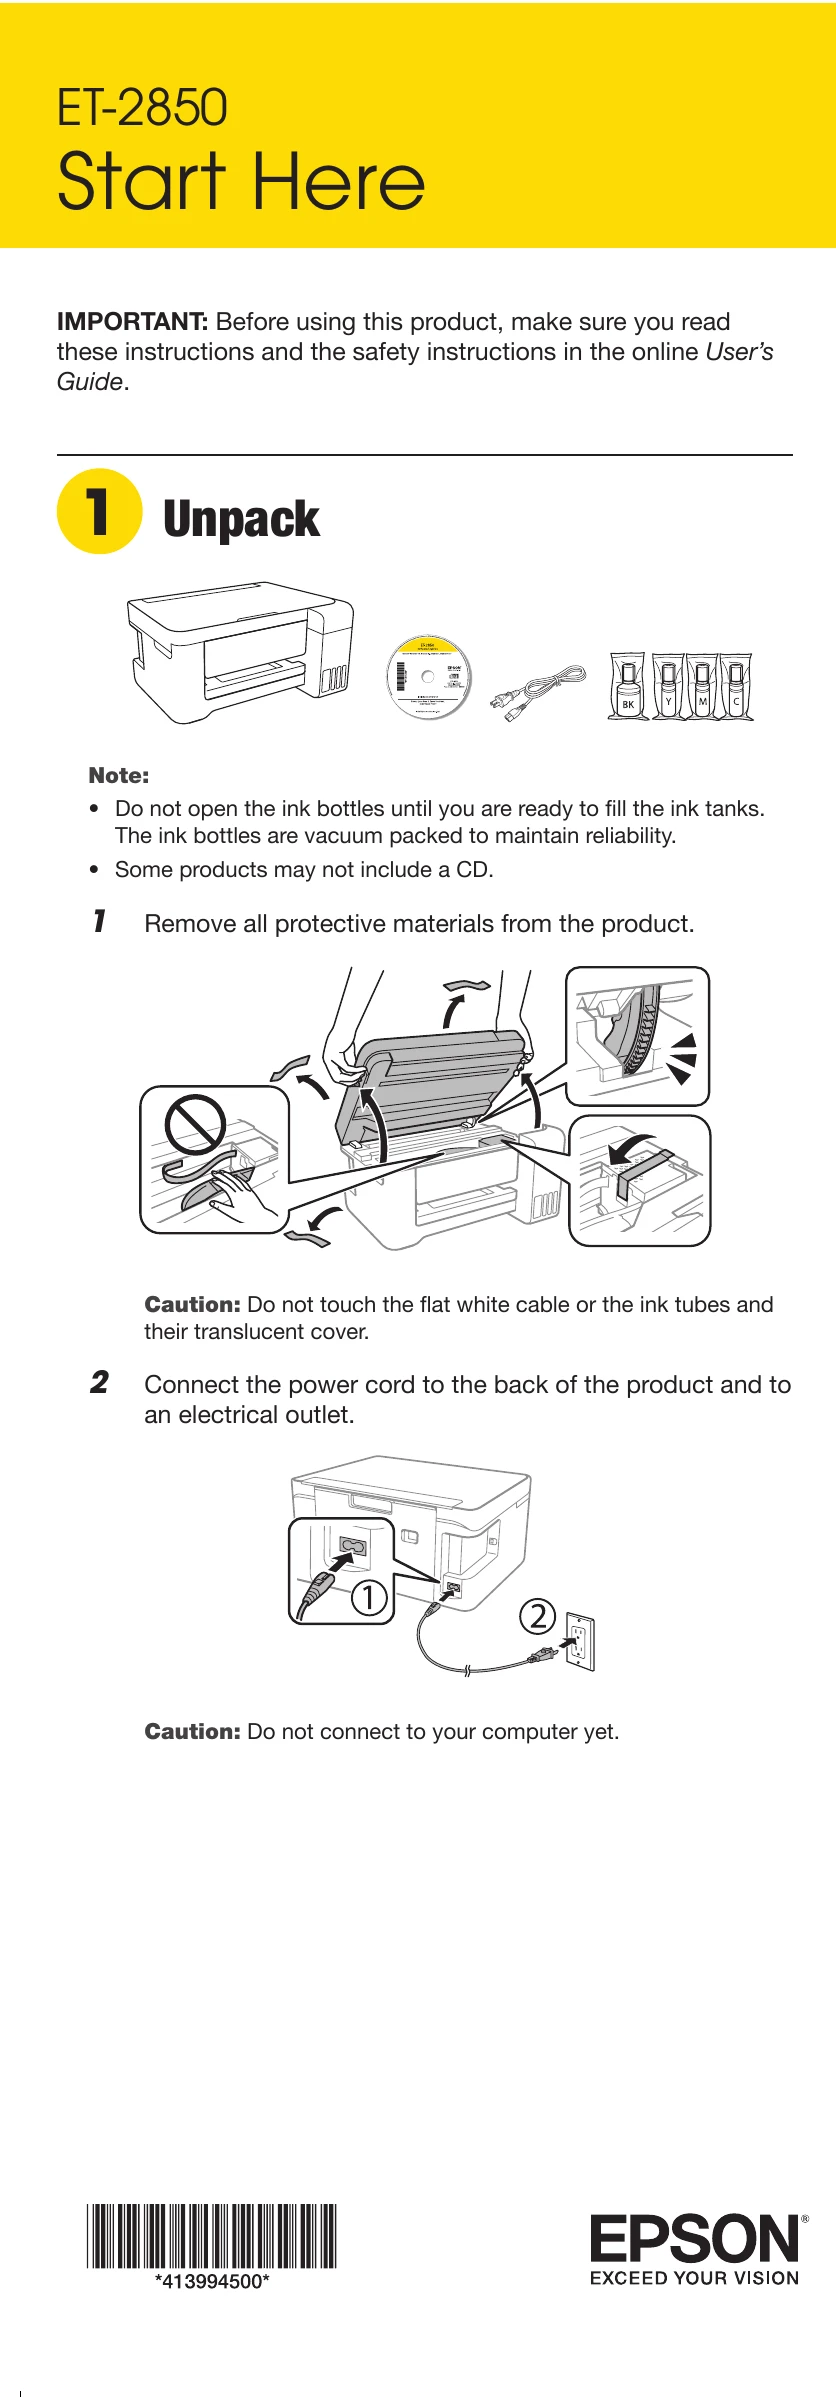
Unpack: Remove all protective materials and connect the power cord.
Choose a Setup Method: Use the Epson Smart Panel app on your smartphone or tablet for an interactive setup, or skip to ink filling if not using the app. Turn on the product by pressing the power button.
Fill Ink Tanks: Open the ink tank cover, then carefully fill each ink tank with the corresponding color ink bottle, ensuring the bottle is keyed for the correct color. Once filled, close the bottle and store it. Repeat for all colors.
Load Paper: Ensure the product is not charging ink. Open the feeder guard, raise the paper support, and tilt it back. Slide edge guides out, load paper short edge first with the glossy/printable side up, slide edge guides against the paper, and flip the feeder guard back. Pull out the output tray and select paper settings on the control panel.
Install Software: Make sure the product is NOT connected to your computer. Insert the CD (Windows only) or download and run the software package from the Epson website. Follow on-screen instructions for setup, including selecting your connection type (Wireless or Direct USB).
Mobile and voice-activated printing: Learn how to print directly from mobile devices using the Epson Smart Panel app, Epson Connect, or voice-activated assistants.