Brand: D-Link
Category: Video Conferencing
Document Type: Manual
Language: EN
Brand: D-Link
Category: Video Conferencing
Document Type: Manual
Language: EN
Uploaded: Nov. 21, 2025, 7:37 p.m.
Manual Publish Date: 2000-11-01
None
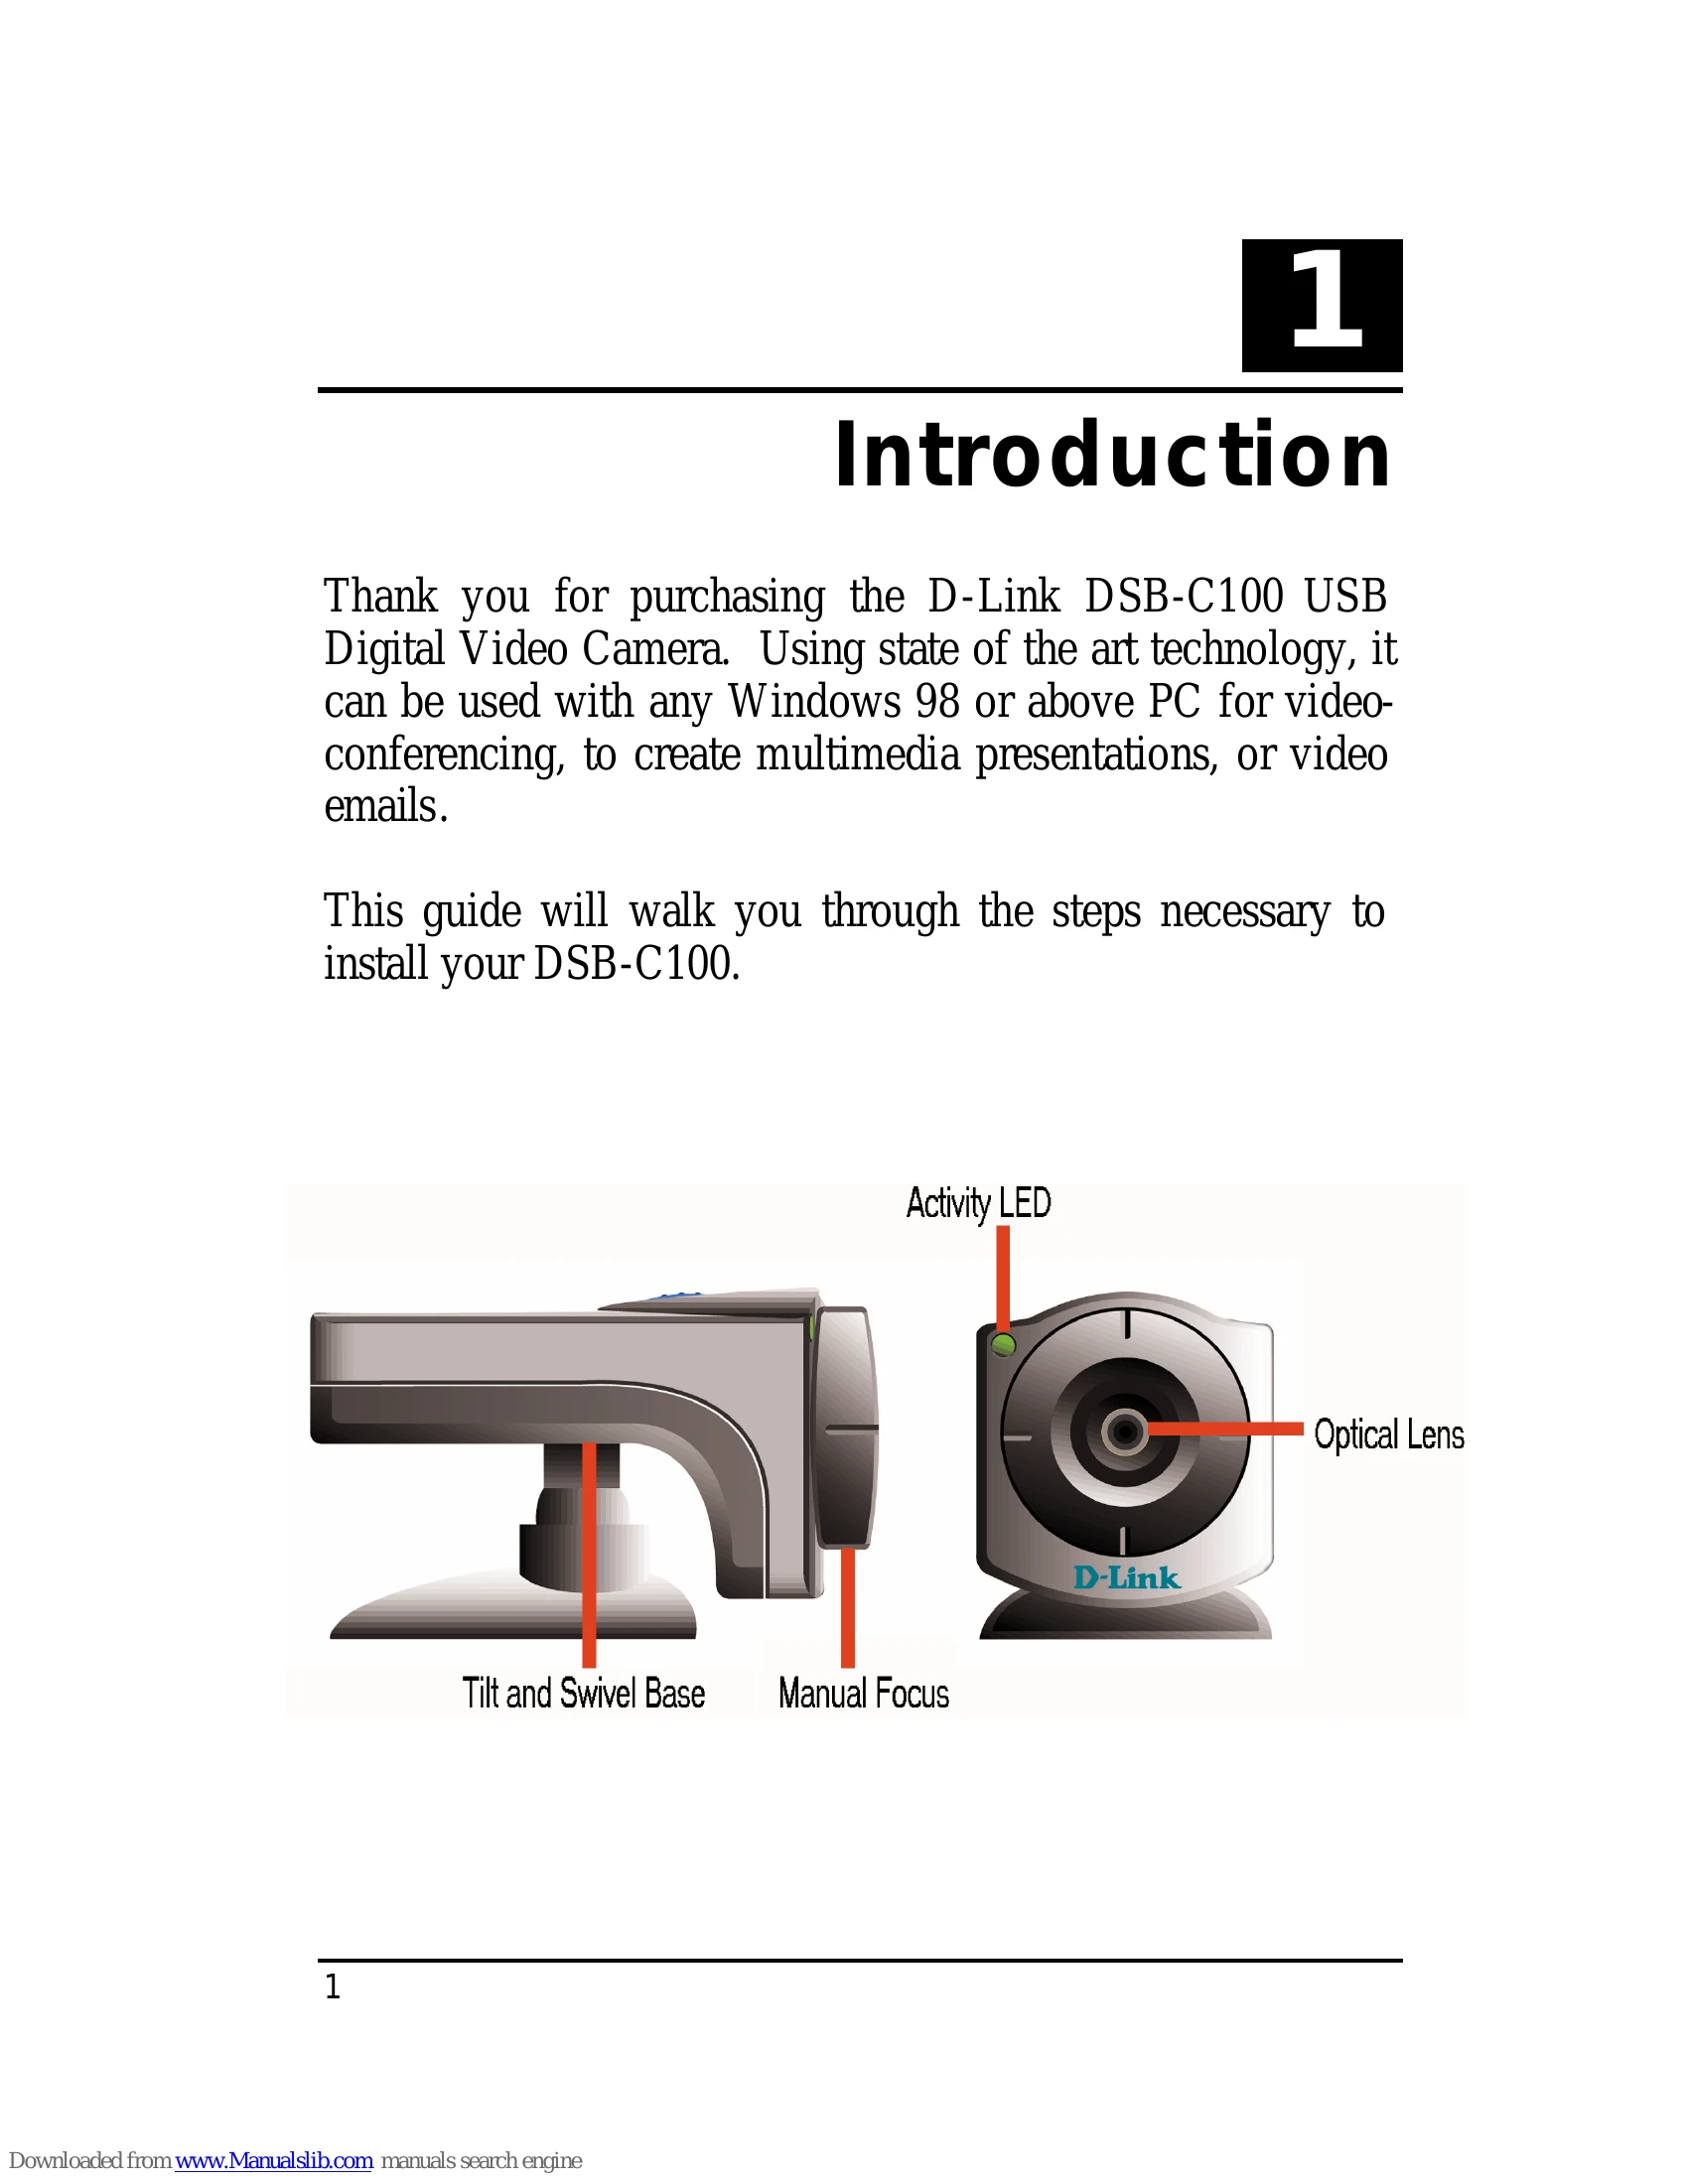
Introduction
This manual provides instructions for installing and using the D-Link DSB-C100 USB Digital Video Camera. It covers hardware installation, driver installation, quality and format adjustments, uninstallation, Macintosh OS installation, and specifications.
Hardware Installation
Connect the camera's USB type 'A' connector to an available USB port on your PC. The Add New Hardware Wizard will start automatically.
Driver Installation
Follow the prompts of the Add New Hardware Wizard. Insert the provided driver diskette when prompted and select "Floppy disk drives" for the search location.
Quality & Format Adjustment
Use the "PC Camera WDM Capture" utility to adjust image quality. Access it via Start Menu/Programs/D-Link USB Digital Video Camera+/Camera/PC Camera WDM Capture. Adjust Brightness, Contrast, Saturation, Sharpness, Hue, Backlight, and Exposure under the "Camera Controls" tab. Format settings for video, frame rate, and output size can be adjusted under "Video Capture Pin".
Uninstalling the Camera
Go to Start Menu/Programs/D-Link USB Digital Video Camera/Camera/Uninstall D-Link USB Digital Video Camera+ and follow the prompts.
Macintosh OS 8.6 or Above Installation
Insert the MAC Driver CD-ROM, double-click "USB Camera installer", and follow the on-screen instructions. Do not plug in the camera until instructed.
Specifications
Details the sensor, illumination, interface, compression, and other technical specifications of the camera.