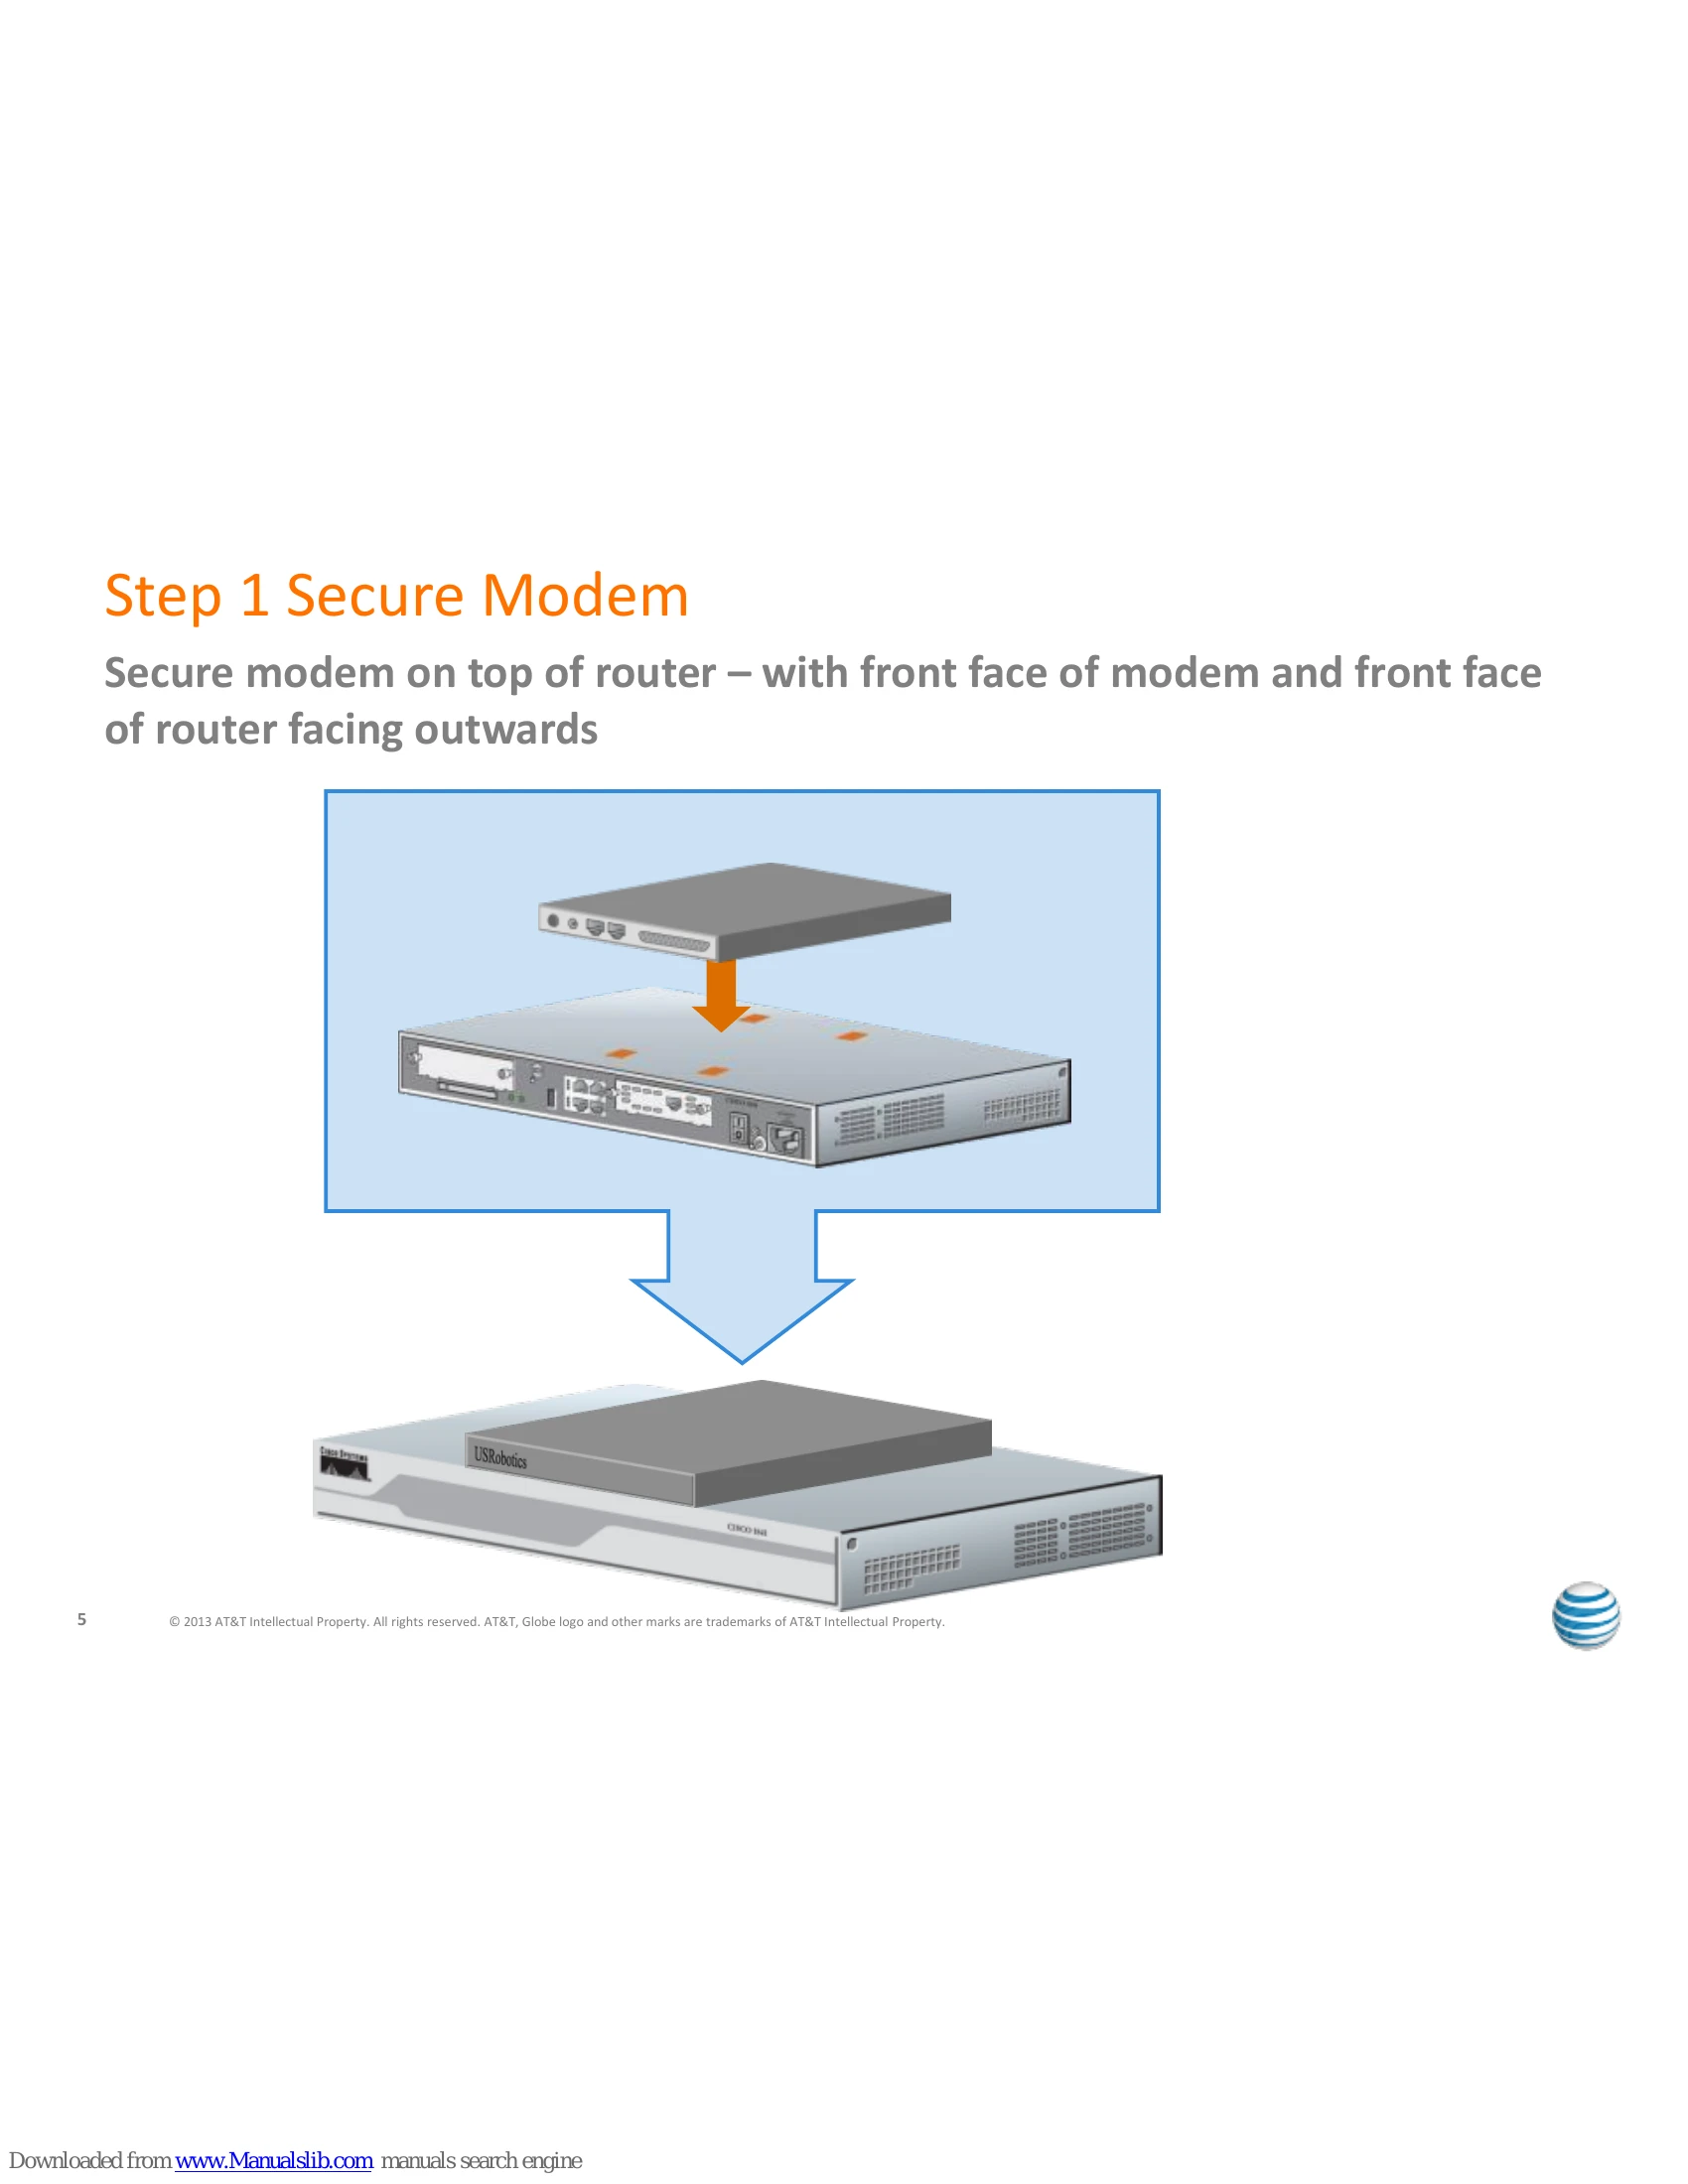
Step 1: Secure Modem: Place the modem on top of the router with both front faces pointing outwards.
Step 2: Attach Power Cables: Connect power cords to the router and the modem, then plug them into a power receptacle.
Step 3: Connect POTS and Console Cable: Connect the analog POTS line from the modem to the wall jack using an RJ11 cable. Connect the console cable to the router's blue-edged console port.
Step 4: Connect Console Cable to Modem: Connect the console cable to the modem. (Refer to Service Director Assembly Guide for dual routers/Call Director setups).
Step 5: Connect Router to Access Circuits: Connect multiple T1 circuits to the EHWIC card slots on the router, ensuring correct mapping as per the Site Documentation Package. This may be done at Test and Turn Up.
Step 6: Connect Router to Local Network: Plug an Ethernet cable into the GE0/1 port on the back of the router or as instructed in the Site Documentation Package. Connect the other end to your local network (server, computer, etc.). Power on the equipment.