Brand: CASIO
Category: Digital Camera
Document Type:
Language: EN
Brand: CASIO
Category: Digital Camera
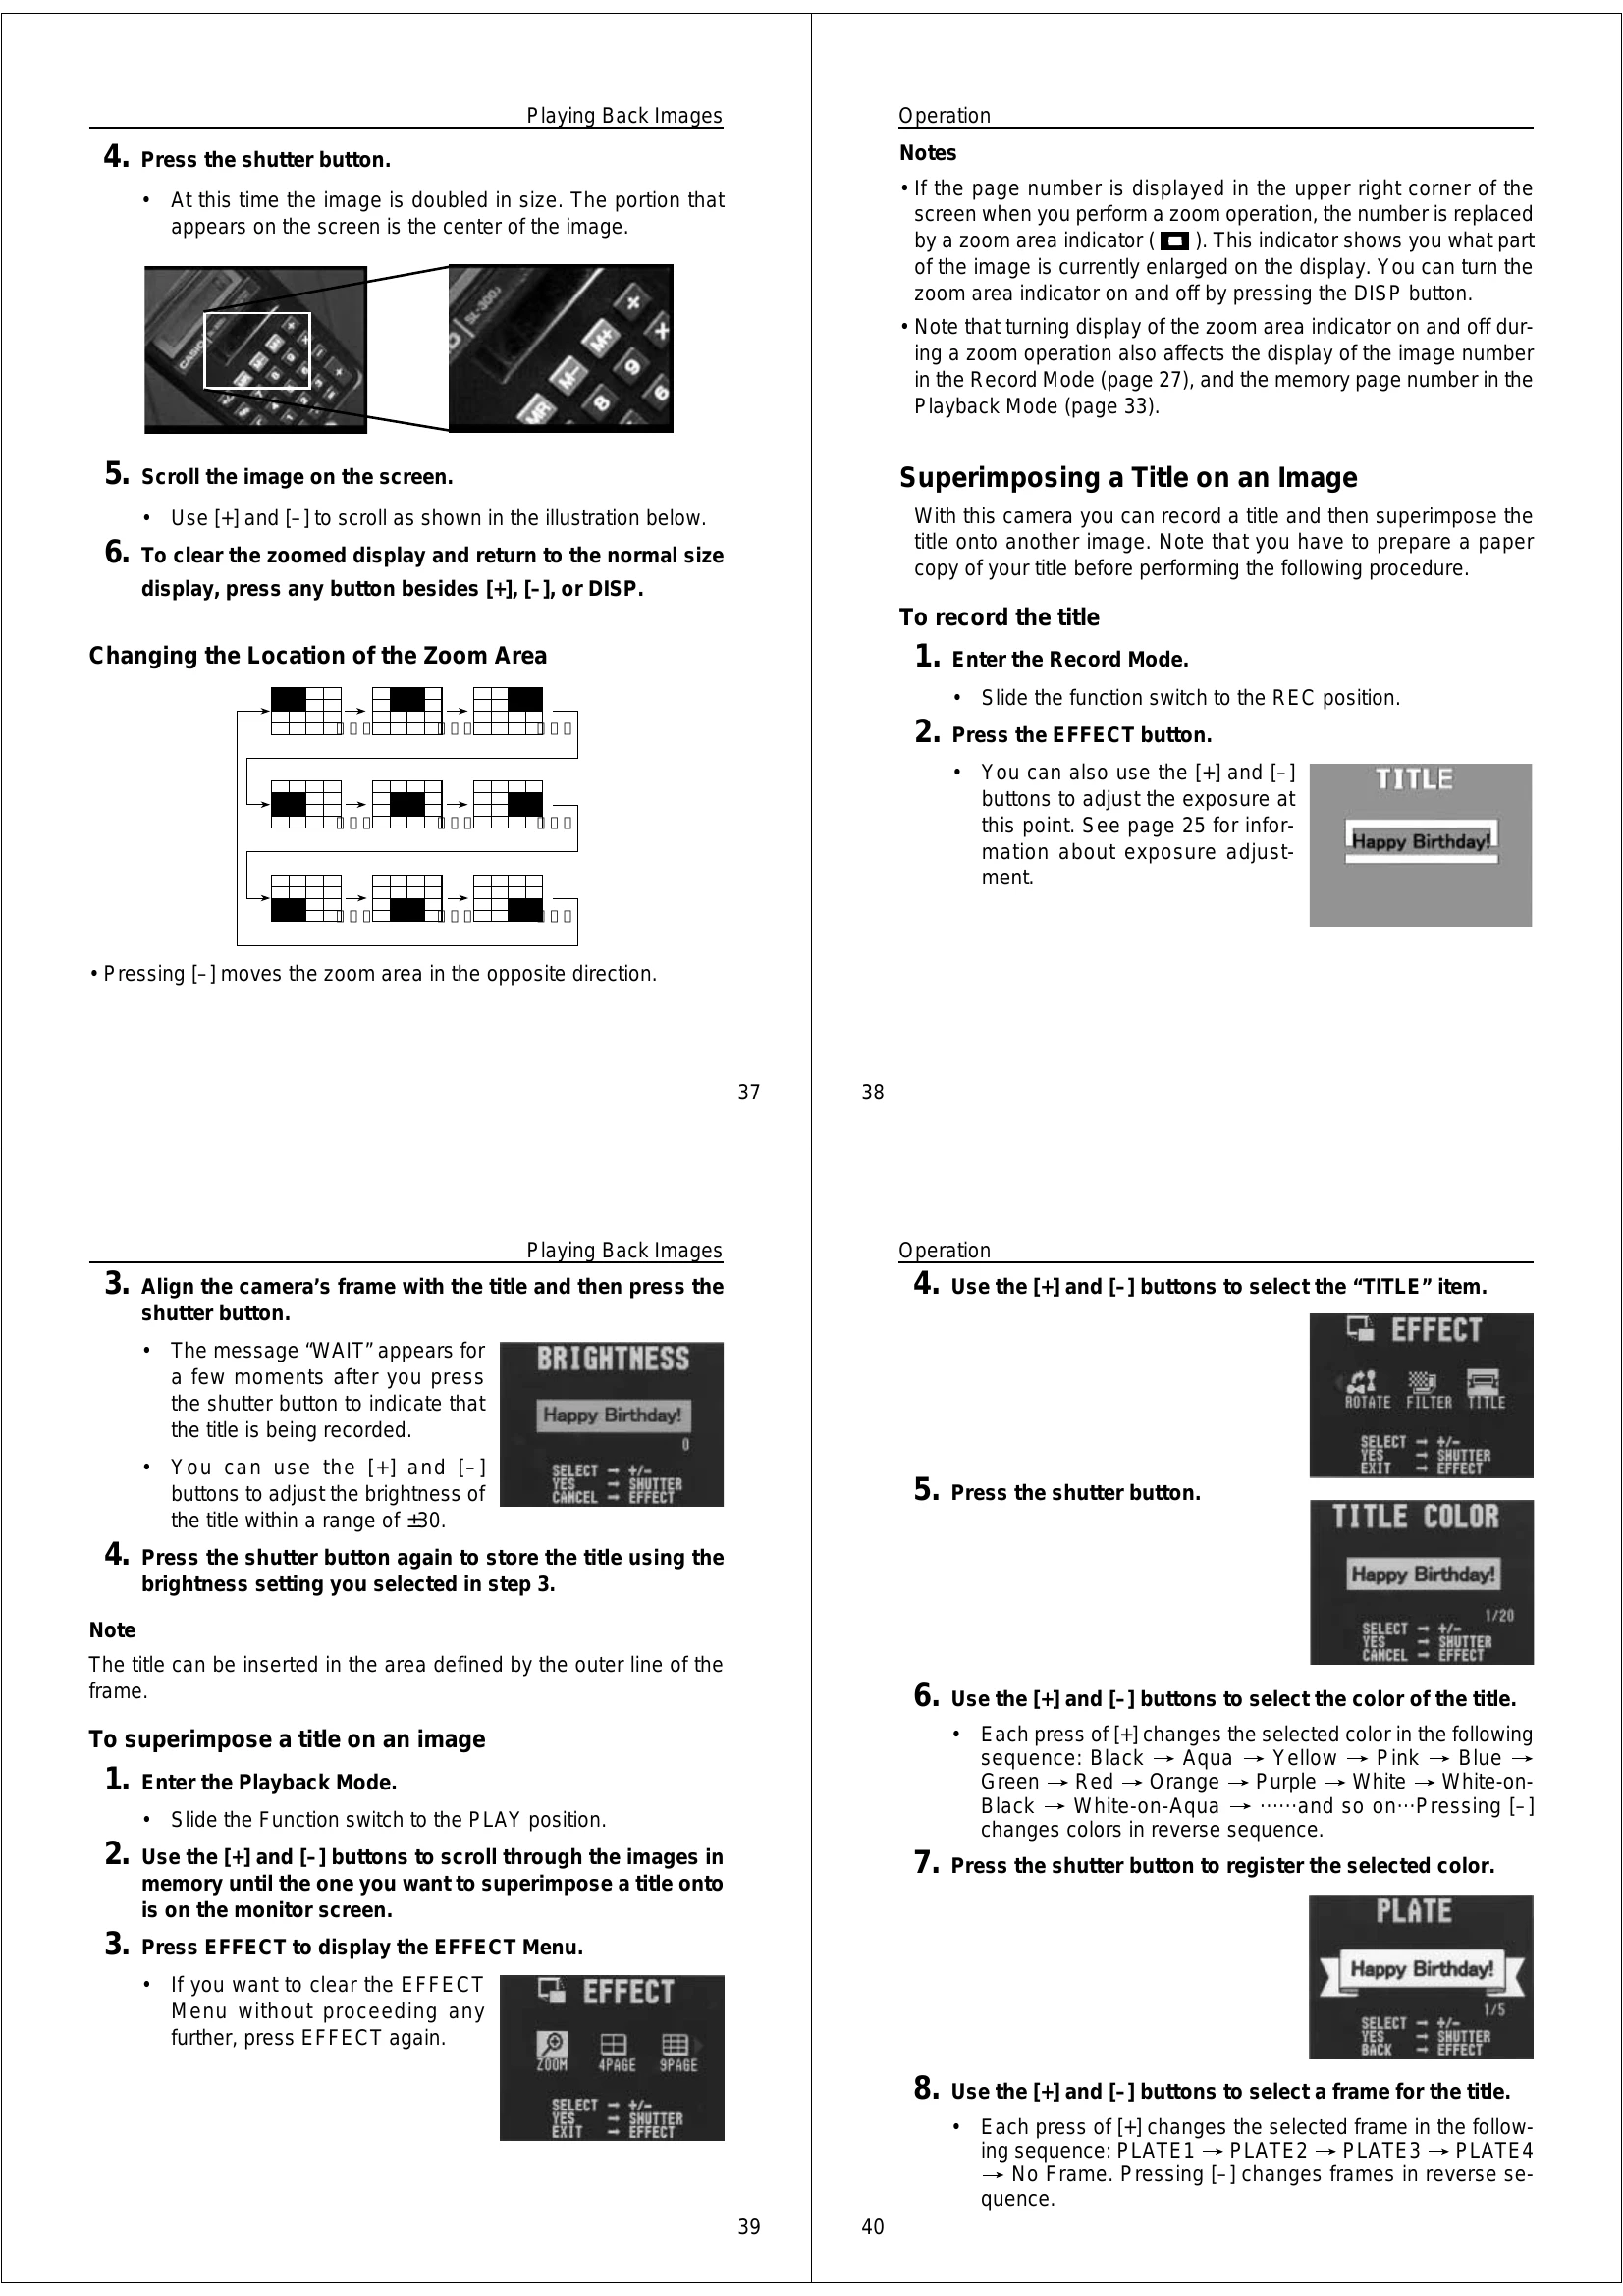
Document Type:
Language: EN
Uploaded: Aug. 9, 2025, 11:39 p.m.
No specific warranty period information is available in this manual.
Powering On/Off: Use the POWER switch.
Recording Images:
Playback:
Connecting Devices: Use the DIGITAL or VIDEO OUT terminals with appropriate cables.
| Symptom | Probable Cause | Action |
|---|---|---|
| No power |
1. Batteries not loaded correctly. 2. Dead batteries 3. Wrong AC adaptor |
1. Correctly load batteries (page 13). 2. Replace batteries with new ones (page 13). 3. Use only recommended AC adaptor. |
| Sudden power failure |
1. Operation of Auto Power Off 2. Low battery power Use of manganese batteries. |
1. Turn power back on. 2. Replace batteries with new ones (page 13). Replace manganese batteries with alkaline batteries. |
| No recording when shutter button is pressed | Function switch sets to PLAY. | Set function switch to REC. |
| Power failure during self-timer operation | Low battery power | Replace batteries (page 13). |
| Indicator on LCD | Over exposure | Change aperture switch setting to [] (page 26). |
| Indicator on LCD | Under exposure | Change aperture switch setting to [O] (page 26). |
| Poor LCD image focus | Incorrect NORMAL/MACRO switch setting | Use NORMAL for scenery and group photos, and MACRO for close-ups (page 24). |
| Poor color and brightness when indoors | Indoor fluorescent lighting | Shoot under incandescent or other non-fluorescent lighting (page 21). |
| Recorded image has greenish tinge. | Strong direct or reflected sunlight | Change aperture setting to []. Note that this condition is due to CCD characteristics, and does not indicate camera malfunction. |
| Color of recorded image is strange. |
1. Reflection from sunlight or light from another source. 2. Difference between Record Mode and Playback Mode characteristics. |
1. Reorient the camera so that light is not shining directly into lens. 2. This difference does not indicate a problem or malfunction. |
| No +/- button operation during multi-page display. | Button operation during page change | Wait until an image is on the LCD before performing a button operation. |
| All pages do not appear during auto play. | Protected memory pages are hidden. | Unhide protected memory pages (page 52). |
| Camera is connected to a TV, but LCD monitor contents do not appear on TV screen. |
1. Function switch set to PLAY. 2. Incorrect camera-TV connection 3. Wrong TV set up |
1. Set function switch to PLAY (page 31). 2. Connect correctly using the special video cable that comes with the camera (page 32). 3. Set up the TV correctly. |
| Some images are missing. | Protected memory pages are hidden. | Unhide protected memory pages by holding down [-] while turning power on (page 52). |
| Cannot use multi-page display. | Protected memory pages are hidden. | Unhide protected memory pages by holding down [-] while turning power on (page 52). |
| Cannot protect memory pages. | Protected memory pages are hidden. | Unhide protected memory pages by holding down [-] while turning power on (page 52). |
| ALL DATA IS PROTECTED! appears on monitor and images do not appear. | Protected memory pages are hidden. | Unhide protected memory pages by holding down [-] while turning power on (page 52). |
| Delete operation does not start when DEL is pressed. |
1. All pages are protected. 2. Multi-page display or zoom display. |
1. Unprotect the page you want to delete (page 50). 2. Change to a normal-size, 1-page display format. |
| All buttons and switches do not operate. | Malfunction due to static electrical charge or strong impact | Remove batteries and disconnect the AC adaptor if you are using one. Restore power and turn the camera on. If this does not work, contact your dealer or an authorized CASIO service provider. |
| Very bright or very dark LCD image. | Wrong BRIGHT setting | Adjust the BRIGHT setting (page 11). |
| No buttons or switches operate. | Malfunction due to exposing camera to electrostatic charge. | Remove batteries and/or unplug the AC adaptor. Reload batteries and/or plug in AC adaptor and try operation again. |
| LCD monitor is too bright or too dark. | Incorrect BRIGHT setting (brightness) setting. | Adjust the BRIGHT (brightness) setting. |
| Cannot exchange data between two cameras |
1. Incorrect cable connection 2. Camera connected to power is not turned on. 3. Function switch sets to REC. |
1. Connect correctly (page 58). 2. Turn power on after connecting cable. 3. Set function switch to PLAY (page 31). |
| Pressing MODE does not change the FINE→NORMAL Menu. | There are no convertible images in memory. | Pressing MODE again. |
| Cannot transfer data (error keeps occurring) |
1. Sending camera's memory is empty. 2. Receiving camera's memory is full 3. Receiving camera's function switch is in REC position. 4. The message "ALL DATA IS PROTECTED" is on the monitor of the sending camera. |
1. Correct the situation and try again. 2. Correct the situation and try again. 3. Change function switch setting of receiving camera to PLAY (page 31). 4. The sending camera's protected memory pages are hidden. Unhide protected memory pages by holding down [-] while turning power on (page 52). |
| Keys of connected camera are disabled. | Connected camera operation is disabled during data communications. | Normal operation will return when you exit data communications by pressing EXIT. |
| Low battery (indicated by |
Low battery | Replace batteries or use the AC adaptor (page 13). |
| Disconnection of cable during data communication | Disconnection of cable | Securely reconnect the cable. |