Brand: CASIO
Category: Digital Camera
Document Type:
Language: EN
Brand: CASIO
Category: Digital Camera
Document Type:
Language: EN
Uploaded: Aug. 9, 2025, 11:39 p.m.
Manual Publish Date: 2012-01-01
Your CASIO camera is packed with a powerful selection of features and functions to make recording of digital images easier, including the following main functions:
Select Premium Auto recording and the camera automatically determines whether you are shooting a subject or scenery, and other conditions. Premium Auto delivers higher image quality than standard Auto. → See page 24 for more information.
The Make-up Function smoothes the skin texture of the subject and softens facial shadows caused by harsh sunlight for better looking portraits. →See page 38 for more information.
Simply select the sample scene you want and the camera sets up automatically. Then all you need to do is press the shutter button for perfect images. See page 46 for more information.
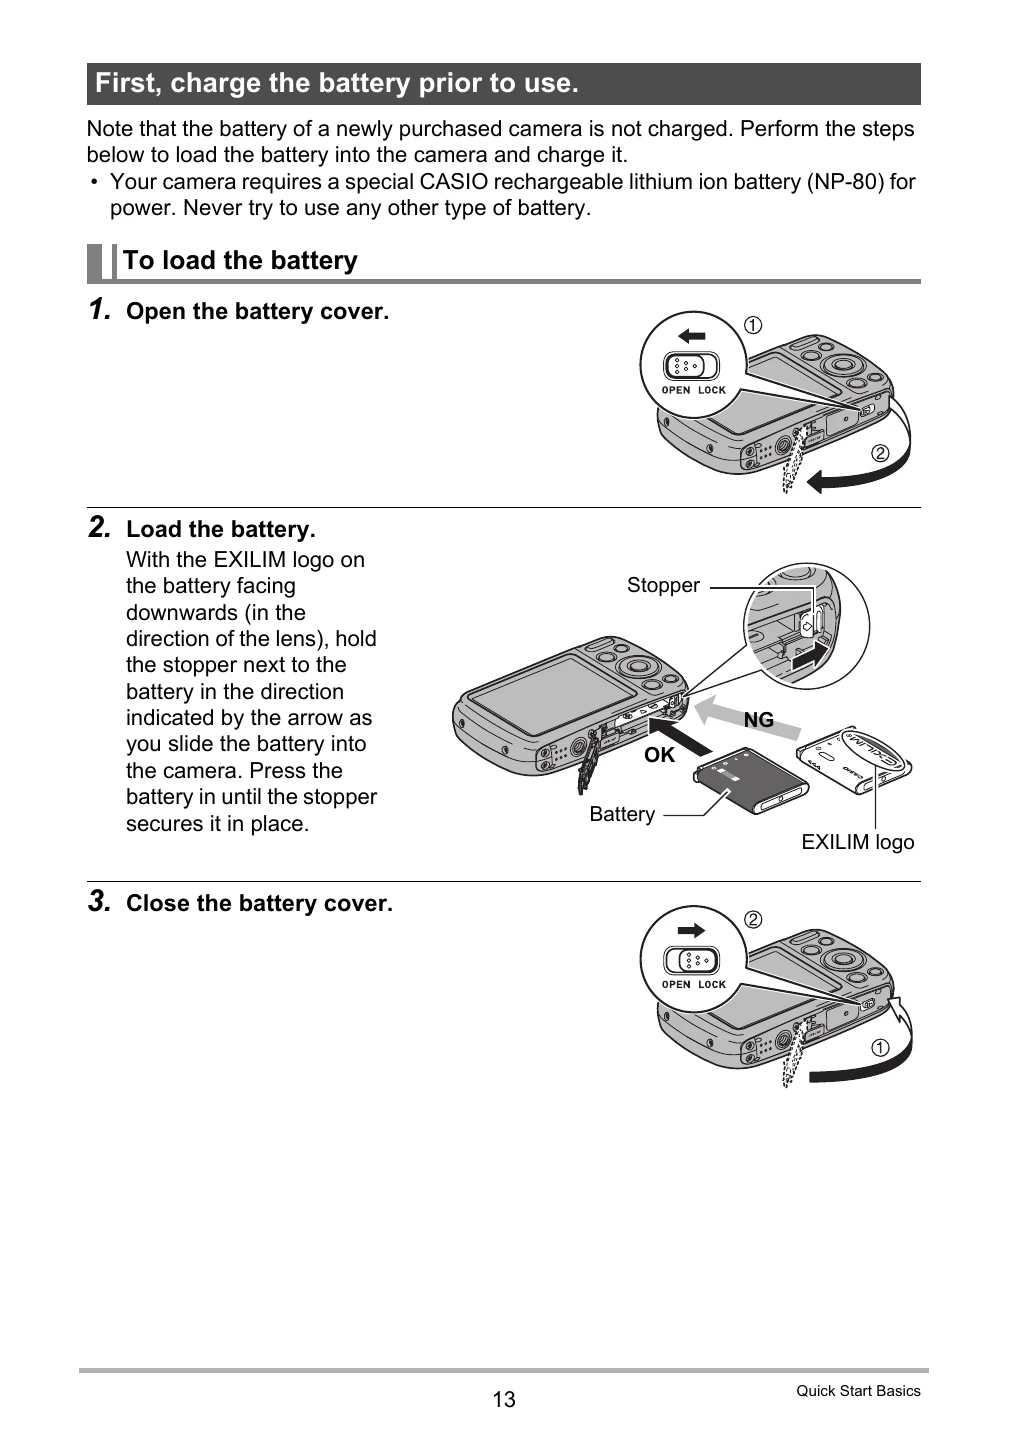
Note that the battery of a newly purchased camera is not charged. Perform the steps below to load the battery into the camera and charge it.
You can use either of the two following methods to charge the camera's battery:
The adaptor lets you charge the battery while it is loaded in the camera. While the camera is turned off, connect in the sequence shown below. Charging time: Approximately 120 minutes.
USB connection lets you charge the battery while it is loaded in the camera. While the camera is turned off, connect in the sequence shown below. Charging time: Approximately 140 minutes.
| Problem | Possible Cause and Recommended Action |
|---|---|
| The subject is out of focus in the recorded image. | The image may not be focused properly. When composing the image, make sure the subject is located inside the focus frame. |
| The flash does not fire. |
|
| The red ☰ (Flash Off) icon is displayed on the monitor screen and the flash does not fire. | The flash unit may be malfunctioning. Contact a CASIO authorized service center or your original retailer. Note that though the flash will not fire, you still can use the camera for non-flash shots. |
| Camera powers down during Self-timer countdown. | The battery may be dead. Charge the battery (page 14). |
| The monitor screen image is out of focus. |
|
| There is a vertical line in the monitor screen image. | Shooting a very brightly lit subject can cause a vertical band to appear in the monitor screen image. This is a CCD phenomenon known as “vertical smear”, and does not indicate malfunction of the camera. Note that vertical smear is not recorded with the image in the case of a snapshot, but it is recorded in the case of a movie. |
| There is digital noise in images. |
|