Mounting the Upper Handle
Secure the two upper screws and the lower screw. Tighten all three.
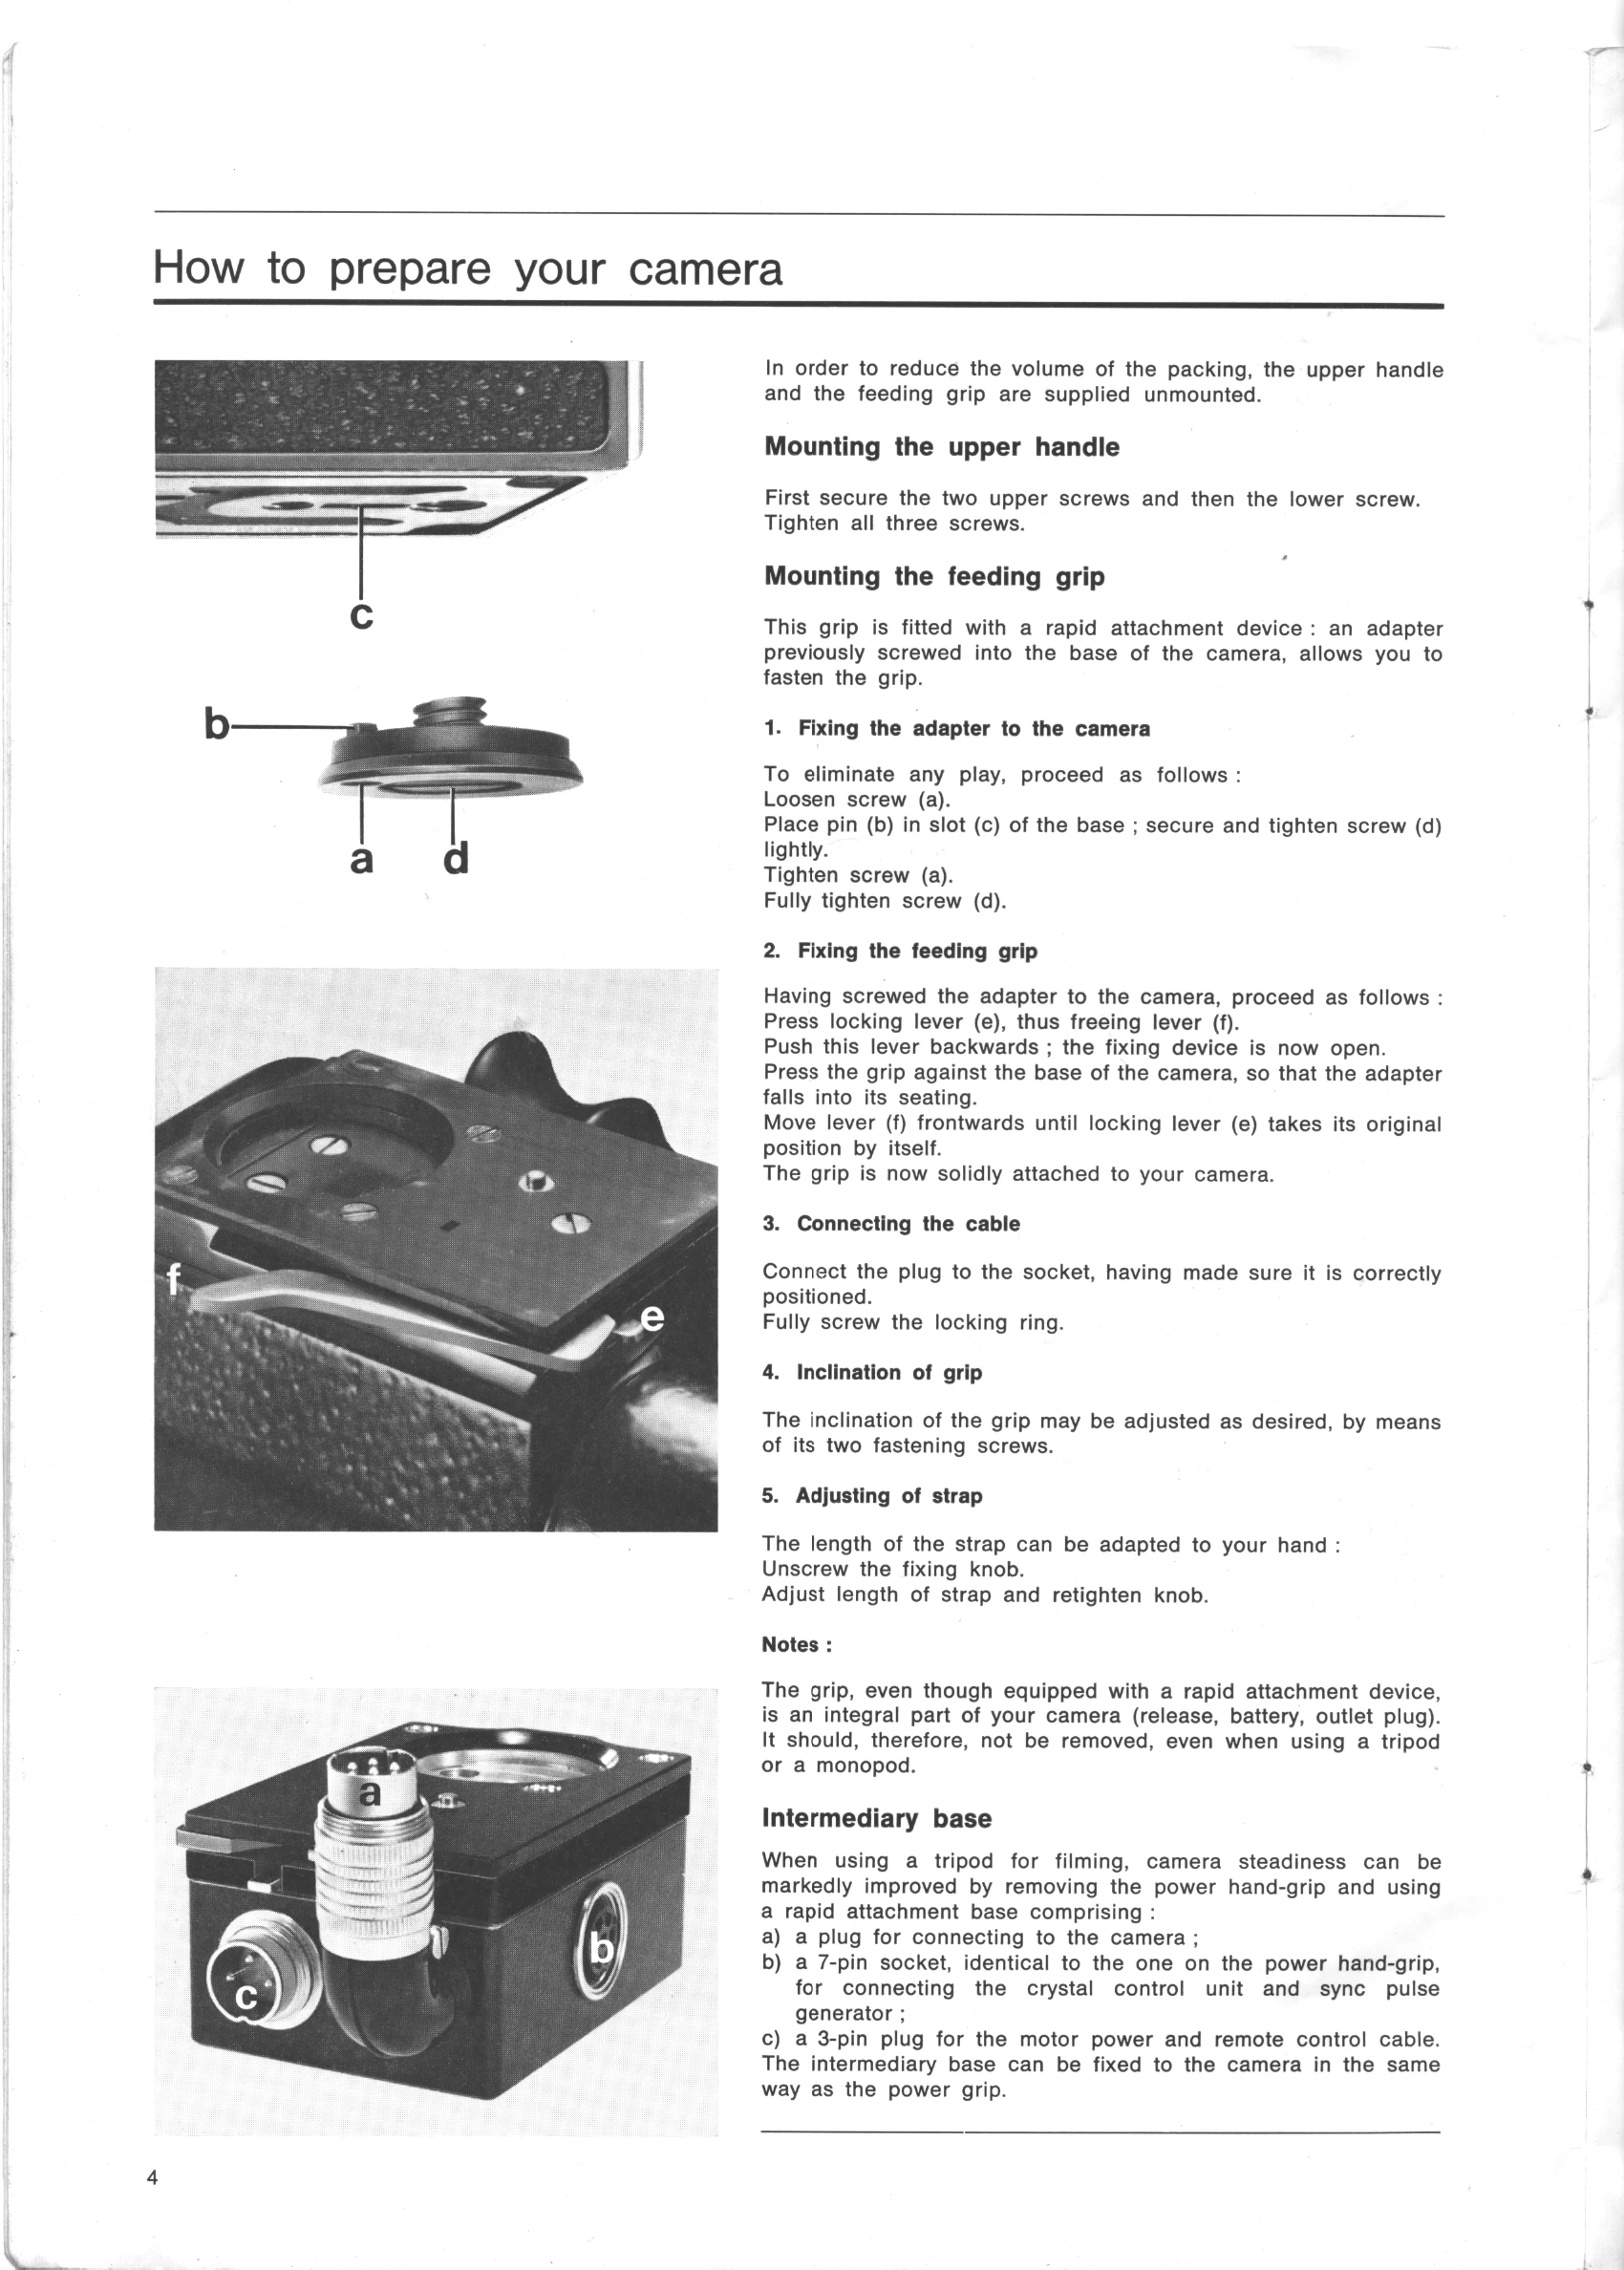
Mounting the Feeding Grip
1. Fix the adapter to the camera: loosen screw (a), place pin (b) in slot (c), secure with screw (d).
2. Fix the feeding grip: press lever (e) to free lever (f). Push (f) back. Place grip on camera, move (f) forward until locking lever (e) returns to original position.
3. Connect cable: plug into socket, screw locking ring.
4. Inclination of grip: adjust using two fastening screws.
5. Adjusting of strap: unscrew fixing knob, adjust length, retighten knob.
Fitting the Battery
Push locking knob, turn lid 120 degrees. Insert battery with '+' side outwards. Replace lid, push down and turn to lock.
Checking Operation
Set speed to 24 or 25 f.p.s. Press and release grip release to start. Press again to stop.
Loading the Camera
Insert battery, set speed. Remove lid by turning knob. Ensure pressure pad pin (a) is locked. Place film spool on upper shaft, emulsion side towards lens. Cut film diagonally. Close loop formers (c). Press release and push film end against sprocket for automatic threading. Continue until 10-12 inches have passed. Open loop formers (d). Insert film end into take-up spool core, take up slack. Final check: run camera for a few seconds.