Brand: Avigilon
Category: Surveillance Camera
Document Type: Installation Guide
Language: EN
Brand: Avigilon
Category: Surveillance Camera
Document Type: Installation Guide
Language: EN
Uploaded: Nov. 21, 2025, 9:16 p.m.
Avigilon warranty terms are available at avigilon.com/warranty.
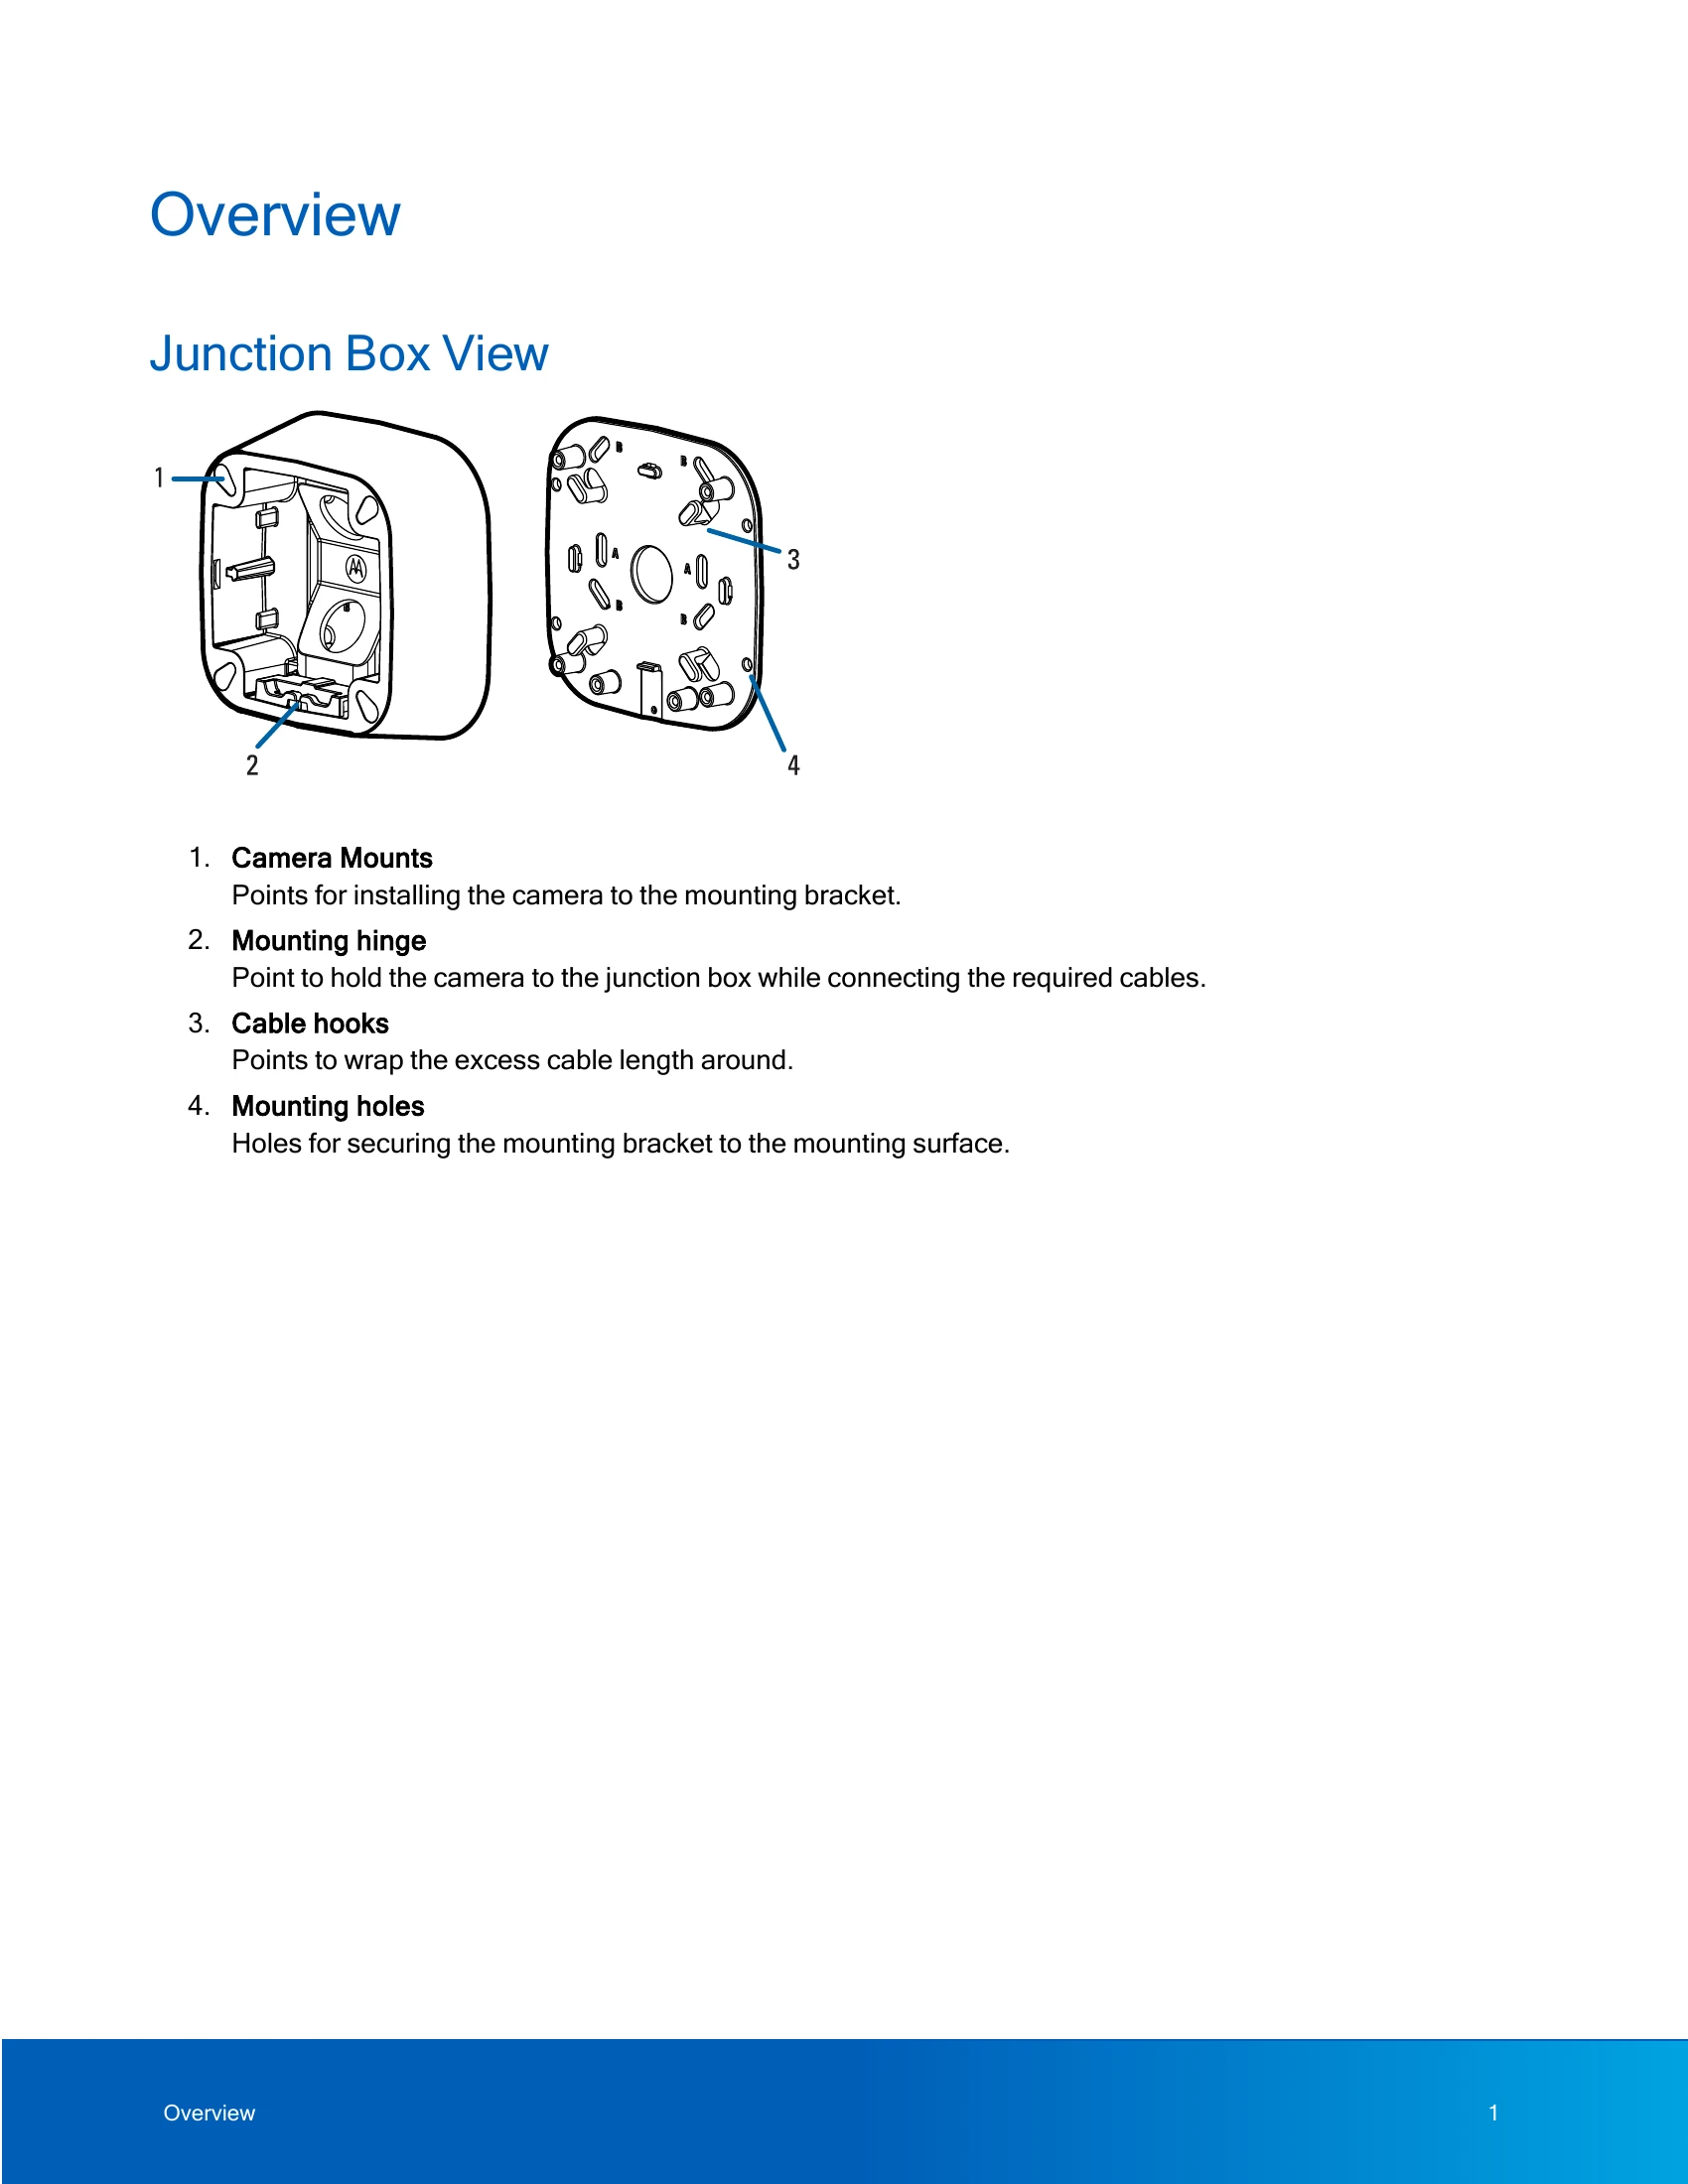
Points for installing the camera, mounting hinge, cable hooks, and mounting holes.
Camera mounting screws, power and I/O cable connectors, Ethernet port, regulatory tag, and mounting hooks.
Microphone and configuration panel cover.
Microphone switch, microSD card slots, connection status LED indicators, and USB-C port.
Sun shroud, mount arm, and adjustment screws.
Configure camera settings before installation using the RJ45 connector.
List of items included with the camera.
Mounting and aiming recommendations, installing the junction box, accessing cables, connecting cables, mounting, and aiming the camera.
Details on how the camera handles power loss and failover between auxiliary and PoE power sources.
Table describing LED indicator states and their meanings.
Troubleshooting steps for network connectivity and LED behaviors.
Instructions for resetting the camera to factory defaults using the firmware revert button.
Information on warranty terms and how to obtain technical support.
| LED Behavior | Suggested Solution |
|---|---|
| Green LED is off and amber is on | Perform a factory reset of the camera using the physical firmware revert button. Resetting through the camera's web interface will not produce the desired result. |
| Both LEDs are off and the camera is not connected or streaming video | Check the General setup page in the camera's web interface to ensure the LEDs are not disabled. If the LEDs are not disabled, perform a factory reset of the camera using the physical firmware revert button. Resetting through the camera's web interface will not produce the desired result. |
| Both LEDs are blinking several times at the same time, then pause and repeat the blinking | Perform a factory reset of the camera using the physical firmware revert button. Resetting through the camera's web interface will not produce the desired result. |
| A different LED blinking pattern than those described above | Perform a factory reset of the camera using the physical firmware revert button. Resetting through the camera's web interface will not produce the desired result. |