Brand: Avigilon
Category: Surveillance Camera
Document Type: Installation Guide
Language: EN
Brand: Avigilon
Category: Surveillance Camera
Document Type: Installation Guide
Language: EN
Uploaded: Nov. 21, 2025, 7:29 p.m.
Manual Publish Date: 2019-09-04
Warranty terms are available at avigilon.com/warranty. Contact Avigilon Technical Support for service.
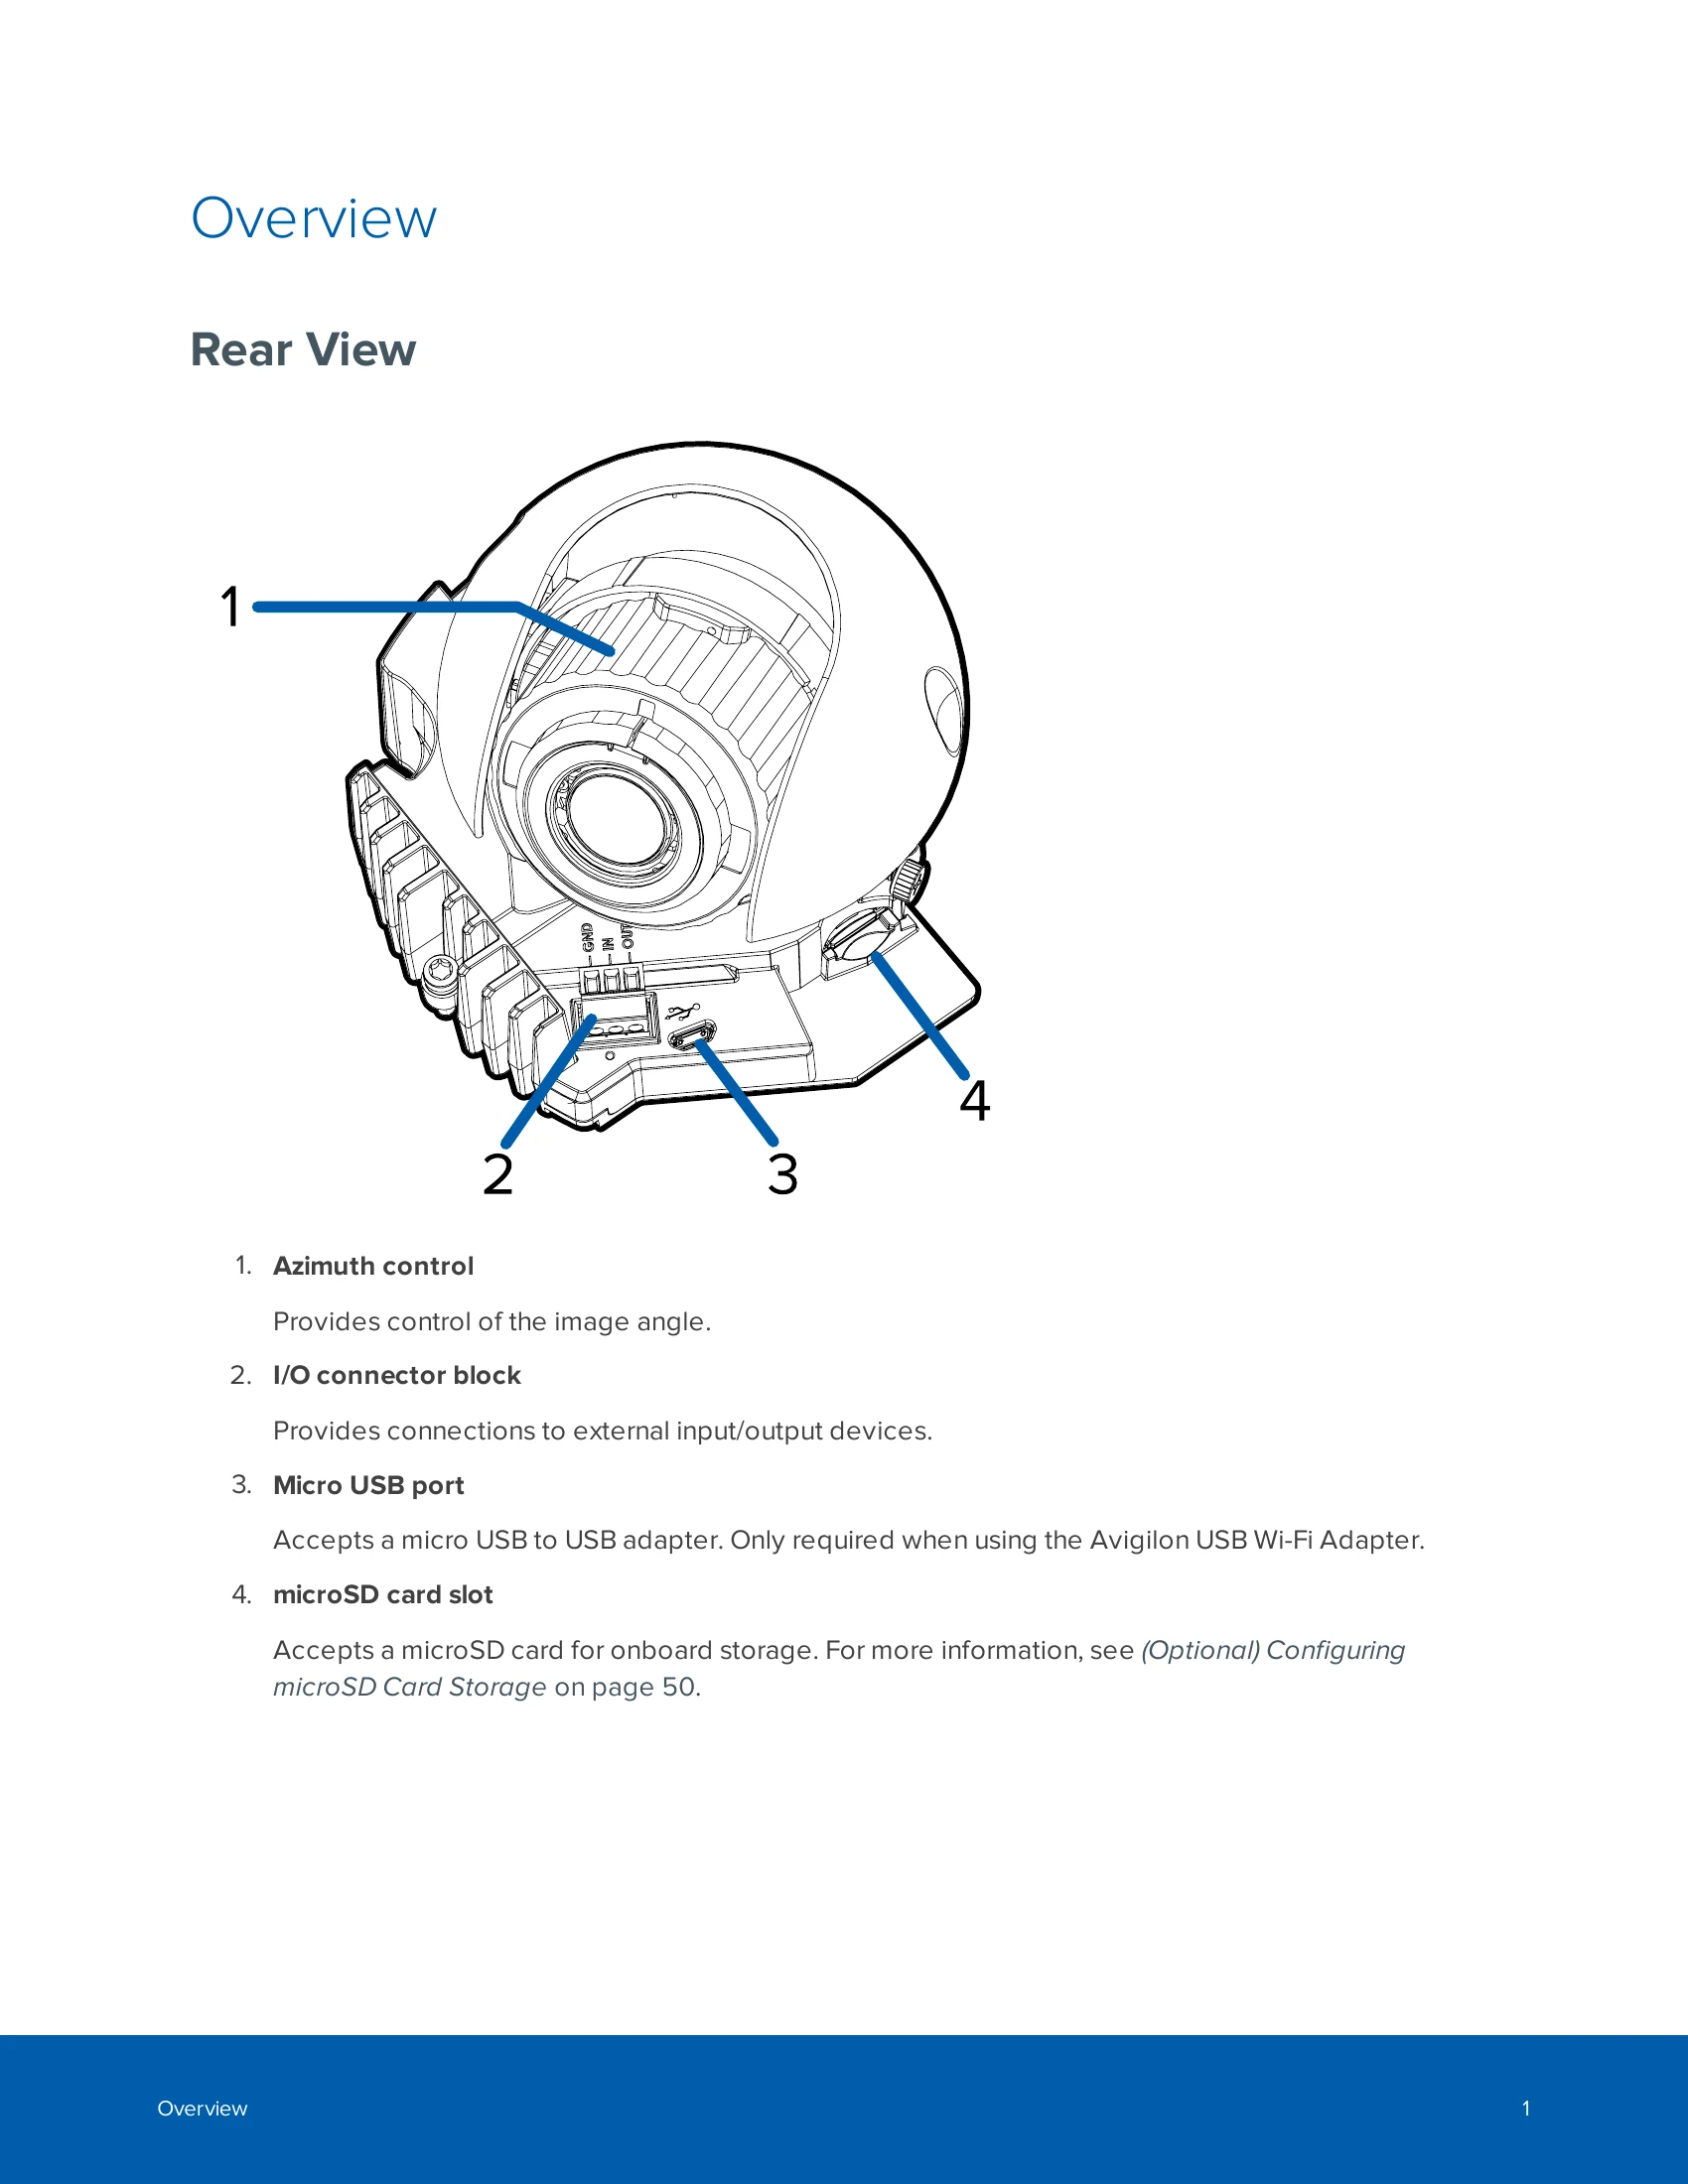
This section provides a general overview of the Avigilon H5A camera series, detailing its various models and their key features. It includes views of the camera's rear, front, and IR components, highlighting connection ports and control elements.
Before installation, it is crucial to read the Important Safety Information. This guide details the different camera models and their mounting options, including indoor surface mount, in-ceiling mount, outdoor surface mount, and pendant mount. It outlines required tools and materials for each type of installation.
Detailed step-by-step instructions are provided for each mounting type. This involves preparing the site, mounting the camera using appropriate hardware (e.g., ceiling clamps, wall plates, pendant mounts), and connecting cables for power and network. The guide also covers attaching the dome cover.
Once installed, the guide explains how to connect to the camera, assign an IP address, access the live video stream, and aim the camera. Optional features like microSD card storage are also discussed. Configuration of the camera settings is outlined, along with information on accessing additional resources.
The manual includes sections on basic maintenance, such as cleaning the dome bubble and camera body. It also provides information on resetting the camera to factory default settings and details the limited warranty and technical support options.
| Connection State | Connection Status LED Indicator | Description |
|---|---|---|
| Obtaining IP Address | One short flash every second | Attempting to obtain an IP address. |
| Discoverable | Two short flashes every second | Obtained an IP address but not connected to the Network Video Management software. |
| Upgrading Firmware | Two short flashes and one long flash every second | Updating the firmware. |
| Connected | On | Connected to the Network Video Management software or an ACC™ Server. The default connected setting can be changed to Off using the camera's web user interface. |