Welcome!
Thank you for purchasing the ASUS® LCD monitor! The latest widescreen LCD monitor from ASUS provides a crisper, broader, and brighter display, plus a host of features that enhance your viewing experience.
Package contents
Check your package for the following items: LCD Monitor, Stand/Base, Quick Start Guide, Warranty Card, 1 x USB Type-C Cable(optional), 1x Power Cord, 1x HDMI Cable (optional), 1x DP Cable (optional), Color calibration testing report, ProArt welcome card.
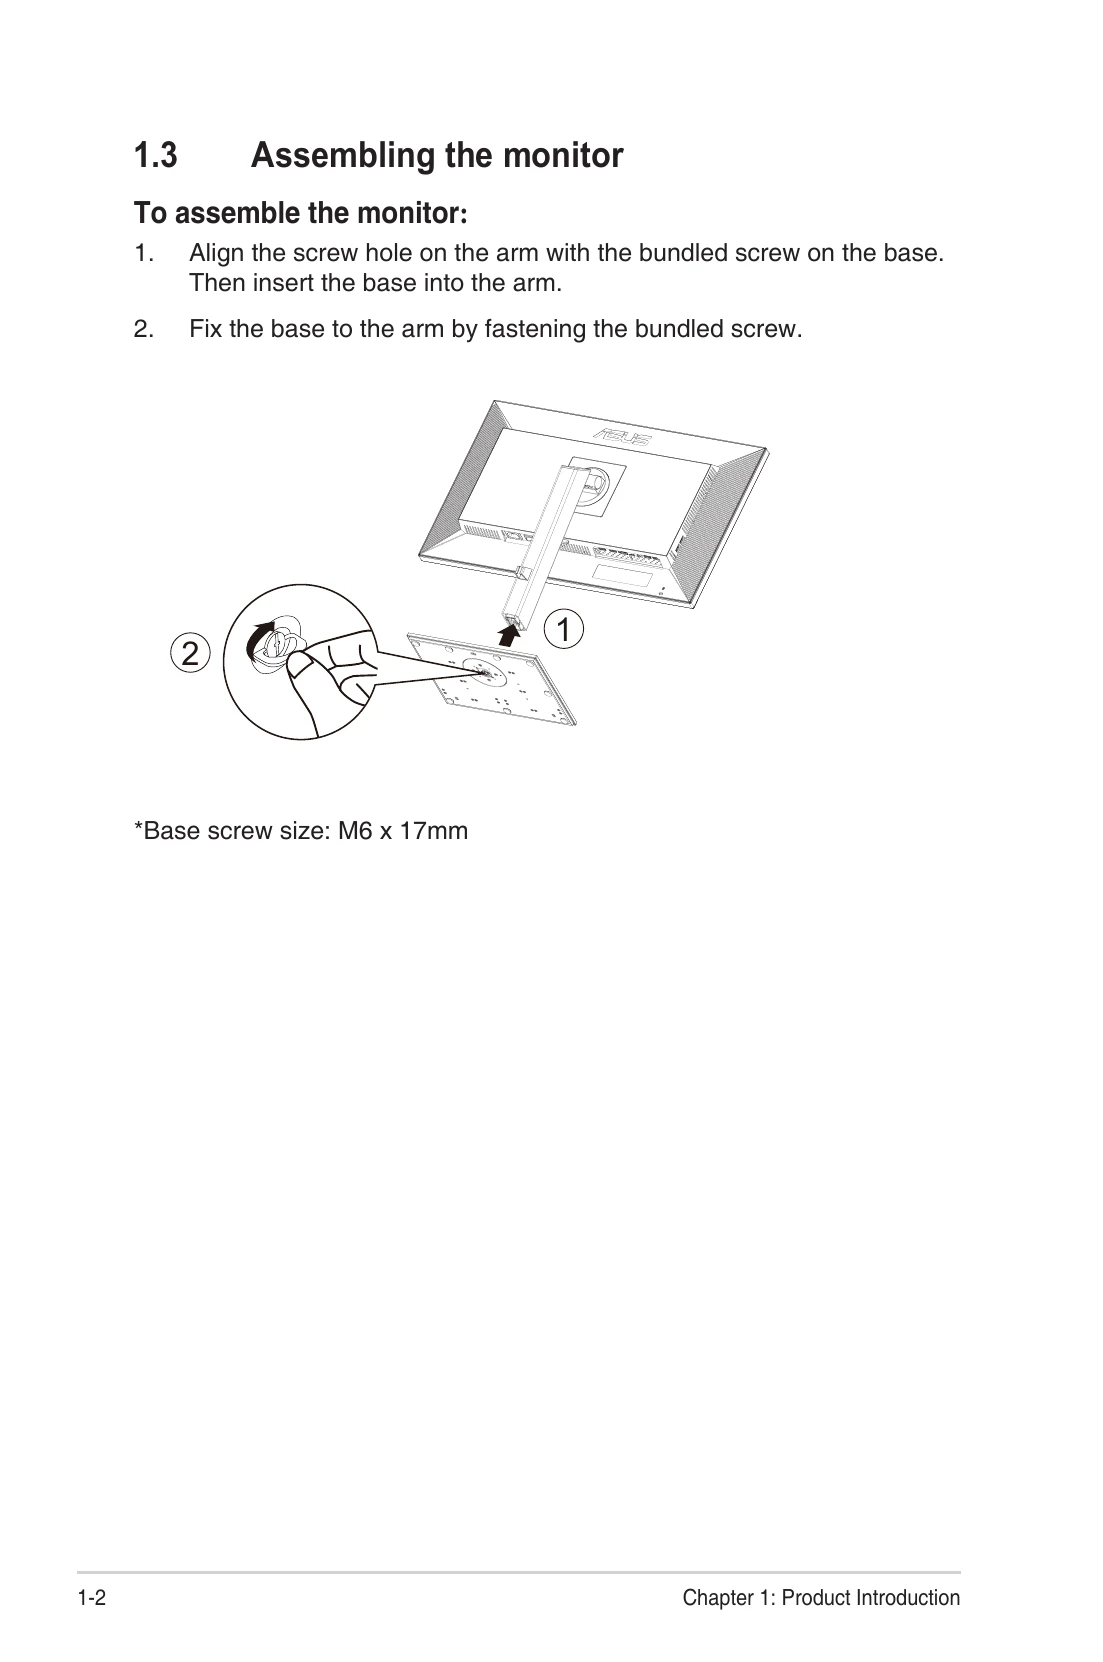
Assembling the monitor
1. Align the screw hole on the arm with the bundled screw on the base. Then insert the base into the arm.
2. Fix the base to the arm by fastening the bundled screw.
Connect cables
Connect the AC-IN Port, Power Switch, HDMI1 Port, HDMI2 Port, DP - in Port, USB3.1 Type-C, Earphone - out Port, USB3.1 Type A ports.
Monitor introduction
Use the control button on the bottom of the monitor to adjust the image settings. The control buttons include Power button/power indicator, Menu button, Close Button, Input Select Button, Shortcut 1, and Shortcut 2.
Adjusting the monitor
For optimal viewing, adjust the monitor to the angle that is most comfortable for you. Hold the stand to prevent the monitor from falling when you change its angle. You can adjust the monitor's angle from +35° to -5° and it allows 45° swivel adjustment from either left or right.
Detaching the arm/stand (for VESA wall mount)
1. Disconnect power and signal cables. Carefully put the monitor facedown on its EPS packaging.
2. Press the quick release button from rear cover.
3. Detach the stand (arm and base) from the monitor.
OSD (On-Screen Display) menu
Press any button (except the Power button) to display the OSD menu. Press the Menu button to activate the OSD menu. Use the buttons as indicated on the screen to navigate through the functions. Highlight the desired function and press to activate it. If the function selected has a sub-menu, press and again to navigate through the sub-menu functions. Highlight the desired sub-menu function and press to activate it. Press and to change the settings of the selected function. To exit and save the OSD menu, press or repeatedly until the OSD menu disappears. To adjust other functions, repeat steps 1-4.
Specifications
Model: PA279CV, Panel Size: 27"W (68.47cm), Max. Resolution: 3840x2160@60Hz, Brightness (Typ.): 350cd/m², Intrinsic Contrast Ratio (Typ.): 1000:1, Viewing Angle (CR=10): 178°(V) /178°(H), Display Colors: 1.07 B, Color Saturation: 100% sRGB, Response Time: 5ms (Gray to Gray), Satellite Speaker: 2W x 2 stereo, Earphone Output: Yes, Sound from HDMI: Yes, HDMI input: Yes, DisplayPort input: Yes, USB Port: Upstream x1, Downstream x 4, Power ON Consumption(Max.): < 32 W* Based on Energy Star 8.0 standard, Chassis Colors: Black, Power saving mode: < 0.5W, Power off mode: < 0.5W, Tilt: -5° ~ +35°, Phys. Dimension (WxHxD): 614 x 523.5 x 227.82 mm(highest), Phys. Dimension without stand (WxHxD) (For VESA Wall Mount): 614 x 369.9 x 59.5 mm, Box Dimension (WxHxD): 680 x 161 x 516 mm, Net Weight (Esti.): 8.6 kg(Net); 5.7 kg(without stand), Gross Weight (Esti.): 11.2 kg, Voltage Rating: AC 100~240V(Built-in), Operational temperature: 0~40°.