Brand: AEG
Category: Power Tools
Document Type: Manual
Language: EN
Brand: AEG
Category: Power Tools
Document Type: Manual
Language: EN
Uploaded: April 20, 2026, 7:57 p.m.
Refer to the product documentation or manufacturer's website for specific warranty information.
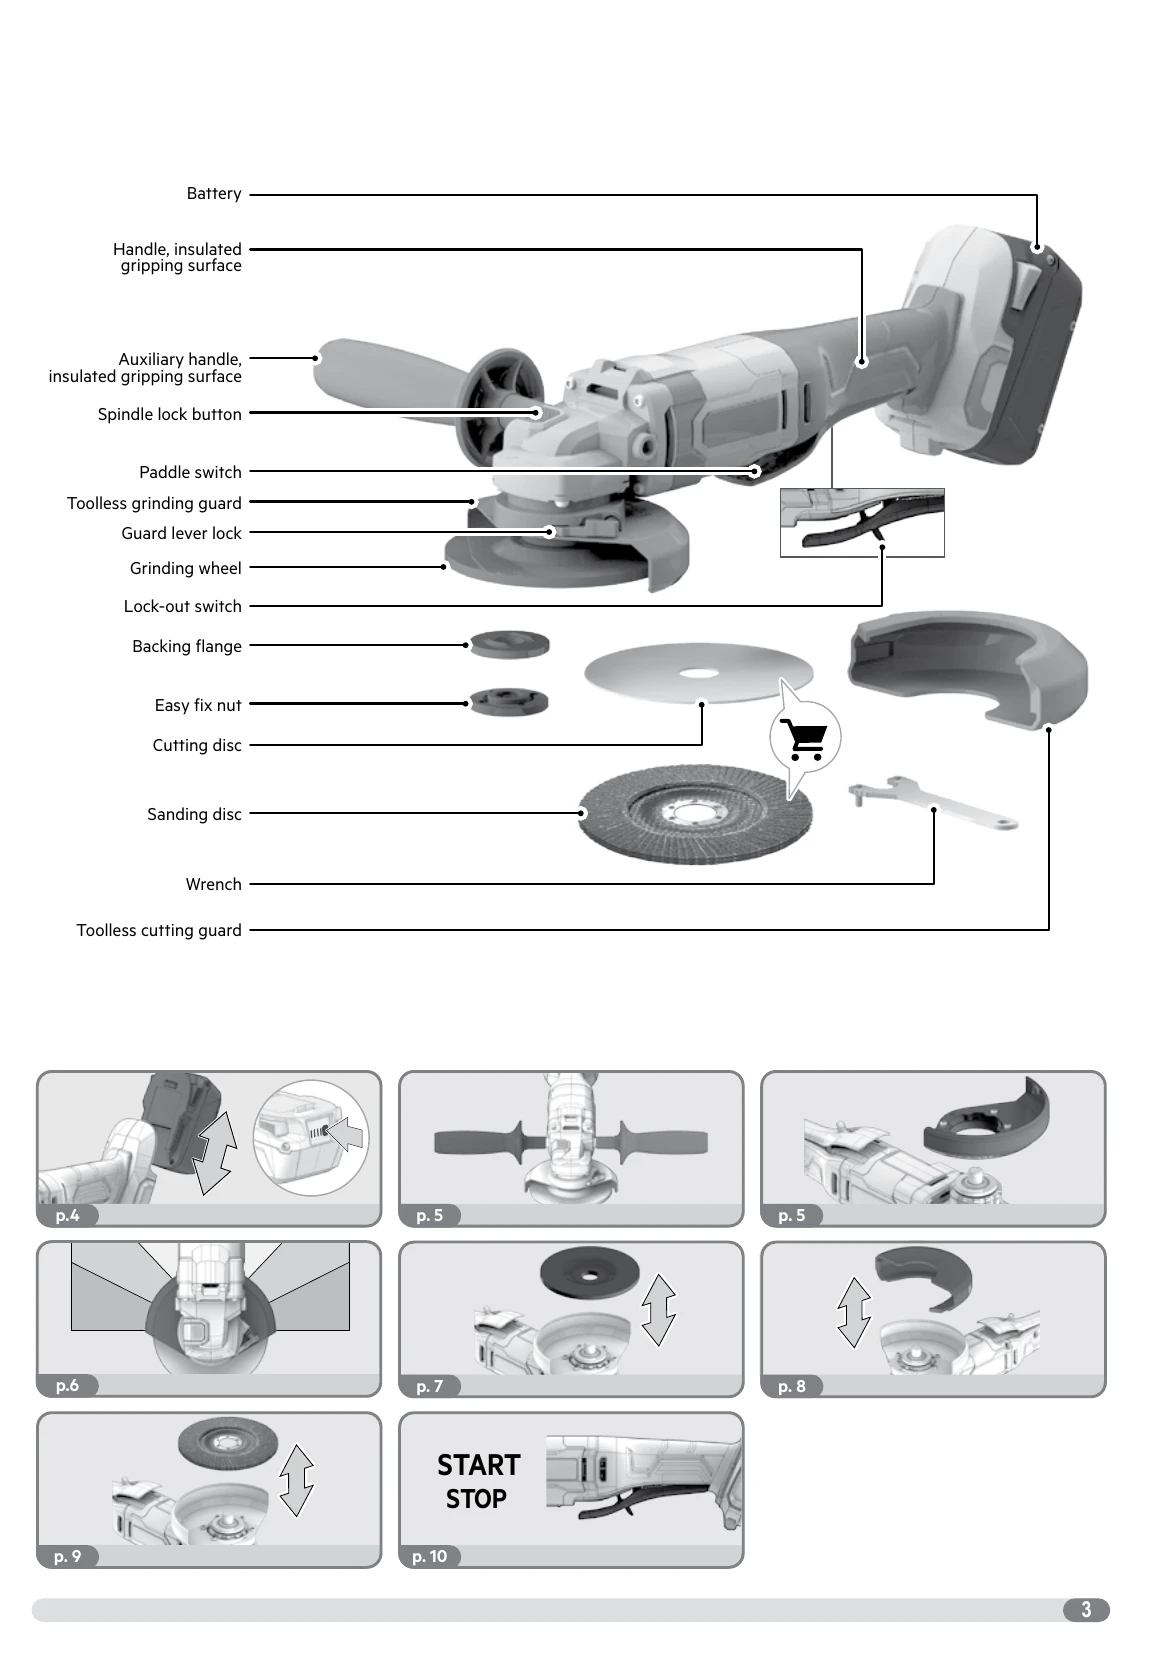
Remove the battery pack before starting any work on the product. To insert the battery pack, align it with the guides on the tool and push it in until it clicks. To remove, press the release buttons and pull the battery pack out.
The LED indicators on the battery pack show the charge level: 75-100%, 50-75%, 25-50%, 0-25%.
Follow the steps for attaching the auxiliary handle and adjusting the guard. Ensure the guard is positioned correctly for safety. For toolless guards, follow the specific steps provided with illustrations.
Use the spindle lock button to secure the spindle. Mount the backing flange, accessory, and easy-fix nut (or standard nut and wrench). Tighten securely. Refer to specific instructions for cutting discs (max 1.2mm thickness) and sanding discs.
To start, press the paddle switch and ensure the lock-out switch is disengaged. To stop, release the paddle switch. The tool has a smooth start feature and a restart cut-out to prevent unintended starting after a power interruption.
| Possible Cause | Troubleshooting Step |
|---|---|
| Stalled insertion tool | Switch off immediately. Determine and rectify the cause. Do not switch on again while stalled. Possible causes: tilted in workpiece, pierced material, overloaded. |
| Battery pack not working | Recharge battery pack. Ensure it is correctly inserted. If issue persists, contact service. |
| Excessive vibration or malfunction | Immediately turn off the product. Check the product for the cause. |
| Ground fault interrupter trips | The product may need servicing. Contact an authorized service agent. |
| Tool does not restart after battery change | Turn the product off and then on again. |